Welcome to Ink N Scrap Habits!
I've created this blog to share my life & love of paper crafts with others. You will read bits and pieces of what goes on in my world and be able to see my paper craft creations! Please leave me a comment if you see something you like. I'd love to hear from you!
Happy Halloween!
A new challenge started today over on the DRS Designs Blog. It's all about Halloween! It inspired me to ink up this cute little ghost (191C) and the new Boo-tiful Halloween Greeting (960E) from DRS Designs. Here's the card I put together for the challenge.
The card base and the orange layer were stamped using watermark ink and the Spooky Eyes Background (647H). I embellished it with a strip of ribbon, 4 black eyelets and I used foam tape to adhere the black scallop and the gray layer for some dimension.
You can enter the Halloweeen challenge at DRS Designs HERE. I hope you my entry and that you all have fun with all the little ghosts and goblins tonight!
Smiles,
Jennifer
I love Fall! It's a great time of year! I love the smell of leaves and all of the beautiful colors, and who doesn't love all of the apple and pumpkin flavored treats that are abundant now? Yum!! Another of my favorites are scarecrows. I used them to decorate both inside and outside my house. I just love their adorable faces and this Large Scarecrow (426L) from DRS Designs is no exception!
I colored this scarecrow with Copic Markers and used the out-of-the-box technique while cutting it out with a Nestie die. Then before removing the die I sponged it with brown ink which created a nice white frame around it. I did the same sponging technique with the Happy Fall Y'all Greeting (635B). The card front was embossed with a leaf embossing folder and 2 red brads embellished the border at the bottom of it.
What are some of your Fall favorites?
I hope you're enjoying this time of year as much as I am!
Smiles,
Jennifer
I can hardly believe it's practically the end of October already! But, I have to admit, I'm like a kid again with butterflies in my belly over Halloween this year, now that my 2 year old is old enough to participate in the festivities and enjoy it! Our neighborhood had a "Boo" parade for all the little kids this past Sunday and it was our son's first introduction to what Halloween is all about. He enjoyed being in his Mickey costume and parading all around the neighborhood singing "boo" carols (something like Christmas caroling.)
Here's a pic of the cutest Mickey Mouse ever!
With Halloween right around the corner, the new challenge on the DRS Designs Blog is "Pumpkins A Plenty." I created this card below for my entry.
It was the perfect opportunity to use some of the cute little pumpkin brads I've had forever! They seem to match the the Fancy Pumpkin (077G) perfectly. I colored it with Copic Markers and then used a masking technique to sponge the yellow ink around it, creating the white frame. I broke up the Batty Happy Halloween Greeting (548G) to accommodate my layout and then added 3 bat punchies to add some dimension to my card front. For the final touch, I used some yellow Stickles on the buckle for a bit of sparkle. Finished card size is 4.25" x 5.5".
Well, that's about it for me today. I hope I've inspired you to get in the spirit of Halloween (or Fall too) and show off your pumpkins. Make sure to check out all the details on the "Pumpkins A Plenty" challenge HERE!
Smiles,
Jennifer
Thanks to all of you who subscribe to my blog, my daily readers, and to those of you who comment often. I appreciate your visits and love what you have to say about my cards! I was recently asked to show how I create the white frame around the images I use after posting my Thanksgiving card the other day. I decided to create a tutorial so that I could show a step-by-step demonstration. Enjoy!
Step 1: After stamping and coloring image, trim excess cardstock around it.
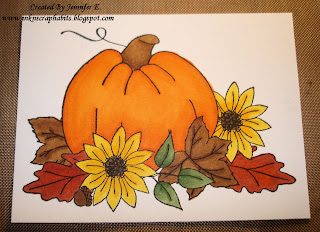
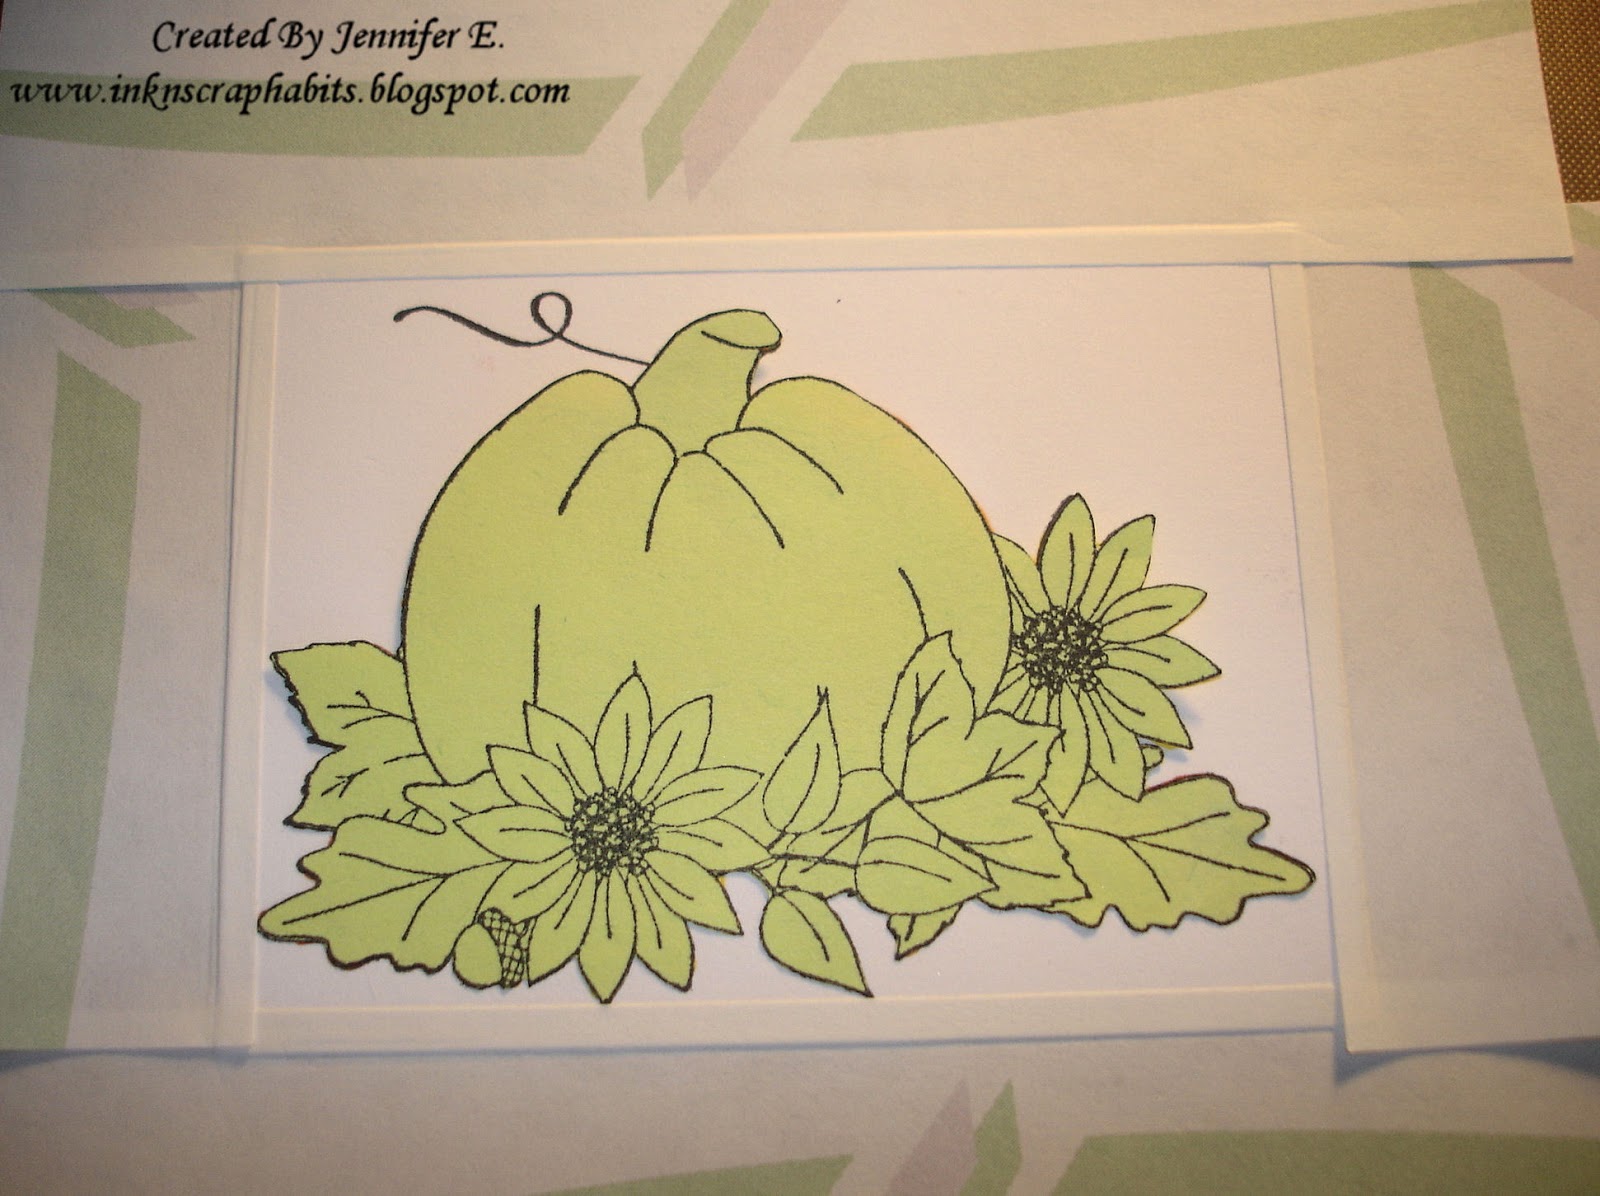
Step 2: Stamp image on Post-It Note and cut out to create image mask.
Step 3: Use Post-It Notes to mask off edges around image.
Step 4: Sponge area around image with ink to match the theme of your project.
Step 5: Remove Post-It Notes around the outer edges.
Step 6: Use finished image to complete your project!
Happy Stamping!
Smiles,
Jennifer
Hi Friends!
My first instinct was to create a Spinner card to sneak peek DRS Designs *Soon-to-be-released* Good Witch Bad Witch stamp (971D). It took me awhile to execute the perfect design, but I'm glad to say that it worked out perfectly and I'm happy I get to finally show it off with you today!

I started by stamping, coloring, and cutting out the Boomstick Stella Witch (415H) and the Good Witch Bad Witch images. Then I used a circle Nestability die to cut out the moon from yellow cardstock. I embossed it and inked the edges with yellow-orange ink for dimension. I added the witch to the center with foam tape to make her look like she was flying in the Halloween sky. Then I put her to the side to work on the card base.
To accommodate the size of the moon, I made a 5" x 5" cardstock base from purple cardstock and I used black cardstock for the card front. I first heat embossed the Halloween Arc (043E) in white, and then ran the entire black piece through the star embossing folder. I wasn't sure if the white embossed area would still look ok after embossing it, but gladly, it held up just fine. The witch and moon were then adhered to the center of the card front.
I used a portion of the spinner card directions on Splitcoast Stampers to create the spinning device at the bottom of the card. The Good Witch Bad Witch image actually spins around! Here are a few pictures demonstrating that.


I embellished this card with some purple grosgrain ribbon to decorate the bottom and then some purple bat punchies flying around the moon. I really like this card a lot and I hope you do to, but I'll let you decide for yourself if she's a Good Witch or a Bad Witch!
Have a great day!
Smiles,
Jennifer
It's Thursday already and time to show off another DRS Designs Blog Challenge card. The theme this week is Sunflowers!
I chose to use the Pumpkin with Leaves stamp (165K) for the qualifying element for this challenge. I carefully colored it with Copic Markers and then masked and sponged tan ink around it while it was in a Nestie die. I used this same technique to add color to the stamped One Line Happy Thanksgiving sentiment (841D). (See my own tutorial for this HERE.) I also stamped the plaid that I used in the background. This was done with the Woven Plaid stamp (613P). I used brown ink and stamped it in 2 opposite directions. It gives a warm and cozy feel to this card, don't you think? The final touch was to decorate the sentiment banner. I used a brown button, threaded with orange embroidery floss that I neatly tied in a bow.
Tis the season for sunflowers, won't you play along?
Smiles,
Jennifer
I started with an A2 size light blue cardstock base. I stamped the Single Birthday Candle (258B) repeatedly on white cardstock to make my own handmade pattern paper. Then I colored it with Copic Markers. I used this paper to decorate the top portion of my dark blue card front, and then added some satin ribbon tied in a bow at the bottom of it. Next, I stamped the Small Birthday Wishes Greeting (020B) in the lower right corner of the card front and added 2 pearls to finish it off.
I hope whoever receives it likes it as much as I do!
Smiles,
Jennifer
There's no doubt that Autumn is near. There are all kinds of colors seen in the trees in my backyard and looking at them was the perfect inspiration to create this card for the challenge on the DRS Designs Blog this week, "Inspired By Autumn." What I love best about this card is that it's clean and simple!

I started first by stamping the Tree Limb (568P) on ivory cardstock. Then I used Post-It Notes to mask off the area that I wanted to sponge with orange ink in order to highlight the sentiment. I started by sponging a light orange color first and then sponged a darker orange ink as I got closer to the bottom edge. I defined this area further by scoring a horizontal line just above and below the sponged area. Using my Stamp-A-Ma-Jig, I carefully stamped the Changing Leaves Thanksgiving Greeting (1122G) over the sponged ink next to the tree. I matted the card front with orange cardstock and then added 4 mini copper brads as shown before adhering the card front to a dark brown cardstock base. What do you think?
Has Autumn inspired you yet this year? Show us and enter to win a prize from DRS Designs HERE.
Thanks for stipping by. Hope you'll be back soon!
Smiles,
Jennifer
The deadline for DRS Designs Operation Write Home Card Drive is this week. Did you submit any cards for a chance to win some great prizes? I'm not elgible to win, but here's what I've made to submit. Now, I know it's not many--hey my time is limited ;-) but it's something. The most important part is that I enjoyed making them and I'm sure they will be well received by the soliders and their families especially!
Most of these cards use stamps from DRS Designs and you'll see them on my blog over the next few weeks. So, stay tuned for details. Big thanks to those of you who participated in this great event.
Until next time,
Smiles,
Jennifer
Yikes, it's October already! Definitely time for harvesting and I'm sure a harvest moon too! Speaking of a "Harvest Moon," that's the theme on the DRS Designs Blog this week. Show us a moon image for a chance to win a fun prize. Today's card is my challenge entry.
I started with white cardstock that was cut with the Top Note die. All of the coloring on the Fall Fence (176M) was done with Copic Markers. Then I sponged yellow ink for the area where the moon was shining down and the edges were inked with a darker blue ink to accent the evening sky. I then added the Shine On sentiment (470D) above the image. I matted the colored image with orange cardstock and added a leaf embossed orange panel to the top. It was wrapped and tied with Fall themed ribbon and it was all adhered to a dark brown cardstock base.
Thanks for stopping by and have a great day!
Smiles,
Jennifer
It won't be long now until DRS Designs finally wraps up the card drive they are holding for Operation Write Home. I've created several Birthday and general occasion cards to submit. Here's one of the birthday cards.
I created it with shades of olive green, so it would be perfect to send to either a man or a woman. Both the Single Birthday Candle (258B) and the Small Script Happy Birthday sentiment (159D) are by DRS Designs. The background was simply created my embossing white cardstock with the Birthday Embossing folder and sponging it with olive ink. After matting it with black cardstock, I wrapped the bottom with black raffia and then adhered the candle on the lower left side with foam tape. This was all added to an A2 cardstock base and then I added 3 square gems to the upper right side to finish it. I love this simple, elegant design and hope you do too!
DRS Designs is collecting A2 cards to send to the troops until October 10th. If you have some (with envelopes) that you'd like to donate, please see all of the details HERE.
Thanks for visiting here today. I hope you'll be back soon!
Smiles,
Jennifer
While hopping around blogland lately, I've seen alot of framing done lately. I really like the look, so I decided to give it a try. Here's my take on a framed card and another use for those awesome Butterfly Ribbon Slides (681D).
I started first by cutting my card front from peach colored card stock. I inked the edges with orange ink, used a decorative border punch for the left side and then a corner punch on the right 2 corners. I used Nestibility dies to create the hole in the center for my frame. I stamped "As Another Year Flies By" (489F) at the top of the card front and then ran it through the Swiss Dots embossing folder. I added some orange ribbon to the the left side and decorated the left side of the frame with Prima flowers and brads. I stamped the Butterfly ribbon slide twice, colored both with Copic Markers and fussy cut them out. I attached them by layering them and then adding 3 black brads to the body. All of this completed the frame card front.

The center of the frame was created by stamping a panel of peach cardstock with the Silhouette Butterfly Background (536H) using Versamark ink. Then I heat embossed it with black sparkle embossing powder and attached it to the center of a black cardstock base.
My final step was to attached the card front to the base using foam tape to create the frame depth. Wouldn't this be great for a Fall birthday? I guess I have my Aunt's October birthday card already finished! Yeah!
Thanks for stopping by. I hope you'll be back soon!
Smiles,
Jennifer
Hi Everyone! Hope your day is off to a fabulous start!
Can you believe it's almost October already!?!? It will be ghost and goblin time before we know it! The new blog challenge over at DRS Designs, "So Spooky it's Scary" and THIS CARD from Splitcoast Stampers inspired me to create this Spooky Halloween card. I'm really happy with how it turned out-actually it's better than I thought it would be. I think it really has an eerie, spooky feel!
The first thing I did was heat emboss the Spooky Tree with Moon (070L) on a white card front. Then, I taped a large circle Nestability die centered over the image and used it as a stencil. I sponged the moon area with yellow inks and the rest of the area with an eerie purple ink. I love how it really looks like the full moon is glowing in the darkness! Next, I stamped the Spooktacular Halloween Greeting (933F). I split it up so that the first half of the sentiment was stamped above the scene and the second half was stamped below it.
I matted the card front on yellow cardstock and then used foam tape to adhere it to a 4.25" x 5.25" purple cardstock base. An eerie card like this wouldn't be complete without a few bat punchies--I added eyes to them with a white gel pen and then adhered only their bodies so that I could fold up their wings to make them dimensional. Eeek! Does this card give you the creeps?
Smiles,
Jennifer
When you hear the term "googlie eyes," especially this time of year I bet you automatically think Halloween. I know I do, but when I heard the challenge over at DRS Designs this week is "Googlie Eyes," I decided to change things up a bit.
Instead of creating a fun Halloween card, I created this cute frog card using the adorable Frog Boy Cutie Pie Kid (428H) and the Frog in your Pants Greeting (1016K) from DRS Designs. Check out the picture of my Frog Boy below and see his googlie eyes. He almost looks the same, even though they are more defined! This is the first time I've ever used googlie eyes on a card and I'm glad this challenge enlightened me to do it. I'm sure I'll be adding them add to more of my stamped images soon!
As you can tell I used a very simple layout for this card.
The Frog Boy was colored with Copic Markers, fussy cut, and adhered in place next to the greeting. I used the Tiny Frog (420A) as an embellishment by also coloring it with Copics, matting it, and then adhering it with foam tape.
I hope you enjoyed seeing my "Googlie Eye" entry and that this greeting made you smile. Have a great day!
Smiles,
Jennifer
Here's another Christmas card I was able to whip up rather quickly, but only cause I cheated! *wink* I found this colored image of Santa and his Reindeer (016L) and the Polka Dot Background paper (688P) in a basket where I keep leftover colored images and backgrounds. I love it when half the work is already done for me!
I'm pretty certain the image was colored with Prisma Color Pencils and blended with Gamsol. It's been a long time since I've used that method of coloring! Then to bling it up a bit and add some hojiday sparkle, I added Stickles at the ground level and around the image for falling snow. I also added some white flock to the cotton parts of Santa's Hat and jacket as well as his beard to make him realistic.

The card base was embossed with the Swiss Dots Embossing Folder and each layer was matted with olive green cardstock. I love olive green and red together for Christmas cards! A red satin bow pulled everything together and I was done in a flash!
Did you know that Christmas is already less than 100 days away?!?!?!? It's time to get started on those Holiday cards and why not start with a challenge where you could win some free product from DRS Designs? Check out the Anything Goes Challenge this week over at Chocolate, Coffee, Cards and link up your card today!
Thanks for stopping by and have a great day!
Smiles,
Jennifer
...Candy Corn!
Would you have ever guessed it? I bet you were thinking broccoli or some other green vegetable. I know this was totally UNEXPECTED--that's because I created this for this week's DRS Designs Blog Challenge which is to create something UNEXPECTED!
This card was pretty quick to create. One of things that helped make this quick is the design of the Candy Corn Background. By stamping it in orange ink, half of the coloring is already done for you. All I did was color the bottom of each candy piece with a yellow Copic Marker and my background was finished --easy, peasy as they say! The background used on the top of the card front was made simply by stamping the Spatter Background with black ink. At times, I stamped it off as well so some of the spatter dots are a bit faded.
Well that's it for me today.
Until next time,
Smiles,
Jennifer
Hi Stampers! Hope you are all doing well!
Since today is Patriot Day in the United States, I'm showing off another Patriotic card and using this opportunity to remind all of you about DRS Designs Operation Write Home Card Drive. The object is to collect as many cards as you can make, but in doing so, there are some great prizes up for grabs too! (Check out the link above to see what you can win!)
Operation Write Home is in need of cards with the following themes:
Birthday
Love
Thank you
Missing you
Thinking of you
Blank (no sentiment)
Just a few things to remember for each card you send in:
Cards must only be 4.25" x 5.5"
**No Glitter**
No Store bought cards allowed
Please be sure to include an envelope for each card donated.
Send your cards to:
DRS Designs
217 Greenwood Avenue
Bethel, CT 06801
So remember over the next few weeks when you sit down to stamp, make a few duplicate cards and send them in to support a great cause. We want you to be our top donator!
Here's the Partiotic card that I have to share with you today.
This design was simple and fun to make! I used the Interlocking Star Background (819H), the Starry Background (124H), and God Bless America (085D). I hope you like it!
Smiles,
Jennifer
DRS Designs is featuring their Christmas stamps this month and I'm showing off many of my Christmas creations with you. Here's one of my favorites so far.
I colored the Cardinal on Branch image (856M) with Copic Markers. I layered it on red and green cardstock as shown. Then I stamped the Small "Merry Christmas" (520D) in 1 line on a white cardstock banner with red ink. This was adhered to the bottom of the image.
Next, I focused on the card base. I created a note card that measures 3.5" x 5" from dark green cardstock. I added texture to it by stamping the Large Original Plaid Stamp (641P) in both directions using Versamark ink. The image was adhered to the center of the card base and then I added a red and white plaid bow underneath the sentiment. I just love how well all of the colors on this card coordinated!
Have you given any thoughts to what your Christmas cards will be this year?
Thanks for stopping by!
Smiles,
Jennifer
Wow! What a chilly start to the day today. It was only 48 degrees when I got out of bed, but the sun was out too, shinning brightly! I know the official start to Fall is still a couple weeks away, but with temps like this I say, "Happy Fall Y'all!"
While browsing challenge blogs the other day, I was inspired to play along with CASology's "Apple" challenge. It's perfect for this time of year and I knew DRS Designs had a perfect Apple Trio image (350G) to go with it. On a side note, I'm really trying to make cards that are more of the Clean and Simple look, so I took the plunge and went for the challenge.
I colored the apples with Copic Markers and carefully fussy cut them out. I put them aside while I worked on my card front. I started with khaki cardstock and stamped "Happy Fall Y'all!" (635B) near the top. Then, I embossed it with the Swiss Dots folder and matted it with red cardstock. I tied a simple red bow with twine and wrapped it around the top, under the sentiment. Next, I added the apple image near the bottom using foam tape for some dimension. The card front was adhered to a dark brown A2 cardstock base and my card was complete!
I'm ready for apple pie, cider and donuts! Are you?
Smiles,
Jennifer
Hi Everyone! Hope today finds you well!
There's a new challenge posted over on the DRS Designs Blog today. The theme is "It's BRIGHT in Here!" We are asked to use bright or neon colors on our challenge cards this week.
I was inspired by this challenge to create a Halloween card. I love using bright green and black for Halloween cards and I think this combo was perfect for my Who's Your Mummy card!
Isn't that Mummy (943H) adorable? (It will be available for purchase from DRS Designs very soon!) It was simply colored with a gray Copic Marker to add shading to his bandages. Then I masked him and the edges of the cardstock and sponged green ink around him. I love the eerie feel this creates! After matting it on a black rectangle, I dressed it up with some spider web punchies to 2 of the corners.
So, are you going to join us in this Bright and Neon colored challenge? I can't wait to see all the fun cards that will enter this one!
Until next time...
Smiles,
Jennifer