Welcome to Ink N Scrap Habits!

I've created this blog to share my life & love of paper crafts with others. You will read bits and pieces of what goes on in my world and be able to see my paper craft creations! Please leave me a comment if you see something you like. I'd love to hear from you!

Showing posts with label Snowman. Show all posts

Wednesday, January 28, 2015

A Warm Winter Wish!

Hi Everyone!

Hope you're doing well and staying warm!
Anyone else excited that January is just about over??  Only about 50 more days until Spring!!  I've had enough of the cold and although we haven't had much snow this Winter, my thoughts and prayers go out to everyone on the Northern East Coast. I can't imagine getting 1, 2, or even 3 feet of snow with a single snow storm, let alone have several of these kinds of storms over a single Winter!! I'm sending a Warm Winter Wish to all of you with my Snowman card today! 
 

The card front was created using an image and sentiment from DRS Designs.  The Medium Mr. Snowman (242H) was colored with Copic Markers.  Both the image and the Warm Wishes Greeting (611D) were cut out using Nestability dies.  Then, before removing the dies they were sponged with light blue ink. They were both matted with dark purple cardstock and then set aside while I worked on the card front.  

I embossed the light blue card front with a snowflake embossing folder and then sponged the edges with purple ink.  It was matted with white cardstock and then a crimped white panel, lined with purple cardstock was added to the lower portion. Snowflake ribbon embellished the crimped panel and then I adhered the snowman image and sentiment in place as shown. 


The card front was adhered to an A2 (4.25" x 5.5") purple cardstock base and I embellished the back of it with the Especially For You Snowman (239C), to let everyone know that I made this card! 
 
 Thanks for stopping by, Everyone! Stay safe and warm!
 
Smiles,
Jennifer


Wednesday, January 14, 2015

Warm Wishes Mr. Snowman!

So, now that the holiday hustle and bustle is over, has your daily routine returned back to normal? All of my holiday decorations are finally put away and now that my older son is back in school, I'm finding more time to work on my resolutions--to be more organized and take more time for me! This "me" time includes whatever I want to do and stamping is high on the list!

After cleaning up and organizing my stamping table this past weekend, I quickly got back to getting inky and one of the cards I created was this Warm Winter Wishes card. So appropriate for all of us in the Midwest and East Coast experiencing another Arctic Blast right now.  We need all the warmth we can get!


I used the new Medium Mr. Snowman (242H) for the focal point of my card.  I know there's not too much coloring you can do since a snowman is all white, but I researched how to color snowman images on Pinterest and found a few tips that were helpful. One technique is to actually color outside the stamped image line. If you look close at my snowman you can see the bluish-gray ink around the edges. I think this really helps enhance how the snowman looks.  Of course coloring his hat and scarf in bright colors helps him stand out as well!  I paired this image with the Warm Wishes Greeting (611D), and decorated the card front with some iridescent snowflakes that were adhered with matching turquoise brads. The finished card size is 4.25" x 5.5."
 
I hope you're all staying warm and cozy inside today!
Thanks for stopping by! 
 
Smiles,
Jennifer
 

Thursday, July 17, 2014

From Our House At Christmas

Whoo hoo! New stamps are available from DRS Designs! They are celebrating Christmas in July with adorable stamps that can be made into cute, little village scenes. This is exactly what I did for today's card.  The new challenge on the DRS Designs Blog this week is a color challenge that I used to drive my thoughts for the Christmas Village scene I created.  The challenge colors are "strawberries and cream."  


I started by stamping the Christmas Village House 1 (117C) repeatedly and then I used the Christmas Village Four In One Accessories (119D) to add the snowmen and pine trees in between the houses. I used Copic Markers to color the scene and then I added fine glitter to all of the snowy areas. I matted the image as shown and layered it on top of a red card stock base that was embossed with the Swiss Dots embossing folder.  The Christmas From Our House Greeting (120C) was stamped and matted and then adhered onto the lower portion the image.  This turned out to be a CAS card, but the glitter for the snow really makes it glisten! It gives me that serene Christmas feel. What about you?

Check out all the details for DRS Designs "Strawberries and Cream" challenge HERE to see how you can win a $10 voucher to DRS Designs online store. 

Thanks for stopping by and have a great day!

Smiles,
Jennifer

Thursday, December 26, 2013

No Fun Like Snow Fun

Hi Friends! 
I hope you all had a wonderful Christmas!  

We woke up to a few inches of unexpected snow this morning. I had to chuckle, as I noticed this just as I sat down with my coffee to type up this post.  How ironic! The card I'm sharing with you today was made for the Frosted Flakes challenge on the DRS Designs Blog.


This fun Winter note card shows off the Cowboy Snowman (178L) which was colored with Copic Markers.  The "snow" at the botton of the card was painted with a Snow Marker and then heat set. This created a velvety effect from the puffed up snow. Then I split up the No Snow Fun Greeting (691E) to fit the empty space of either side of the stamped image. I embellished the card front with some blue twine and a snowflake punchie that I decorated with a large pearl. I adhered the card fron to a dark blue cardstock base and my card was complete!

Do you have snow where you live? 

Thanks for stopping by!

Smiles,
Jennifer

Thursday, January 10, 2013

Nothing Without Friendship

Here's my entry for the button challenge that can be found on the DRS Designs Blog this week. I created it to show off the new Life is Friendship sentiment (794F). I thought it was perfect for the Snowman Bird Buddies (232H) image. Since it is a Winter theme, I had to use snowflakes for my background paper. I stamped the Interlocking Snowflake stamp (015H) in blue and purple inks. I added 2 blue buttons to the background panel and love the finished look! I often forget to use buttons for embellishments, but I'm definitely inspired by all of the sample cards seen on the Challenge post! This challenge was a wonderful reminder and I hope to include buttons more routinely in my card making.


Thanks for stopping by and checking out my post today. Hope you'll be back soon!

Smiles, 
Jennifer

Monday, December 10, 2012

Snowman and Holly

The current challenge on the Cupcakes Inspiration Blog inspired me to create today's Christmas card. Here's the inspiration photo. Those snowmen are just too cute to eat!


I've combined it with the sketch challenge that can be found on the My Favorite Things blog.


Both the Large Snowman Portrait (001L) and the sentiment are by DRS Designs. I found this snowman image already colored and ready to use in a binder where I keep my extra stamped images. I colored it a long time ago with Prismacolor pencils and Odorless Mineral Spirits. Its been a long time since I've used that coloring technique that it kind of makes me want to put my Copic Markers away for a little bit! I got a little creative with the sentiment as it is part of the Christmas Multi Greeting (341H). I use this stamp often when I need a Christmas sentiment to fit a certain space or area. I just cut out the portion that I want to use from my cling-mounted stamp and use it as an individual stamp.  It's like having 7 stamps in 1!  I decorated the sentiment tag with a punched snowflake and a holly paper punch.

Well, that's it for today. I'm off to finish up some more Christmas cards.  I've got to get them in the mail soon! 
Have a wonderful Monday!

Smiles,
Jennifer

PS: DRS Designs is sponsoring the Cupcake Inspiration Challenge I mentioned above. You have a chance to win a $10 store voucher. Check out all the details HERE!

Thursday, November 29, 2012

Snow Fun Buddies!

Rarely do I ever combine different challenges, but today's Christmas card was made with 3 challenges in mind.  That alone, made things a little more challenging! ;-)  But it was fun to coordinate them all together.


•The layout I used is for this weeks Tuesday Morning Sketch Challenge. DRS Designs is their sponsor and 1 lucky winner will win a $10 store voucher to put towards any DRS Designs product of their choice! Use the sketch below for a chance to win!


• The stamped and embossed elements I chose are for this card are for this weeks DRS Designs "snow fun" Blog challenge. This is another opportunity to win free product from DRS Designs! I colored the Snowman Bird Buddies (232H) image with Copic Markers and after masking it I sponged blue ink around the upper portion of the image.  I stamped the Interlocking Snow Background (015H) for the vertical panel. 
Then finally for the third challenge I added glitter to enter this card for Last Friday's Free For All challenge on Splitcoast Stampers (F4A144).  
Hope you've enjoyed seeing it! 

Smiles,
Jennifer

Tuesday, September 4, 2012

Winter Friendship!

One of the newer Christmas images from DRS Designs is the Snowman Bird Buddies (232H) that I've used on today's card. I really like how this card turned out--the colors, the layout, and the bit of sparkle on the snowman make this one of my faves!


I appropriately paired this image with the Snowflakes and Winter Cheer Greeting (135G). I used red snowflake punchies as embellishments along with twine tied in a cute little bow on a snowflake embossed background.


Since I like all of the elements of this card so much, I'm pretty sure I'll be using this image and greeting for some of the Christmas cards I send out this year. Stay tuned!

Thanks for stopping by. I hope you'll be back soon!

Smiles,
Jennifer

Saturday, July 28, 2012

Let It Snow!

Dare I say it...It's time to start thinking about your Christmas cards this year! Perhaps some new Christmas stamps are what you need to inspire you. The new stamps I showed off in my previous post and the ones seen on the latest DRS Blog Challenge are now available for purchase!!


It was a lot of masking and sponging, but I think it turned out really cute!  It was a lot easier to create than I thought it was going to be too--which is always a good thing!  For the background I stamped the Interlocking Snow Background (015H) with white Staz On ink. Three simple rhinestones decorate the top right of the card front.


Check out all of DRS Designs new Christmas stamps HERE as soon as they become available. Happy shopping and stamping!

Smiles, 
Jennifer

Friday, July 6, 2012

Christmas In July!

My what a Summer we are having! For the last 2 weeks temps have been 90* or higher! I'm enjoying staying in with the air conditioner on full blast and cooling off by stamping some Christmas in July cards.


This card uses for different stamps from DRS Designs:
Snowmen Smiles Greeting (962G)
Simply Snowman (383G)
Small Happy Holiday Greeting (515C)
Interlocking Snow Background (015H)


Do you need a cool down too? Join DRS Designs this month for several different Christmas in July challenges.  This week they are looking for Christmas cards in general.  Link you card up HERE to enter to win your choice of 2 DRS Christmas holiday stamps! 


Thanks for stopping in!

Smiles, 
Jennifer

Thursday, January 19, 2012

Snowman Challenge!

Have you heard of a Center Step Card? I received 2 hand stamped Christmas cards this past year using this technique, and it was just the inspiration I needed to try something different! I used the instructions found on SCS to create my Snowman card for this weeks DRS Blog challenge. This is such a fun card! I love how it turned out!


Here's what I did...The card base was created from black cardstock, and I stamped the center panel with the Interlocking Snow Background (015H). I cut small strips of white cardstock embossed with the Snowflake Cuttlebug embossing folder to decorate the side panels. The Warm Wishes Sentiment (611D) used here is actually one stamp that I split apart so that I could stamp it as shown on the red panel used to decorate the bottom of the card base. For the center image, I stamped the Silhouette Snowflake Snowman (247K) on Vellum, using white Staz On ink. I layered it on black cardstock, cut it out with an oval Nestie and added red twine for a scarf and 3 black brads for buttons. I matted it with a white scalloped oval which really made the snowman and his red scarf pop! Best part about this card is that it measures A2 size, so no need to purchase a separate envelope for mailing...Gotta like that!

Just to show you how unique this card is, I took a picture of the side view.
Hope you enjoyed seeing this card! Give it a try, it looks so much more difficult than it really is and I'm sure it will become one of your favorites as well.

Smiles,
Jennifer

Tuesday, November 29, 2011

Snowman Smiles

Some great new Winter stamps are now available for purchase from DRS Designs!  You can check them all out HERE.  The card I have to show you today shows off the new Snowman Smiles greeting (962G).  Even though this is another CAS card, I love it!

To make this card I started with a piece of white cardstock and stamped the Snowman Smiles greeting on one side and Stretch the Round Button Snowman (1129H) on the other. Stretch was colored with Copic Markers. I then masked the snowman and stamped the Interlocking Snow background (015H) over the entire piece with Versamark ink (However, the snowflakes didn't photograph very well!).  I added a snow mound using one of the snowflake Cuttlebug embossing folders.  I ripped off a small portion of it to adhere to the bottom. I used a snowflake border punch to dress up the top along with some elegant red ribbon. After adhering this card front to a red cardstock base, I went crazy with the Stickles--I love how this card just sparkles! 

Hope your holidays are off to a great start!
Have a wonderful day!

Smiles,
Jennifer

Wednesday, January 12, 2011

Three Snowmen In A Box!

We've got snow coming our way today so today is a good day to show off DRS Designs new Snowman in a Box stamp (581C).  This little guy is so cute that I added 3 of them to my card front.  Each was colored with Copic Markers.


I used a pretty basic layout for this card, but wanted to dress it up with some fun colors.  Tturquoise and violet were selected with a snowflake embossed background and some sparkly silver ribbon.  The Warm Wishes Greeting (611D) is also new by DRS Designs and was stamped in Taken with Teal ink.
Make sure to check out the rest of DRS Designs new stamps.  I'm sure you'll find something perfect for all of your Winter and Valentine's Day card making needs.

I'm off to get some Hot Cocoa! Brrrrr!

Smiles,
Jennifer

Monday, December 13, 2010

Dough Dashing!

Posted by Jennifer E.

So, is your holiday shopping going well? Almost done? I've started...I'm no where near finished and this card explains my thoughts exactly! Every shopping trip feels like I'm dashing through the dough! LOL! Can you relate?
 

Today is my day to post on the DRS Designs Blog, so you'll have to go there to see my card and find exactly who is "Dashing though the Dough!"

Tuesday, November 23, 2010

Have a Jolly Holiday!

Are you missing me?  I'm still not feeling well, so I have yet to get to my stamp room.  I am slowly starting to come around though.  I hope to have another card to share with you later this week in honor of "Turkey Day!" 


Today is my day to post on the DRS Designs blog and I managed to dig up a card I made a while ago, but have yet to share.  I hope you'll take some time to run over there to check it out.

Thanks so much and have a great day!
Smiles,
Jennifer

Sunday, August 29, 2010

Card Patterns Sponsorship!

Here's another chance to win FREE stamps from DRS Designs!

This week DRS Designs is sponsoring the Card Patterns Blog Sketch Challenge


My challenge card uses stamps from DRS Designs and includes the newly released Wintertime Buddies image (362). 

I used only the upper portion of the Wintertime Buddies stamp.  I masked it and then clear embossed the Interlocking Snowflakes Background (H015) to make it look like it was snowing around them.  Sponging blue ink on top of the snowflakes made them appear white.  I also used the Star Ribbon Slides (D963) as embellishments.

A bit of Icicle Stickles made this snowman come to life!

Make sure to check out all of the details over at the Card Patterns blog and link up your take on the sketch to be entered to win a $10 voucher to DRS Designs!

 Thanks for visiting!

Smiles,
Jennifer

Thursday, August 26, 2010

Wintertime Buddies


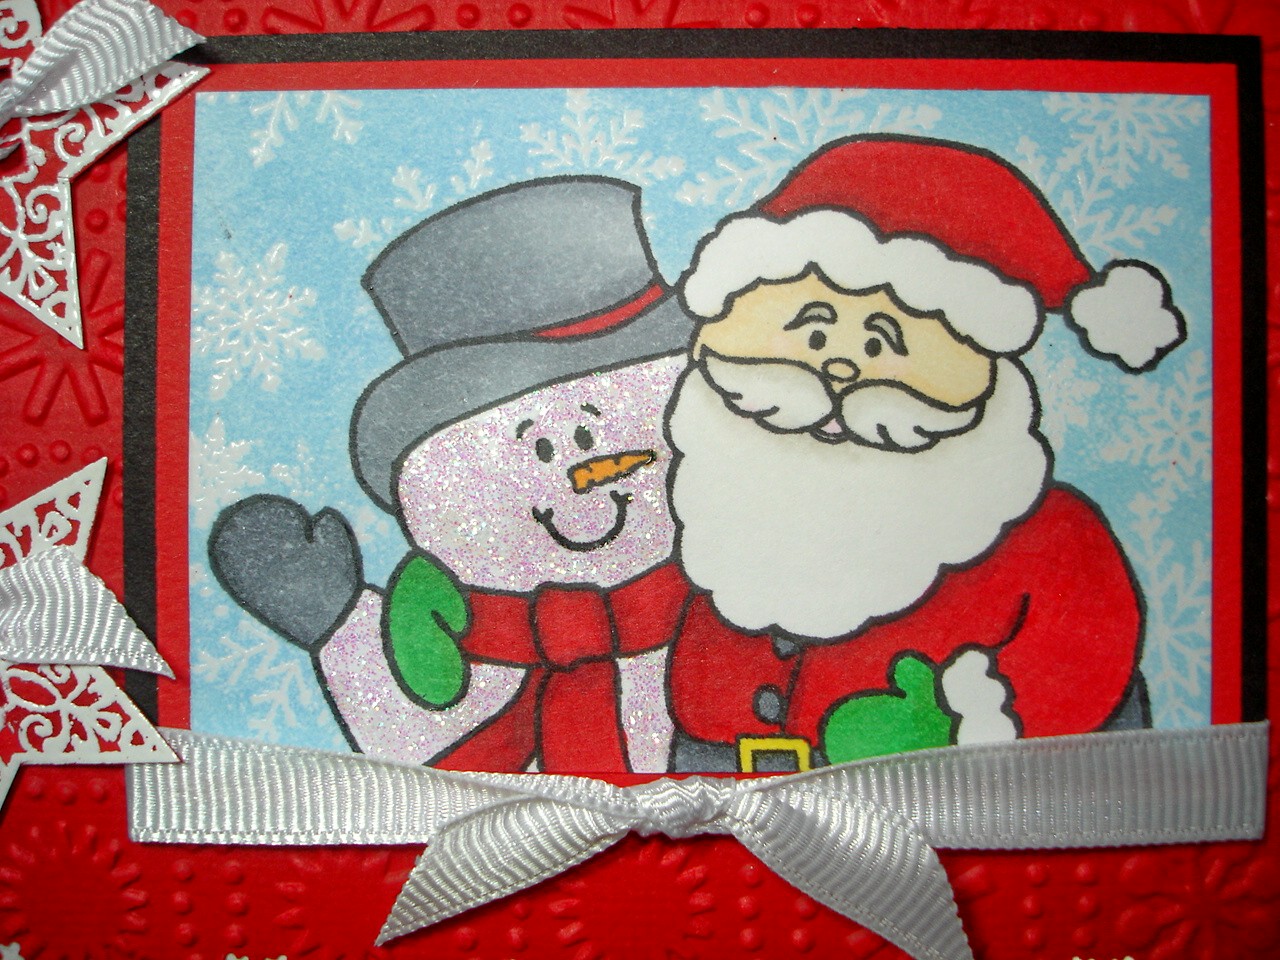
Today I'm showing you a Christmas card I made with DRS Designs Newest Releases.  I've used the fun loving Wintertime Buddies (M362), the Christmas Music Background (P372)and I created my own embellishments using the holly from the Joyful Christmas Mouse stamp (H351). 


The Santa and Snowman were colored with Copic Markers and I distressed the edges with Vintage Photo Distressing ink.  I stamped the Music Background on off-white cardstock, distressed the edges, and then sprayed it with Glimmer Mist, before crumpling it up in a ball to create the vintage look.   I love this background stamp and I promise you'll see more of it from me! I think it makes an very elegant looking Holiday card.  The hollies were colored, cut out and adhered in the corners of my focal image.

Here's a close up of those Wintertime Buddies.  Adorable, huh?

Make sure to run over to DRS Designs and check out all 12 of the new designs added to their Christmas and Holiday collection.  I promise you won't be disappointed!

Thanks for stopping by!

Smiles,
Jennifer

Wednesday, June 16, 2010

Ever Heard of Scraplings?


Have you ever heard of Scraplings?

Scrapling cards are strips of cardstock that measure 1.25”x 8.5" scored at the 4.25" mark so that you have a tall and very skinny card.  Best part is that you often have scraps laying around that are this size from making larger size cards.   It's always great when you can re-use your scraps!

I've been busy trying these out. I made several Scraplings yesterday during my Scrap Therapy session--Papercrafting seems to be a complete stress reliever these days-I love disappearing into this other world where it's just me, my stamps, paper, and ink and not a care in the world!  Can you relate to this?

Anyways, here they are!


Like I said, very tall and skinny! However, these are not even as skinny as they should be! I made them a bit wider to accomodate my stamped images and to also include room for a bit of matting.

I used stamps from DRS Designs on each Scrapling. 


This first one uses the Holly/Candy Cane Postage Frame (H998).  I colored it with Copic Markers and then carefully cut it out along the Holly border. I covered the postage frame part with red cardstock and added the Triple Holly (F1004) image in that space.  The background was created using White Staz On ink and the Lines O'Plenty Background (H366).

Next up with a bit of Golden flair, is my Sunflower Scrapling.  It is very similar to the one above, since it is also a postage frame stamp.  This one uses the Sunflower Postage Frame (H710), and it too was colored with Copic Markers.


As you can see I added brown cardstock to the area where the postage should go.  I stamped this image a second time and then colored and cut out the bottom sunflower to fill the postage frame space. After matting it with green cardstock I added some ribbon.  The yellow base was embossed with the Stars Cuttlebug Embossing folder to add a bit of texture. 

Finally, the last one is also for the holidays.  It uses the Vertical Let It Snow (H233) stamp


This image was colored with Prismacolor Pencils and the colors were blended with Gamsol.  A bit difficult to see, but by looking closely, you can see that the red cardstock base was stamped with the small snowflake from the 4 in 1 Snowflake stamp (D096) and white ink.  This Scrapling was the plainest of a ll three, so to bling it up a bit I added Stickles to the Snowman's face and to all the snowflakes. A bit of red ribbon dressed it up too.

So, what did you think of my Scraplings?  Do you have a favorite? Are you brave enough to give them a try? Leave me a link if you do, I'd love to see yours!

Have a great day!

Smiles,
Jennifer

Friday, January 8, 2010

Sending You A Smile...

...in the hopes of cheering up your Winter blues!


Don't forget, DRS Designs has another great round of stamps that will be available for purchase starting tomorrow.  You can see all of the new releases HERE as soon as they become available.  This Snow Mama is one of the stamps that will be released.  I colored her with Copic markers, and added a touch of Stickles to the Snowflake on her hat.  I also added some pink to her cheeks and a few freckles.  Isn't she adorable?!?!  I paired her with the "Sending you a smile..." (D289) sentiment.  This stamp combo is bound to cheer anyone up!


Well, I hope your Winter is a bit warmer and better than ours is right now in Michigan.  We just received about 5 inches of fresh snow yesterday and the high temperature over the last few days has been about 20 degrees!   If weather conditions like that don't give you the blues, then you must be a penguin! LOL!

Brrrr!
Smiles,
Jennifer

PS: As of January 31st DRS Designs will be retiring hundreds of its current stamp designs.  Get them before they're gone by clicking here. 

Tuesday, January 5, 2010

We Can Build A Snowman...

...and that's exactly what I've done to create today's card! DRS Designs will have a bunch of new Winter images available for purchase this Saturday and one of them is this Invisible Snowman set of images. It consists of 3 stamps--the hat, scarf and face!

I know it's hard to see, but I created the snowman body by cutting white cardstock circles with my Nestabilities and then embossing them with the Cuttlebug Snowflake Embossing folder.  I used a black marker to draw the coal buttons on his chest.  I adhered all 3 circles together and then added hit hat and scarf.  I had to give him arms, and the twine I had stashed in my ribbon box was perfect! I used foam tape to adhere him to the dark blue background which was stamped with the Interlocking Snowflake background (H015).  I used the snowman's face stamp to create the background and used an orange marker to color in the carrot nose!


Surprisingly, we haven't had much snow this season yet, --this is the only snowman I've made so far.  Based on the latest weather reports I'm sure we'll be getting plently of the white stuff very soon!

Have you built a snowman this season yet? 

Have a great day!
Smiles,
Jennifer

LinkWithin

Blog Widget by LinkWithin