Welcome to Ink N Scrap Habits!
I've created this blog to share my life & love of paper crafts with others. You will read bits and pieces of what goes on in my world and be able to see my paper craft creations! Please leave me a comment if you see something you like. I'd love to hear from you!
Can you believe Thanksgiving is next week? Time is flying by and I can't seem to catch up! Unfortunately I missed last week's DRS Designs Blog Challenge, but I'm glad I found time to play in this week's beautiful color challenge. Here's the inspiration photo:
I colored the image with Prismacolor pencils and sponged around it with brown ink. It was adhered on a red scallop square. I stamped the sentiment on the bottom portion of the center panel and then layered it with yellow cardstock and then again with red cardstock that was punched to create the decorative border. Three fishtail banners were added to the left side and the matted image was adhered as shown on the right side. The card base was made from brown cardstock to form an A2 size card and the layered panel was adhered in the center to complete this card.
Make sure to run over to the DRS Designs blog and check out all of the fabulous DT cards and enter your color challenge card to win a great prize!
Thank for stopping by!
Smiles,
Jennifer
Finally, sometime to myself to stamp and blog! Things have been so hectic here--we now have my 4 year old son into ice skating lessons, we are often fighting the temper tantrums of both boys, my Husbands crazy work schedule leaves me with all the house-hold chores more often than I'd like to count, and I'm already feeling the pressure of the holidays that has me shopping more now than I normally do. Did I mention how much homework a preschooler brings home?!?!? Makes me wonder what his homework load will be like in a few years!! Craziness!
At any rate, DH and I have really been making an honest effort to get both boys ready for bed around 7pm so they can hopefully be sleeping by 8pm. I know that probably sounds pretty routine for most families with little ones, but it's really a struggle for us, since we a just sitting down for dinner around 6:30pm. Thankfully, it's been working and it's allowed for a bit more "me" time, which I've been loving! This Happy Thankful People Greeting (612G) from DRS Designs couldn't be more true! I am thankful for my family and being with them makes me happy, despite the hecticness!

I created this card for the DRS Designs Blog Challenge from last week, but never got around to blogging about. The challenge was "Pile It High," using layers on your challenge entry. First I created the card front using light blue cardstock and then I stamped the Tree Limb (568P) vertically on the far right side and then the Autumn Leaf Pile (575F) was stamped in the center at the bottom. I sponged blue ink above the leaf pile and green ink at the very bottom edge for grass. Next, I stamped the leaf pile again on white cardstock, colored with Copic Markers, and then cut it out and adhered in place in the scene I created on my card front. The greeting was stamped in the empty space as shown and then I drew a line around the edge of the card front omitting the stamped portions to complete the look. The card front was matted with a piece of yellow-orange cardstock to match the color scheme before finally adhering it on to a turquoise cardstock base. I really like the look of this card as it was and decided not to embellish it any further. Sort of funny how this card has a few layers, yet it's still completely flat!
Thanks for stopping by!
Smiles,
Jennifer
I love the Fall and even more so, I'm really excited that Thanksgiving is right around the corner. Despite how hectic the holidays can be, I love all the togetherness! There's nothing more rewarding then lots of time with extended family and to me, that's what the holidays are all about.
Since I was in a Thanksgiving kind-of mood, I made this Thanksgiving card! for the new challenge on the DRS Designs blog this week, "Fall-ing For You."
I started by stamping and coloring the Autumn Flower Spray (452L) with Copic Markers. I used a Nestability die to cut it out and then sponged brown ink around it while it was still in the die. Next, it was matted with brown and yellow card stock cut from Nestability dies. I stamped the *NEW* Give Thanks Bible Verse (585E) on yellow card stock and cut it out with a fishtail die. The green card stock that was used to mat it was cut out the same way. The card stock base was made from brown card stock to form an A2 size card, and the stamped portions were adhered in place as shown. I cut a tab from green card stock and added three yellow pearls to embellish the upper left corner of the matted image and this card was complete!
I hope you like it!
Thanks for stopping by and have a wonderful weekend!
Smiles,
Jennifer
A couple weeks ago I created today's card for the DRS Designs "I'm so hungry" blog challenge, but due to a nasty computer virus I was unable to get it uploaded onto my computer to share. I'm glad that's all in the past now because you can only do so much on a smart phone and I'm happy to have my computer back!
When I first sat down to create this card, I really wasn't giving it much thought and as this card progressed it turned out to be a Thanksgiving greeting using non-traditional colors! I really liked the way the olive green, mauve pink, and the yellow color combination came together. I first colored the Indian Corn (151H) with Copic markers. Then, the image was masked and light brown ink was sponged around the image while it was in a Nestability die. On the pink cardstock in the background, I stamped the new Silhouette Cornstalk (179B) repeatedly using Versamark ink to create my own pattern paper. The One Line Thanksgiving Greeting (841D) was stamped above the image, and I used a portion of the new Thank You Lord Greeting (165G) for the sentiment below it. The finished card size measure 4.25" x 5.5" and other than the knot in the ribbon, this card is nice and flat for mailing. Have you made your Thanksgiving greetings to send out yet?
Thanks so much for taking the time out of your busy schedule to stop by today. I appreciate your visit!
I'm not sure how you feel, but I think 2014 has flew by way too fast! Maybe it's just because I'm getting older, or maybe because I'm really enjoying life and as they say, "Time flies when your having fun!" Or, maybe it's because I'm the Mother of 2 small children. It makes me so sad seeing my 9 month old son growing so fast. Just after the holidays we will celebrate his first birthday and I just can't believe it! Seems just like yesterday that my Doctor was worried about me going into pre-term labor and his big arrival, 3 weeks early. Despite all of the changes and growth 2014 has brought into my life, I am more Thankful than ever! Thankful for being blessed with a wonderful Husband to share my life with and thankful for our 2 little blessings that help make our lives challenging and fun all at the same time!

In honor of the Thanksgiving season that is right around the corner, the new challenge on the DRS Designs Blog this week is "So Thankful," and this CAS card is my challenge entry. The focal point of this card was stamped with the new Giving Thanks Greeting (160H) and the Simply Pumpkin (304G) was stamped overtop of it using orange ink. I hope you like it!
What are you thankful for this year?
Thanks for stopping by!
Smiles,
Jennifer
Happy Thanksgiving to all of you who are celebrating this wonderful holiday today!
We have a big family party planned for today and our house smells wonderful with the turkey in the oven! How are you celebrating today?
Here is a card I created from inspiration I found on Pintrest for today's challenge on the DRS Designs website, Happy Thanksgiving. I love the simple layout and how the twine is wrapped around the background banner.
I started first by coloring the Autumn Wreath (429M) with Copic Markers and then I carefully cut it out. Next, I assembled the card base using Kraft cardstock. I wrapped the twine around the red banner, adhered it in place and used a corner rounder on a small piece of dark brown cardstock. Then I ran it through the Swiss Dots embossing folder and adhere it inplace on top of the red banner. I placed the wreath in the center and added a small twine bow to the far left side. As a finishing touch, Thanksgiving Blessings (637E) was stamped at the bottom of the cardstock base.
Well, that's it for me today. I'm off to spend some quality time with our family and cherish all that we are thankful for.
Have a wonderful Thanksgiving!
Smiles,
Jennifer
Can you believe it's the middle of November already?!?!?! With that, Thanksgiving is only 2 weeks away and, dare I say it, Christmas is only about 6 weeks away! Have you made any Thanksgiving cards yet?
I created this one for this weeks DRS Designs Blog challenge, Rip Torn. We are to use ripped or torn paper on our project. This is also to show off DRS Designs new Classic Turkey image (1033H) and classic it is! I just love this image and I love how his feathers turned out colored with Copic Markers!
I started with an A2 dark brown cardstock base. The card front was embossed with the swiss dots folder on the lower half and the Thanksgiving Arc (050E) was stamped near the upper portion. I used a corner punch on all 4 corners and distressed the edges with brown ink.
For the middle panel I stamped the Polka Dot Background (688P) on ivory cardstock and ripped the bottom edge. Then, I used a decorative border punch on the red cardstock panel and ripped the bottom layer of that as well. I simply tied some red and white twine to the middle before adhering it to the card front. Finally, I added some dimension to the the card front by adhering the turkey image with foam tape.
I appreciate you stopping by today and hope that you'll play along with our Ripped Torn challenge. Check out all the details HERE, including the great prize DRS Designs is giving away this week.
Have a great day!
Gobble, Gobble!
Smiles,
Jennifer
Hi Everyone!
I'm posting here today to remind you that it's time to start thinking of the next holiday now that Halloween is over. I'm sharing a Thanksgiving card with you today that has a unique fold. No worries though, the finished card size is still 5.5" x 4.25"!
The top flap on the front of my card was created using the Wonderful As You Thanksgiving Greeting (216g). I wanted this to be the focal point of my card, so I used a decorative Nestability die to show it off. I sponged the inside of the die with brown ink and then used a fine point marker to outline the inside edge. Then I stamped the sentiment with brown ink. The background of this top flap was decorated with the Silhouette Branch Background (363H). I matted it with dark brown cardstock and then added orange ribbon and a button tied with orange embroidery floss.
This picture reveals how the card opens. there's a fold on both the right and left sides of the card. As you can see, I decorated the orange cardstock on the middle flap with the Woven Plaid stamp (613p) and 2 brown brads. As a final touch, I added some cardstock layers to the inside of the card so that there was a space to write a personal message.
Thanks for stopping by and enjoy your day!
Smiles,
Jennifer
We all love the food that Thanksgiving brings but along with it come plenty of yummy calories! However, as mentioned in this greeting from DRS Designs, hopefully they all stay off your seat! LOL! We can only hope though, right?
Hope you'll join the challenge this week and show off your turkeys!
Have a great day!
Smiles,
Jennifer
It's that time of year when many of us reflect on all of the blessings we have and share the things we are thankful for. Here's a card I created with stamps from DRS Designs with these thoughts of Thanksgiving in mind.
I started with an A2 brown cardstock base and heat embossed it using clear embossing powder and the Silhouette Branch Background (363H). The ivory layer on the card front was stamped lightly with Woven Plaid (613P). I stamped and colored the Be Thankful Cross (634G) on another piece of cardstock and then fussy cut it out. I then adhered it in the center of the card front and the ivory layer was matted with tan cardstock. I added 2 brads to the upper corners and then added sheer brown ribbon to the bottom. This was adhered to the card base and my card was complete.
So, what are you thankful for this year?
As always, I am thankful for being healthy, having a wonderful husband and family and being blessed with a beautiful son. Butm this year I am especially thankful for a healthy pregnancy and I'm eager to meet our new son in January!
Thanks for stopping by. Have a great day!
Smiles,
Jennifer
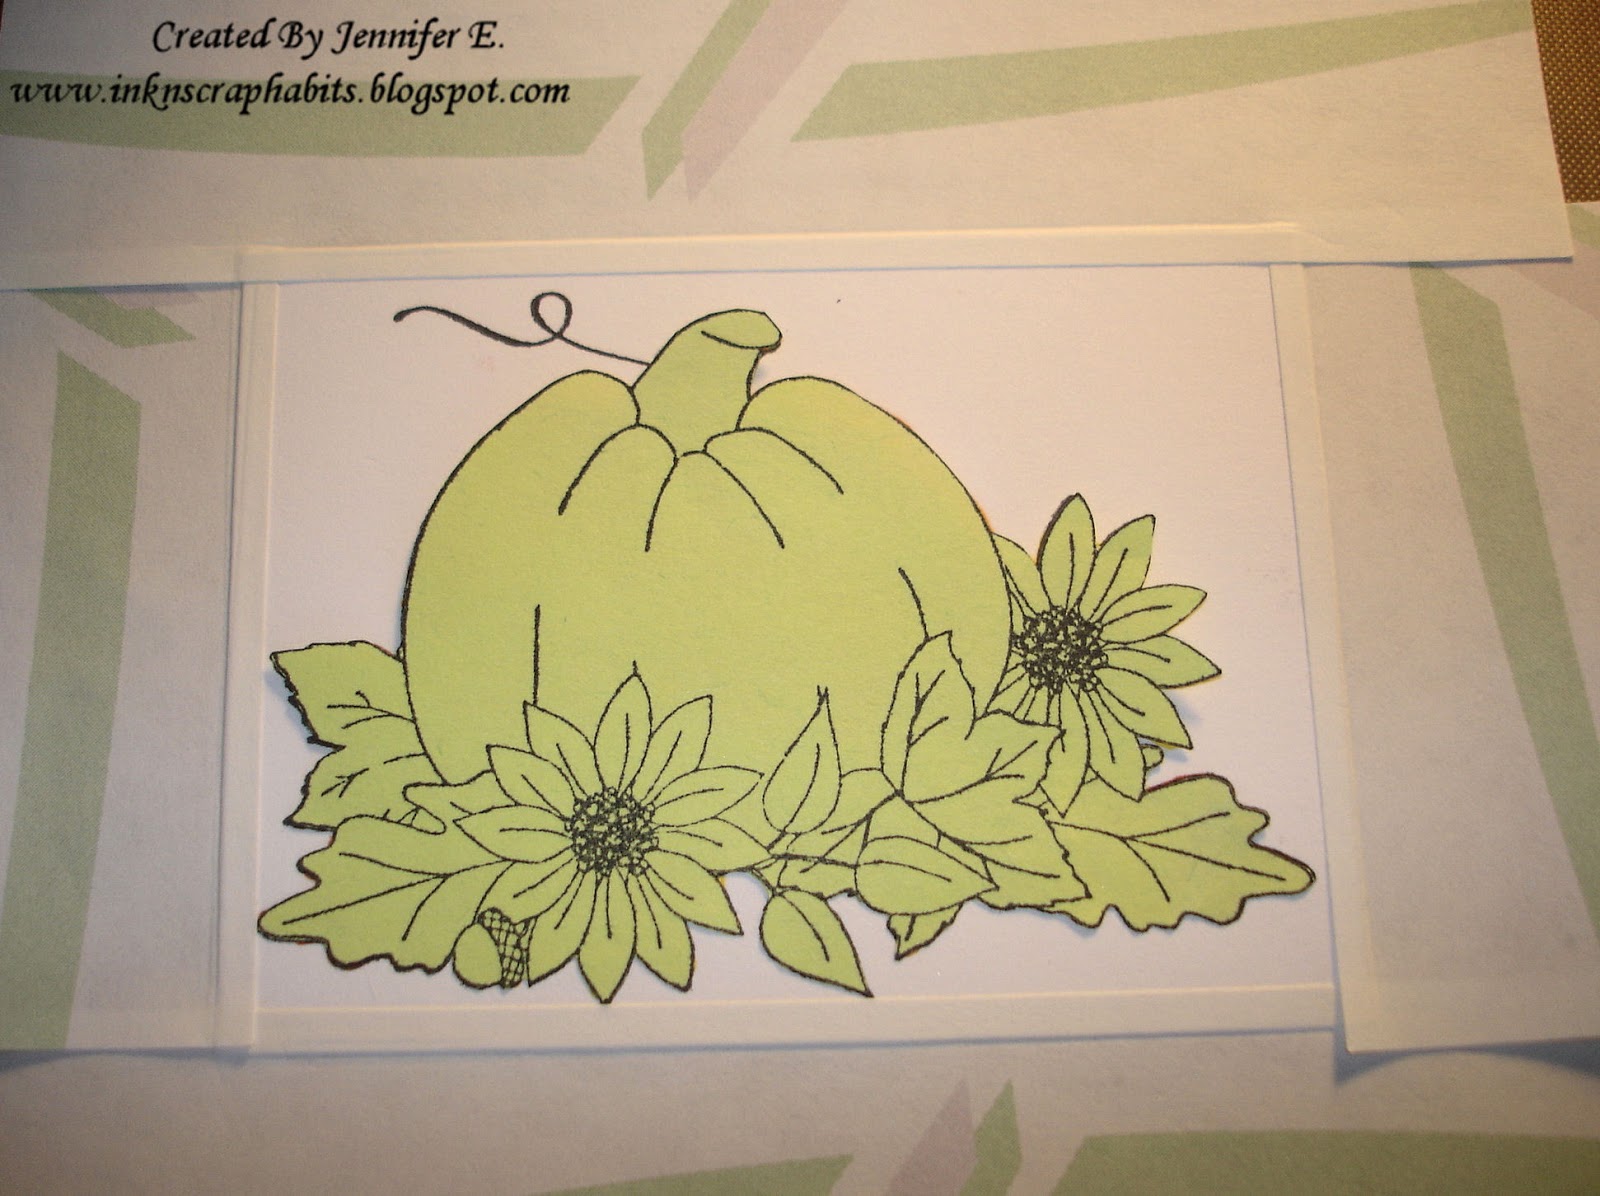
Thanks to all of you who subscribe to my blog, my daily readers, and to those of you who comment often. I appreciate your visits and love what you have to say about my cards! I was recently asked to show how I create the white frame around the images I use after posting my Thanksgiving card the other day. I decided to create a tutorial so that I could show a step-by-step demonstration. Enjoy!
Step 1: After stamping and coloring image, trim excess cardstock around it.
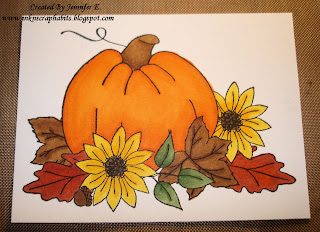
Step 2: Stamp image on Post-It Note and cut out to create image mask.
Step 3: Use Post-It Notes to mask off edges around image.
Step 4: Sponge area around image with ink to match the theme of your project.
Step 5: Remove Post-It Notes around the outer edges.
Step 6: Use finished image to complete your project!
Happy Stamping!
Smiles,
Jennifer
It's Thursday already and time to show off another DRS Designs Blog Challenge card. The theme this week is Sunflowers!
I chose to use the Pumpkin with Leaves stamp (165K) for the qualifying element for this challenge. I carefully colored it with Copic Markers and then masked and sponged tan ink around it while it was in a Nestie die. I used this same technique to add color to the stamped One Line Happy Thanksgiving sentiment (841D). (See my own tutorial for this HERE.) I also stamped the plaid that I used in the background. This was done with the Woven Plaid stamp (613P). I used brown ink and stamped it in 2 opposite directions. It gives a warm and cozy feel to this card, don't you think? The final touch was to decorate the sentiment banner. I used a brown button, threaded with orange embroidery floss that I neatly tied in a bow.
Tis the season for sunflowers, won't you play along?
Smiles,
Jennifer
Happy Thanksgiving!
May you be blessed with good food and may you enjoy the company of your family and friends today!
Hope your Turkey Day is wonderful!
Smiles,
Jennifer
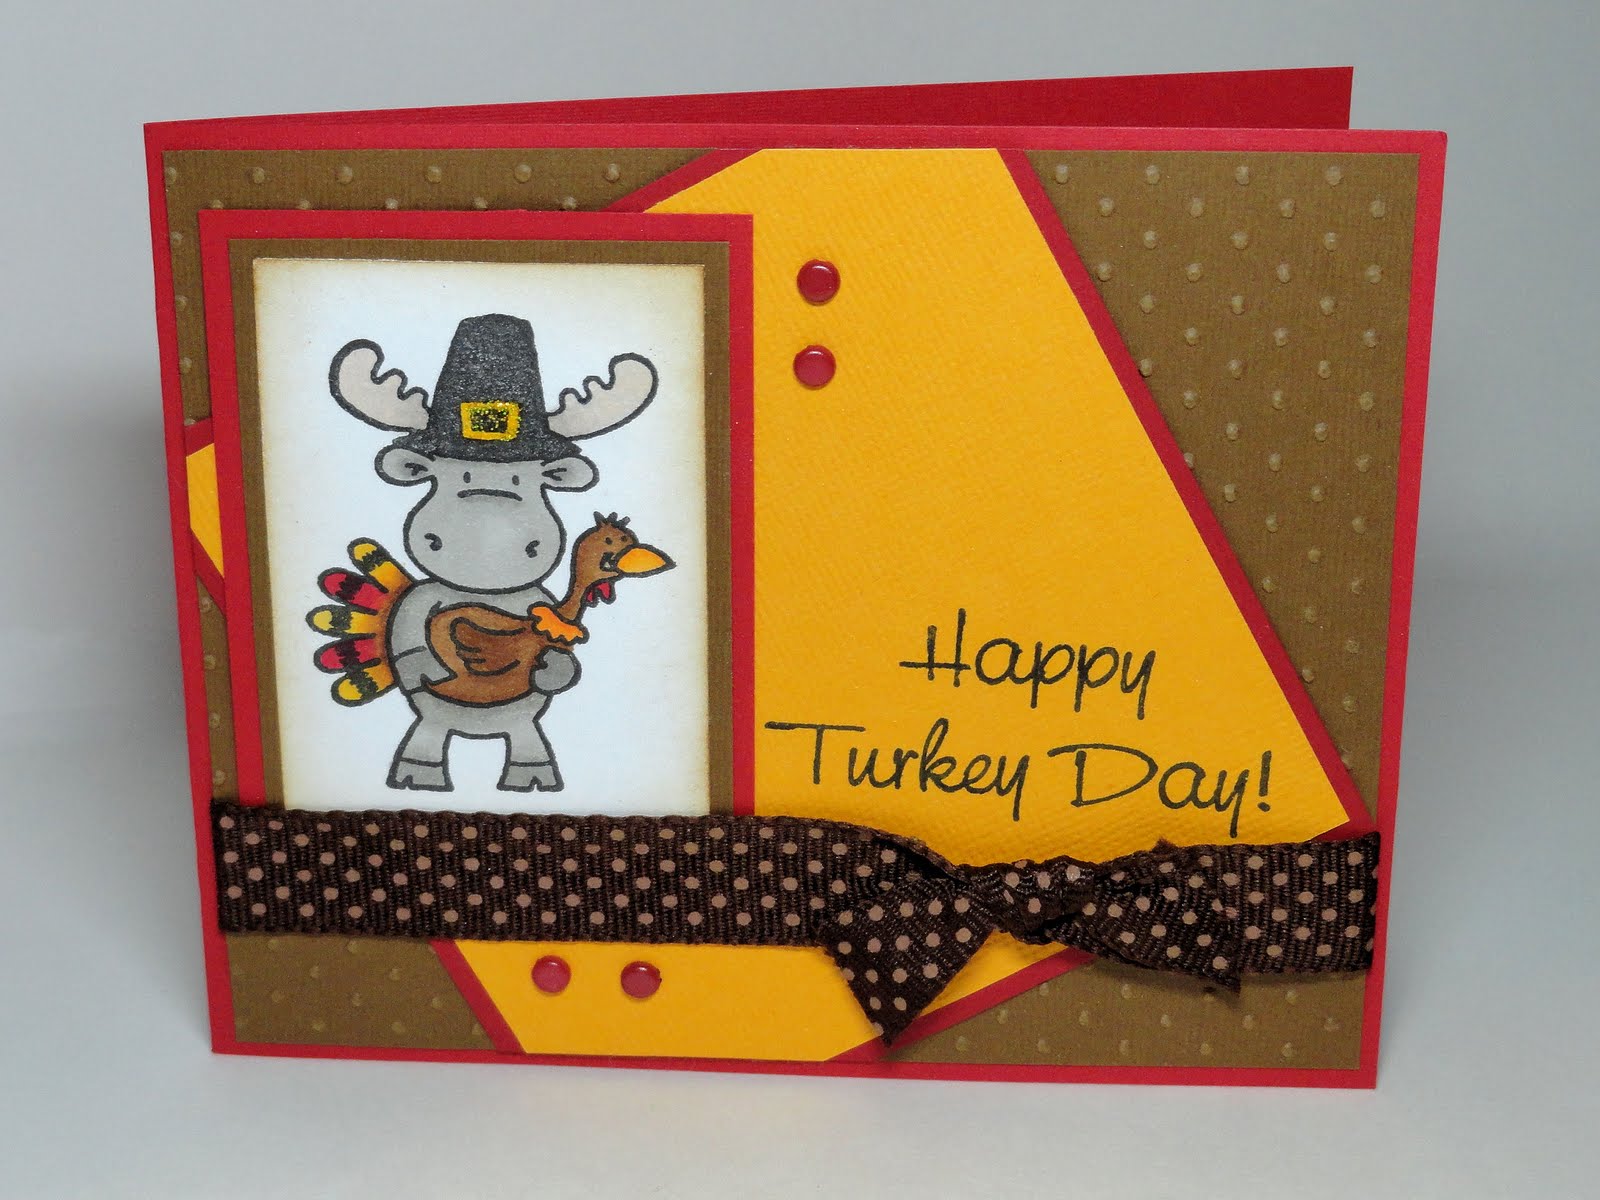
Stamps: Riley and Co-Turkey Riley, DRS Designs-Turkey Day Greeting (787E)
With all of the Thanksgiving preparations underway, I was looking for a quick and easy card to make for today's post. The first line of DRS Designs Thankful For the Little Things Greeting (071H), "Leaves of red, orange, and gold," inspired me to create something with leaves to use with it. I decided on a wreath made out of leaf punchies for the focal design on my card front. I thought since I didn't have to color an image I could get it done quickly--wrong! Punching all those little leaves and trying to arrange them in a circle probably took me just as long to do as coloring an image. However, my frustration slowly went away as I saw how elegant this card became with a little distressing, some matted layers, a border punch, some craft glue, and a beautifully tied bow!
I hope each of you has a wonderful and safe Thanksgiving!
Thanks for stopping by!
Smiles,
Jennifer
Happy Sunday! I hope you're having a great weekend!
Things are still really busy here. We've been cleaning, organizing, setting up, and decorating for the big Turkey Day. Our family party seems to keep growing a little bit everyday. We now have 38 people coming for dinner!!! So, it's been hectic, but it will be so much fun to have the extended family together!
All of the stamps I used on today's card are from DRS Designs-Long Tall Wheat (590H), Checkerboard Background (342P), and the Hayrides Harvest Greeting (624H). The greeting was heat embossed with Copper embossing powder, cut out with a Nestie Die and sponged with orange ink while still in the die. The wheat stalks were stamped in SU! More Mustard and Pumpkin Pie inks, the checkerboard was stamped in Versafine Vintage Sepia, and I used a new (to me) embossing folder by Darice for the bottom panel.
Thanks for stopping by!
Hope you have a wonderful week!
Smiles,
Jennifer
Our Thanksgiving preparations are underway! How are yours coming along? We are having about 35 people at our house for Thanksgiving this year, so we have been busy straightening up our basement, setting up tables and chairs, and decorating. Luckily, I don't have to cook--Thank God for Moms and Grandmas who take pride in that, otherwise I would be way over my head! Unfortunately for the Turkey on today's card, we are having turkey with all the fixin's for our meal.

I created this card for the Turkey challenge that can be found on the DRS Designs blog this week and for this weeks Ways to Use It Challenge on Splitcoast Stampers. The image I used is DRS Designs Turkey Propaganda (499H). I colored it with Copic Markers and then masked it, creating a stencil so that only the sign was showing and sponged it with light brown ink. Then I masked the entire image and sponged yellow ink around it. The background panel was created by stamping the new Material Maker Square (583L) repeatedly to create a pattern. A decorative border punch, few silver brads, and some beige grosgrain ribbon were used to embellish this card. Finished size is 5.5" x 4.25."
Until next time, Thanks for stopping by!
Smiles,
Jennifer
Don't these apples look delish?!?! They make me think of the yummy apple crisp I'm making for our Thanksgiving holiday. My mouth is watering already just thinking about that wonderful meal!
They apples were colored with Copic Markers and brown ink sponged around them while in a nestie die. The checkerboard was stamped with SU! Real Red and I used the Swiss Dots embossing folder for the beige portion of the card front. Some red brand and brown grosgrain ribbon finished this card nicely.
Thanks for stopping by to see my work!
Smiles,
Jennifer
The new challenge on the DRS Designs Blog this week is candles. I got a little creative and changed up the Holly Hurricane (164M) to look more harvest-like.
The candle, hurricane glass, and bow were colored with Copic Markers. I sponged light brown ink around the hurricane and then added a bit of yellow Stickles to the candle flame and then Diamond Glaze to the hurricane make it look like real glass. For the transition from a Christmas image to a Thanksgiving image, I stamped the Bunch of Wheat (137K) repeatedly, colored them with Copic Markers, fussy cut them out, and then arranged them over the bottom of the hurricane to cover up the holly. I replaced the bow that was originally there.
The new Thanksgiving Blessings Sentiment (637E) was broke up and stamped individually to fit the layout.
DRS Designs is giving away a great prize this week for this challenge. Check out all the details HERE and link up your card for a chance to win!
Thanks for stopping by, hope you'll be back soon!
Smiles,
Jennifer
This past Saturday DRS Designs released some great new stamps perfect for making Thanksgiving cards and I'm sharing some of them off today with this bright and cheery card!
I used the Sunflower Trio (345G) to decorate the Beauty of An Autumn Day Greeting (788G). The sunflowers were colored with Copic Markers and then I added some bling to them with Yellow Stickles. The greeting was stamped with brown ink and then I used a Nestie die to cut it out. I sponged yellow ink around it before taking it out of the die. The new Checkerboard background stamp (342P) was used to create the background panel. The Swiss Dots embossing folder, some brown grosgrain ribbon, and few brown brads made this card complete.
Here's a close up of the greeting panel. Aren't those sunflowers gorgeous?!?!
Run over to the New Release page to check them out along with the rest of the new stamps HERE.
Thanks for stopping by and have a wonderful day!
Smiles,
Jennifer
Here's my attempt at this weeks Splitcoast Sketch Challenge SC357. The focal design should be more towards the right side, but, it is what it is. Now that Halloween is over it's time to start thinking about Thanksgiving cards. All stamps on this card are by DRS Designs.
Have you started making Thanksgiving cards yet?
Thanks for stopping by to see my first one!
Smiles,
Jennifer