Welcome to Ink N Scrap Habits!
I've created this blog to share my life & love of paper crafts with others. You will read bits and pieces of what goes on in my world and be able to see my paper craft creations! Please leave me a comment if you see something you like. I'd love to hear from you!
Wishing you all a very joyous Easter!
Smiles,
Jennifer
There's a new color challenge on the DRS Designs Blog this week. The inspiration photo is below and it's all about Spring with pinks and greens!
I thought the Easter Daffodil Oval (663L) was perfect for this color combo.
The entire image was colored with Copic Markers. I used RV000, RV02, and RV23 on the daffodils. The leaves were colored with G00, G02, and G05. Y17, Y15, and Y02 were used for the background. I used RV23 to colored the image divider and the bottom was colored with YG06.
I built up the card front by layering green and pink cardstock. The green panel was embossed for texture and the pink panel was layered with a scallop border and some light green and white twine tied in s knot. Finally, I added some pearls around the matted image and ta da, it was complete!
Thanks for stopping by. I hope you'll be back soon!
Smiles,
Jennifer
If your looking for free stamps this week I have 2 opportunities for you!
The first is with DRS Designs weekly Blog Challenge. The theme is "Button It!" How easy is that? Many of us use buttons as everyday embellishments anyways so this should be easy to complete.
That's exactly what I did for today's card. I used a button to embellish the bow I added to the bottom of my "Peep Garden." This Easter card uses the Simple Easter Bunny (347E), which I colored with Copic Markers. Then I fussy cut each of them out and arranged them as shown. I even made my own grass by stamping a piece of green card stock with the Easy Grass Background (059E).
The second opportunity for a chance to win free stamps is with Tuesday Morning Sketches. DRS Designs is their sponsor this week. One lucky winner will be picked to win a store voucher to DRS Designs online catalog for creating a challenge project with the sketch below.
Unfortunately, time was against me this week and I was unable to design a card using it, but I hope you'll get a chance to! Even better, use this sketch for your card layout and then embellish your card with some buttons to satisfy both challenge requirements! Someone has to win, why not you?
Good luck!
Smiles,
Jennifer
Hi Everyone!
I colored the bunny
with Copic Markers--RV10, RV02 and
RV23. It was fussy cut out and then layered on light purple
cardstock that was embossed. I split up the greeting to accommodate my
layout. I love how the banner really emphasizes the word "PEEPS" in the
greeting, especially since it's a pun resembled by the bunny image. I love the font
too! It's sort of hard to see, but the yellow cardstock used for the card front
was stamped repeatedly with the Bunny Ears (307C) to add some
texture to the background. Some violet plaid ribbon, a decorative border punch
and a few white pearl embellishments made this card complete.
I'm so excited that Easter and
warmer weather is right around the corner!
I hope the weather starts to warm up
soon in your neck of the woods too!
Have a great day!
Smiles,
Jennifer
Can you believe this is the last week of February....already?!?!? That means that March is right around the corner and perhaps at some point it will turn to Spring and we can put this deep freeze behind us! I'm done with winter, can you tell? LOL! I have a bad case of cabin fever and I'm itching to get outside with my boys! One good thing about the weather still being yucky is that I don't mind being trapped inside if I can spend the time stamping. Today I'm sharing an Easter card I recently made during one of our recent Arctic Blasts, where the wind chill was -30 degrees!
I started by coloring the Three Wooden Crosses (1116K) with Copic Markers. I used E31, E33 and E35 specifically. I cut the image out using an oval Nestability die. Then, I masked it with a Post-it Note and sponged it with light blue ink, layering the ink, so that it was heavier toward the bottom of the crosses. The ground beneath the crossed was sponged with brown in k in the same manner. The colored image was layered with a dark brown scalloped oval and set aside while I worked on the rest of my card.
For one side of the card front I used Kraft colored cardstock that was embossed with a wood grain embossing folder to match the texture of the wooden crosses in the image. I used smooth blue cardstock for the opposite side and embellished it with a dark brown decorative border to hide the seam between the 2 card front panels. Then I stamped the I Am The Resurrection Greeting (303D) on the lower portion of the left side of the card front. The matted image was adhered in place just off center as shown and then I embellished the upper left portion of the card front with 3 different colored banners and a button tied with a blue twine bow. This card was then completed by attaching the card front to an A2 dark brown cardstock base.
I'm really happy with how this turned out, but blue and brown are one of my favorite color combinations, so I might be a little biased. I hope you like it too!
Thanks for stopping by!
Smiles,
Jennifer
Happy Easter to you all!
Yesterday we went to the local greenhouse for their Easter event and took this picture of our oldest son with the Easter Bunny. This was the only picture we took and I'm over the top excited about it because it is perfect! We never get pictures of him where his head and eyes are both facing directly at the camera along with a perfect smile on his face!
Despite visiting the Easter Bunny, cleaning house, preparing food, and dying Easter Eggs, I even had time to stamp up this CAS card. Both the image and sentiment are by DRS Designs. The Three Wooden Crosses (1116K) were colored with Copic Markers, masked, and then sponged with yellow ink behind the crosses and brown ink for the dirt. He Has Risen (1138E) was stamped in the smooth section below the image. I love the decorative flair this Nestie die gives this card overall and how it really shows off the image. I hope you like it too!
Thanks for stopping by and have a wonderfully blessed day with your family and friends!
Smiles,
Jennifer
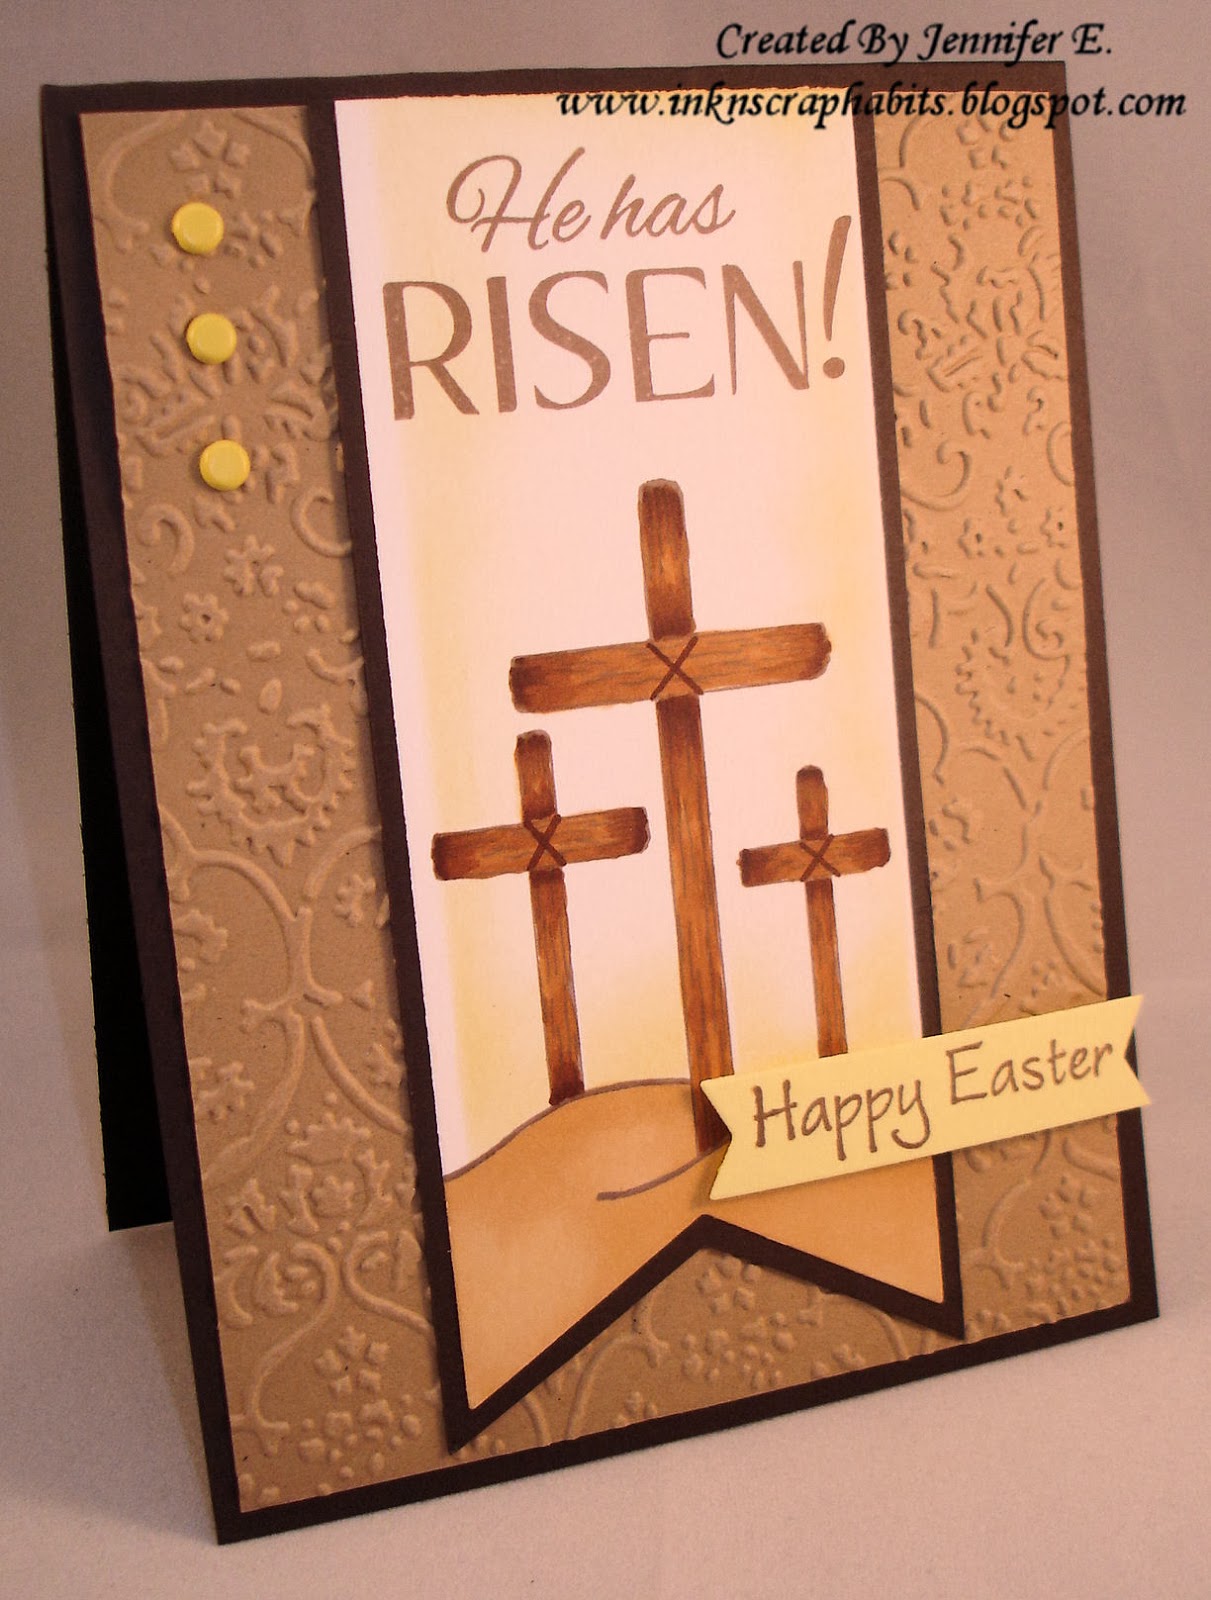
Hi Everyone!
I used a banner to show off these stamps on my card front. As you can see, the crosses were stamped at the bottom and the greeting at the top. I used Copic Markers to color in the crosses. Then, I masked the edges of the banner and the crosses with Post-It Notes and sponged the area around the image with yellow ink. Next, the banner was matted with dark brown cardstock. I used a kraft piece of cardstock for the card front and embossed it for added texture. The banner was adhered to the center and I added 3 yellow brads to the upper left corner. As the final touch, the One Line Happy Easter (665B) sentiment was stamped on a yellow banner and adhered as shown with foam tape.
Easter is just 20 days away. Have you made your Easter cards yet?
Thanks for stopping by!
Smiles,
Jennifer
I was an avid scrapbooker before I got into card making and stamping. But one of the reasons I love both of these papercrafts is the fact that nothing is ever wasted and it's always a bonus when you can actually use up some scraps! I did just that on this card for this weeks "Leftovers Again" challenge on the DRS Designs Blog--to literally use your scraps!
I used the Tulip Bunny (1112K) as the main focus of my card and colored it with Copic Markers. I had some left over banner tags that didn't work on a previous card and used it to show of the Some Bunny Loves You Greeting (1140D). Two pink brads simply embellished the upper left corner of this 5" x 3.5" note card.
I hope this challenge inspires you to use up your scraps as well and play along. Check out the details HERE!
Thanks for stopping by!
Smiles,
Jennifer
Hi Everybody!
There are now new Spring and Easter stamps available for purchase from DRS Designs! Woo Hoo I love getting new rubber and I'm sure you'll like these new stamps too! Today I'm showing off the Tulip Bunny (1112K) on this Easter card.
I colored the image with Copic Markers and kept my layout rather simple. I embellished this card by adding a small panel embossed with the Swiss Dots folder that I lined with a decorative border punch and a beautiful pink satin bow complemented the image nicely. I stamped the Vertical Happy Easter (838D) on the sentiment banner and added it to the empty space to the left of the image. Finished card size is 5.5" x 4.25."
Hope you enjoyed seeing my card today and that you're looking forward to Spring as much as I am. It has to be right around the corner...right?!?!
Have a great day!
Smiles,
Jennifer
Hippity, hoppity Easter's on its way!
Yes, this is true, but it is still very hard to believe with the fresh 8" of snow we had dumped on us yesterday. Will this Winter ever end?!?!
Well, here's a little wishful thinking I guess--this is the Easter card I made while I was stuck in the house during the snow storm. I've made this for DRS Designs "You're A Good Egg" Challenge.
I created the line of Easter eggs by masking DRS Designs new Easter Egg With Bow (1108D) stamp. They were colored in Spring pastel colors with Copic Markers. I filled the empty space above the Easter Egg line up with the Medium Script Happy Easter (762F) sentiment and embellished the card front with some pastel borders and a button tied with twine.
So how's the weather where you live? I hope it's a lot more Spring-like than mine!
Thanks for stopping by and be sure to check out the Egg challenge HERE.
Smiles,
Jennifer
Happy Easter!
I hope you all have a wonderful holiday and if you are off of work or school this week, enjoy that too! I unfortunately won't be enjoying either. I have to work today and the rest of this week, but it's ok! I have some time away from work coming up very soon and I'm spending it with a bunch of crafty friends--nothing but stamping for 4 whole days! More on that later. For now how about this fun Jelly Bean Easter card?!?!?

All of the stamps I used on this card are by DRS Designs. I started by stamping the Full Belly Easter Greeting (230H) with dark purple ink. While it was in a Nestie die I sponged the inside edge with pink ink. For the bottom panel, I stamped the Jelly Bean Jumble Background (241D) repeatedly and colored them with Copic Markers in fun Spring-time colors to match.
I also created this card with the DRS Blog challenge in mind this week to use paper flowers. I added a purple Prima flower for the challenge that was embellished with a light pink button that was threaded with purple and white twine bow. The shimmer purple cardstock base measures 4.25" x 5.5."
I hope you have fun hunting for eggs and lovin' up the Easter Bunny!
Thanks for stopping by!
Smiles,
Jennifer
Easter is one week away! It's hard to believe that it's even Spring with all of the cold weather and pending snow we have on the way. We may just have to do the Easter Egg Hunt indoors this year.
Today I'm sharing one of my last few Easter cards with you. Both the image and sentiment are by DRS Designs. I colored the Circle Lily (437G) with Copic Markers and fussy cut it. This was rather easy though, since I just cut on the thick black line around the image and then around the lily flowers that stick out beyond the circle. The Abundance of Spring Greeting (527G) was stamped on the background panel next to the image as shown. After layering some pastel cardstock and using a border punch on the bottom-most layer, the card front was adhered on to a pink cardstock base. Finished size measures 5" x 3.5." To add to it's elegant look, I added different sized pearls to the bottom border.
Well, that's it for now. Gotta finish cleaning up my *extremely* messy crafting desk.
Thanks for stopping by!
Smiles,
Jennifer
Hi Everyone!
DRS Designs has several opportunities to win free stamps right now and I'm going to tell you about a few of them today.
For starters, DRS Designs is sponsoring the Tuesday Morning Sketch this week! Up for grabs is a $15.00 Store voucher to DRS Designs for playing with the sketch below.
I used it to create another Easter card that shows off the Jelly Bunny Bean (221M), the Large Original Plaid (641P), and a portion of the Abundance of Spring Greeting (527G). The bunny was colored with Copic Markers and the plaid stamp was used to make my own coordinating paper in with blue and pink ink on purple cardstock. I also used it to create the lines in the background on my card front that were simply stamped with Versamark ink.
Also, don't forget that the Stamp-A-Versary contest is still going on over on the DRS Designs Blog. Click the link in the description below to read all the details, enter the contest, and see pictures of the fabulous prizes.
Find the 4 current stamp designs that were featured in our
original stamp catalog way back in 1992 and win prizes!
Click here for all the details
Hurry, there's only a few days left to guess the 4 original stamps in their current catalog. Grand prize is a package of 20 DRS Designs stamps!
Feel free to contact me in the comments section if you have any questions.
Thanks for stopping by!
Smiles,
Jennifer
I can't believe it's March and the Easter Holy season is already underway! Where does the time go? Seems like Christmas and New Years were just last week! Perhaps it all feels so rushed because Easter is early this year. Well, regardless it's time to start showing off my Easter cards (St. Patty's Day too, stay tuned!) before it's too late! And, that's exactly what I have in store for you today!
I used the Easter Promise Greeting as my focal point. I stamped it in purple ink and used the same ink to shade around it while it was in a Nestie die. I decorated it with a few purple rhinestones and matted it with an oval scallop made from shimmer purple cardstock.
I used a 4" x 4" piece of light purple cardstock for the middle layer and embossed it with the Cuttlebug Textile Texture embossing folder. The bottom was punched with the Treading Water border punch. I decorated it by adding a pearl to each of the holes created by the border punch, and white grosgrain ribbon was tied in a knot just above the border. I used smooth white cardstock for the background layer and stamped the bottom portion 3 times with the Cross In A Cross stamp.
Finished card size measures 4.25" x 5.5".
Don't forget to run over to DRS Designs and check out today's clue for the Stamp-A-Versary contest! DRS has several prizes up for grabs including a 20 stamp grand prize package. Make sure to enter today!
Thanks for stopping by. I appreciate your visit!
Smiles,
Jennifer
Lucky for me (and you!), I just realized that I have a bunch of cards that have not been shown on my blog yet. I'm going to try and get them all posted for you soon. I have one of them to share with you today.
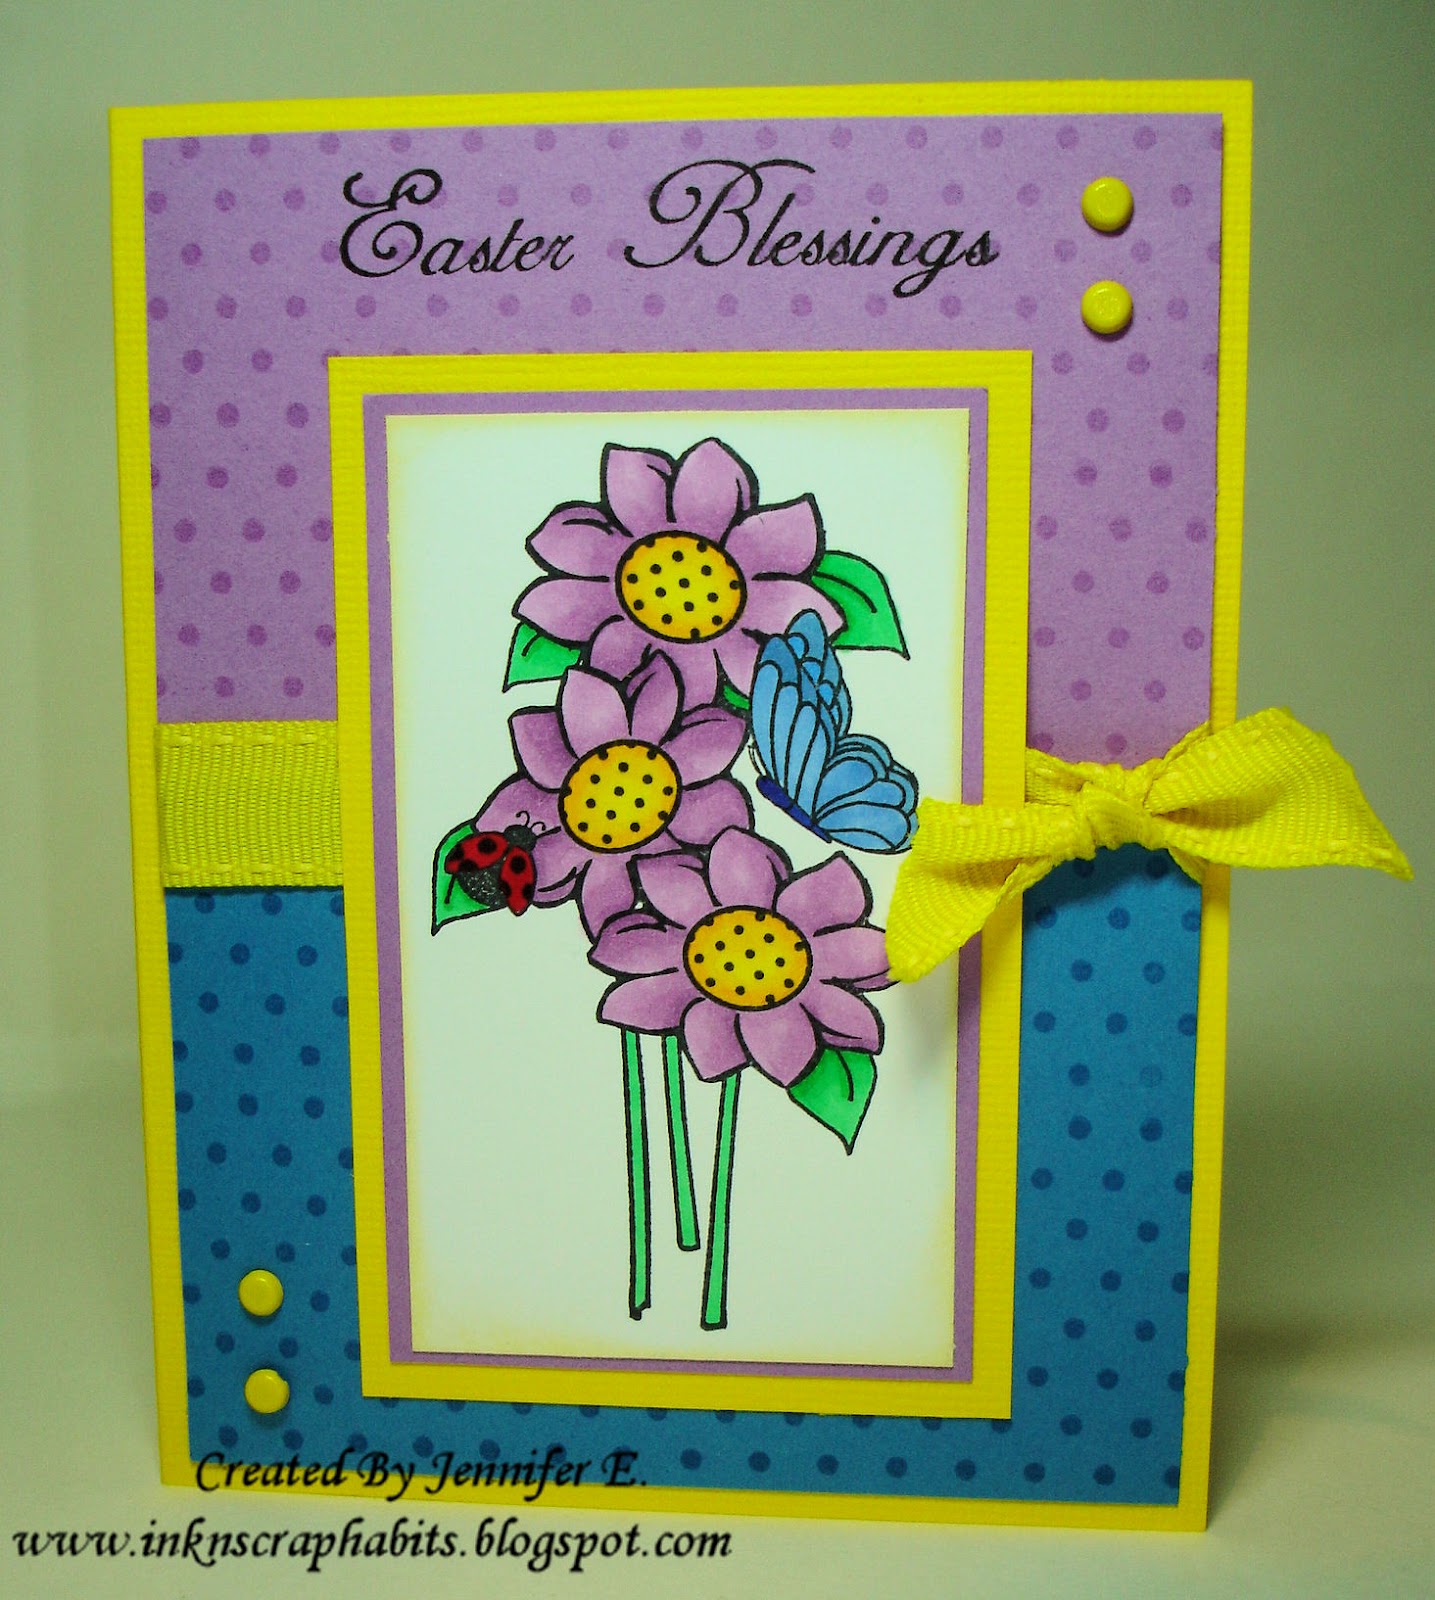
All of the stamps used to make this Easter Blessings card are by DRS Designs. I often think of purple and yellow as Easter colors, so those are the Copic colors I used on this Polka Dot Flower image (1036K).
I also used the Polka Dot Background stamp (688P) on this card to make my own coordinating pattern papers. I stamped it with Versamark ink on purple and blue smooth cardstock. The Easter Blessings Sentiment (1029D) stamped at the top is one of my favorite Easter stamps. I love the font and think it gives an elegant feel to any project.
Since the polka dots keep this card pretty busy, I kept the embellishments simple. The polka dot papers were separated by a band of wide yellow ribbon tied in a knot, and a couple yellow brads filled in the empty space in the upper right and lower left corners of my card front.
I hope you've enjoyed seeing this card and I hope you have a wonderful and blessed Easter.
Thanks for stopping by!
Smiles,
Jennifer
Sometimes the best looking cards are those that are the simplest, and right now there's a challenge out there that works best with my schedule nowadays--Clean and Simple!
CAS is the theme for this weeks DRS blog challenge, and this Easter card is my challenge entry. I'm sure it's pretty easy to figure out how I made it, but just in case some of you are looking for a specific detail, here they are: I started by making the card base from white cardstock to measure A2 size. Next, the edges were inked with Vintage Photo. I then cut a yellow cardstock panel matted with a thin border of brown cardstock and decorated it with a little twine near the top border. This was adhered to the bottom half of the card front. Next, I stamped the bottom of the yellow panel with the Promise of God's Love Easter greeting (974F). I used the Triple Crosses (510G) as the focal point, which was stamped in Momento Cocoa Brown ink, and adhered it to the center of the card with foam tape after matting it with brown cardstock. A small bow made from twine was added to the right of the image and a few yellow rhinestones were added along the decorative panel to dress it up a bit.
I know I inked alot on this card and I added some embellishments that I could have easily omitted and still had a nice looking CAS card, but this card really didn't take me too long to make. Compared to most of my cards, this is CAS for me and I guess you could call it QAE too--quick and easy!
If you have a few minutes to create a CAS card, the DRS DT would love to see it. Link it up HERE to enter and win free stamps from DRS Designs.
Thanks for stopping by and seeing my work. I appreciate your visit!
Smiles,
Jennifer
In need of a little inspiration? DRS Designs is the sponsor this week on the Card Patterns Blog. There's a great sketch to play with and the opportunity to win $20(!) in FREE DRS stamps! You can see all the details HERE. I used the challenge sketch to create this Easter card.
The Big Bunny Face (639G) was colored with Copic Markers and layered a bit with matching cardstock. I used an embossing folder to embellish the right side of the card front and separated that section from the rest of the card with sheer dark pink ribbon. I stamped the One Line Happy Birthday (665B) for the sentiment, but stamped each word separately with my Stamp-a-ma-jig as shown. Three layered paper flowers were used to decorate the upper right side of the card. Finally the card front was adhered to a 4.25" x 5.5" dark pink card stock base.
Don't forget about DRS Designs weekly blog challenge for another chance to win. You'll find another sketch challenge to play with there as well. I hope you'll take a few minutes to check them out.
Thanks for poppin' in and have a wonderful day!
Smiles,
Jennifer
Now that Lent is upon us, it's time to start those Easter cards. Here's one of my first for this year using a new image called the Daffodil Butterfly Circle (1073L). This image was fun to color. I used Copic Markers and I also used twine to dress up this layout rather than ribbon. It was a nice change and I love how it pulls all the colors together. I added a self-adhesive pearl on either side of the Easter Blessings Sentiment (1029D).
In case you need a bit of inspiration to get you started on your Easter cards, take a look at the Easter stamps by DRS Designs or check out all of the Easter cards made by their Design Team in the DRS Designs Card Gallery. I'm sure you'll find something to jump start your mojo!
Have a great day!
Smiles,
Jennifer
Happy Easter!
I hope you all have a wonderful day with family and friends!
Today, I'm taking a break from playing with some of DRS Designs newest Easter images and brought out an oldie but goodie, you might say! This Praying Bunny image (407L) is one of my favorite stamps from DRS Designs. I colored it with Copic Markers and used the masking technique to sponge blue ink around the image creating the sky. Every now and again I'd ink blue around a small portion of a scalloped circle to shade in clouds. Next, I stamped the God's Love Easter Greeting (974F) in the empty space above the image. Then the image was cut out and layered using Nestabilites. I created the background by scoring lines in both diagonal directions on my Score Pal and then using a decorative corner punch on all 4 corners. A olive green cardstock base was created measuring 5" x 4.5," and I used 4 yellow brads and an olive grosgrain bow as the only embellishments.
I hope the Bunny was good to you today!
Happy Good Friday!
Are you all set for the coming of the Easter Bunny?
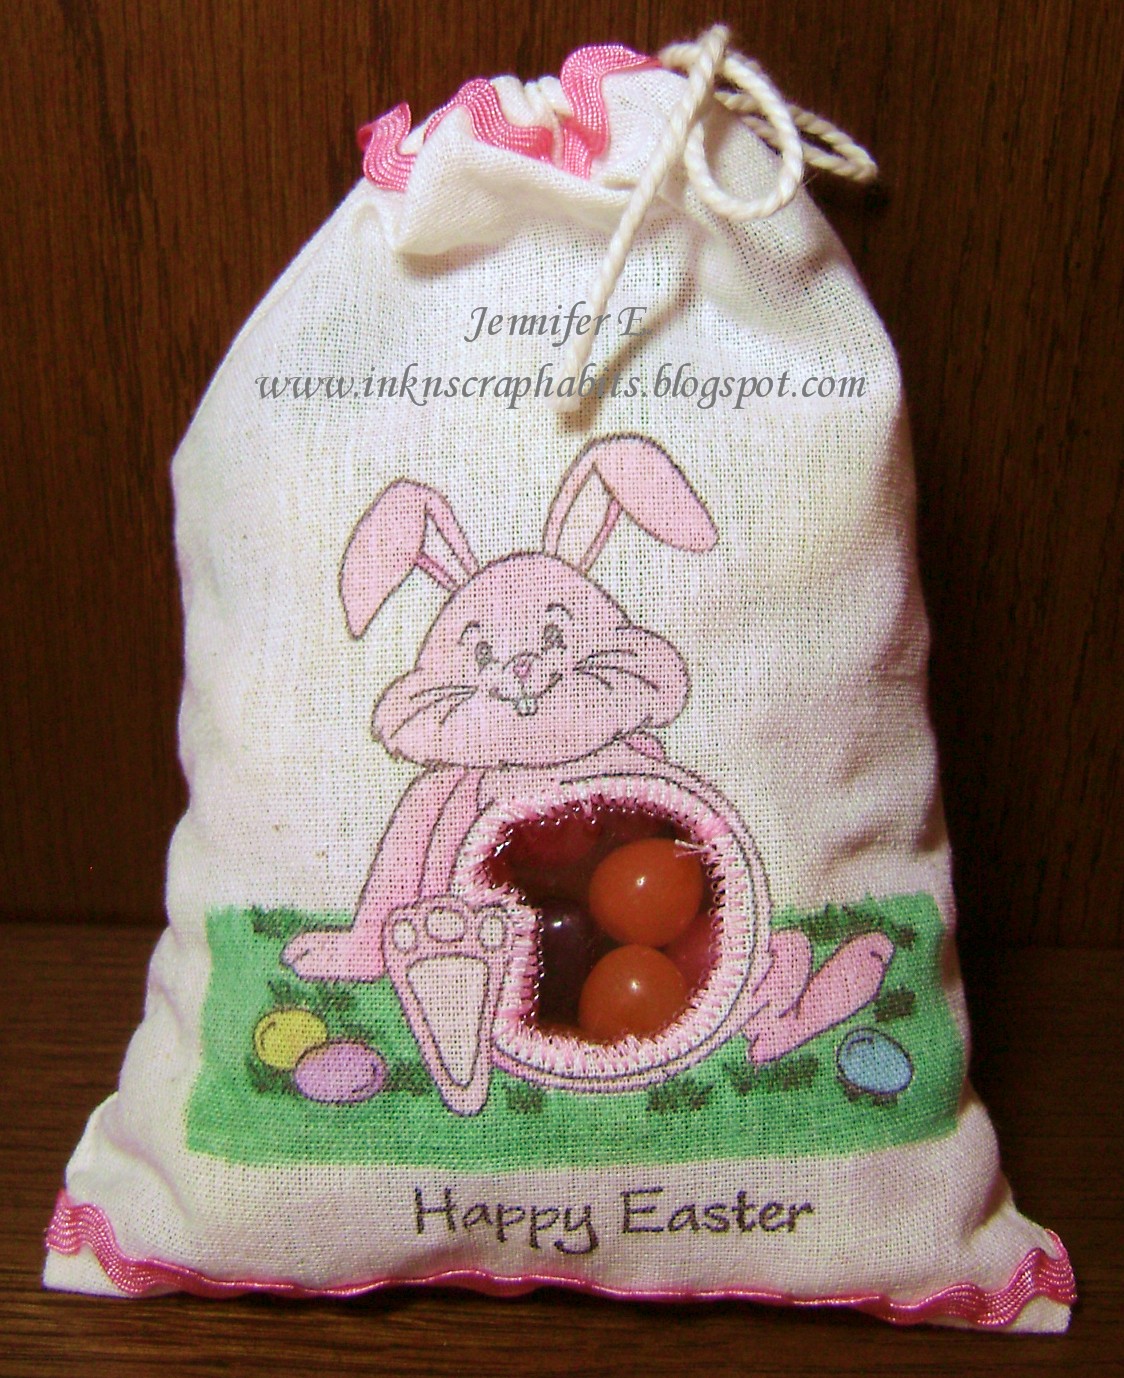
I'm getting ready by creating some of these Easter Bunny Jelly Bean gift bags. You can purchase these canvas bags from DRS Designs. They measure approx. 6.5" x 5" when completely flat and have a drawn string closure. They are available in 10 packs for $4.95. Here is mine unfilled so you can see what I did to decorate it.
I tried thinking out of the box and did a bit more than just stamping the bag as I had with the St. Patrick's Day bag I made. After stamping and coloring the Jelly Bunny Bean (221M) image with Copic Markers, I opened the side seam and then used scissors to cut out the fabric from the bunny's stomach. I used a sewing machine to sew an acetate panel in it's place to create a see-thru window. I then sewed the side panel back up, stamped the One Line Happy Easter Greeting (665B) and then adhered pink ric-rack ribbon to the top and bottom of the bag. Last, but not least, I filled the bag with jelly beans!
Now I know why that bunny has such a big tummy...look at all the jelly beans he ate! LOL!
Hope you all have a wonderful Easter!
Smiles,
Jennifer


.JPG)