Welcome to Ink N Scrap Habits!
I've created this blog to share my life & love of paper crafts with others. You will read bits and pieces of what goes on in my world and be able to see my paper craft creations! Please leave me a comment if you see something you like. I'd love to hear from you!
For all you Halloween lovers, you need to check out the new stamps DRS Designs has just released! I mentioned a few posts ago that I got sidetracked with these new stamps and here's one of those projects. The Fuzzy Spider (550H) and the Vertical Happy Halloween(538D) are brand new and now available for purchase!
I thought it was only appropriate to stamp the Empty Spider Web (329G) for the background to show off the Fuzzy Spider. The Martha Stewart Bat punchies are a great touch for this kind of card. I added eyes to them with a white gel pen.
I colored the spider image with Copic Markers masked it and then sponged purple ink around its belly. I thought about adding black flock to the gray parts, but for the sake of time I decided against it. I just might still do it when I use this stamp again. How would you spook up this spider?
Enjoy all of DRS Designs new Halloween stamps and even better, enjoy stamping and creating your Halloween Cards!
Smiles,
Jennifer
Hi Friends!
It's Thursday already and another Blog challenge just started on the DRS Designs Blog. The theme this week is pumpkins, and I was able to plan my layout to show off another sneak peek of the new stamps DRS Designs is releasing this Saturday, September 29th.
The new stamps on this card are the Batty Happy Halloween (548G) and the Accent Bats (517A) that I used to create the pattern paper. I also used the fun Fancy Pumpkin (077G) and the Interlocking Star Background (819H). The Fancy Pumpkin was colored with Copic Markers and I stamped the Accent Bats around it. Some Yellow Stickles brightened up his eyes, nose, and mouth.
I'm loving these new Halloween stamps and I hope you've enjoyed the ones I've show so far. Don't forget, Saturday is the big release day and you can see the new stamps HERE as soon as they become available.
I'll be showing off more Halloween goodness soon!
Stay tuned!
Smiles,
Jennifer
With the chill in the air, Autumn is definitely here! Don't let that bright sunshine fool you! It's time to start winding down every evening with my fireplace on, a cozy blanket over my shoulders, a good book in one hand and a nice hot cup of cocoa in the other!
Here's another card I made to sneak peek DRS Designs new "You're So Sweet" (546D) sentiment. That adorable "Mini Marshmallow" (493A) you see in the background is also part of this upcoming release. All of the new designs will be available for purchase on September 29th. I colored the Cocoa and Marshmallows (233H) with Copic Markers and fussy cut it. I used an SU! punch to cut out the sentiment and adhered it with foam tape. I wrapped a little twine at the bottom and added 3 brown rhinestones.
Three more days until the new releases are available for purchase! Stay tuned to see more!
Enjoy!
Smiles,
Jennifer
Happy Fall, Y'all!
I know Fall just began, but I just had to squeeze one more Summer related post before Autumn, Halloween and Christmas dominate my blog for a while. I created this Summer Strawberry card to sneak peek one of DRS Designs new sentiments. "You're So Sweet" (546D) is part of their next release which will be available for purchase on September 29th.

I liked the idea of this sentiment paired with these Large (Juicy) Strawberries (291K), but I'll also be showing it off soon with some of DRS Designs Marshmallow stamps too. Here, they were colored with Copic Markers and then sponged with light blue ink after cutting them out with a Nestie die. I handmade the sentiment banner and used Post It Notes to mask off the edges before sponging it with light blue ink as well. I added a red rhinestone to each side to dress up the banner a little bit. Red and white gingham ribbon was tied in the center and a little ribbon tag in the upper right corner made this card fun! Hope you enjoyed seeing my last taste of Summer...Lots of Autumn and Halloween cards coming soon!
Smiles,
Jennifer
Sorry it's been a week already since I've last posted. I received a new bag of rubber goodies from DRS Designs and I got sidetracked with their new Halloween images. Just wait til you see them!!! I get to show them off very soon, so stay tuned.
For now, I'm sharing this cute birthday card I created for this weeks DRS Blog Challenge. The theme is "Punny" sayings and I couldn't resist using cute, little "Wags" the Dog (1117F) with the "Paws"itively Fantastic Birthday Greeting (727F).
I also used the Polka Dot Background (688P) and the Small Dog Print (1003A) to create my own pattern paper. I love the look of the 2 patterns and colors overlapping each other. Not sure how I stumbled on this layout, but I'm really happy with it as well. I think it shows off the image and sentiment well, yet is spacious enough to show off the background too. Wags was colored with Copic Markers and the background layers were distressed with Antique Linen. Finished card size is 4.25" x 5.5"
Run over to the DRS Blog and check out the rest of the "punny" cards created by the DRS DT. I promise you'll enjoy what you see!
Have a great day!
Smiles,
Jennifer
I couldn't help but be inspired and in awe of all the telescoped cards in the gallery at SCS recently. I just had to give it a try for this weeks Sunflower challenge on the DRS Designs Blog and I thought the large size of the Sunflower Pumpkin Patch (105P) would be perfect for this technique. (See the tutorial for how to create a telescoping Image HERE.)
The image was colored with Copic makers and distressed with Vintage Photo ink. I embellished this card with some sheer copper ribbon tied in a knot and added Yellow Stickles to the Sunflower petals. This looks really nice with the shimmer from the copper cardstock. I added the Small Autumn Greetings sentiment (422B) to the bottom right corner, right over top of the ribbon band.
Here's what the telescoped layers look like from the side. There's quite a bit of dimension here! This finished card size is 4.5" x 5."
Thanks for stopping by and please come back to visit soon!
Smiles,
Jennifer
There's nothing worse then the feeling you get when you realize you've missed someone's birthday. The new Lost Track Birthday Greeting (482F) is a belated funny from DRS Designs that you can use to help make up for it.
I created my own pattern paper for this card using the Funky Birthday stamp (494D). It was stamped in blue and green inks and then the edges were distressed in blue as well. I stamped the recently released Vertical Birthday Wishes (400D) on the blue panel and the dark blue panel at the top was embossed with the Swiss Dots folder for texture. Some white grosgrain ribbon embellished it nicely and pulled everything together. Finished card size is 4.25" x 5.5".
Have a great day!
Smiles,
Jennifer
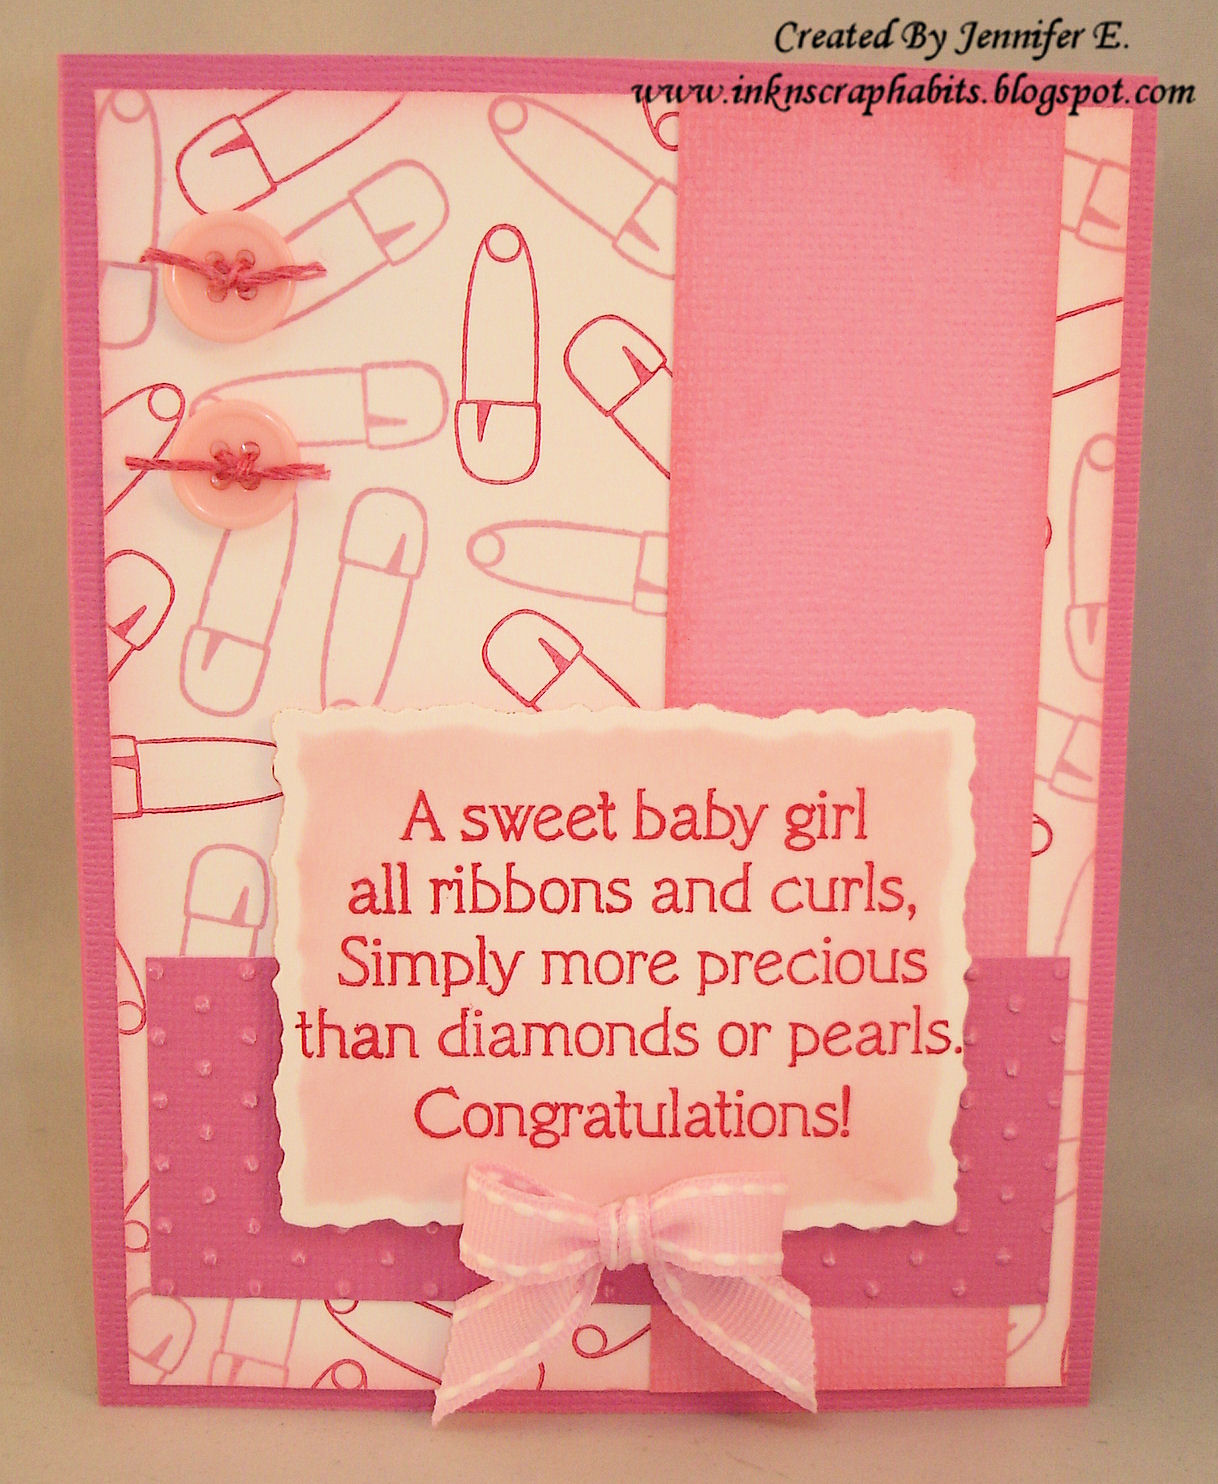
It's been awhile since I've created baby cards and it works out perfectly with this week's challenge on the Craft Your Passion Blog. It's a "Blast From The Past" challenge to use any of their previous challenges. I've selected challenge # 112 For Baby. This challenge is being sponsored by DRS Designs and you could win a $10 DRS Designs Store Voucher. Can you say "FREE" stamps?!?!? Gotta love that! Enter to win HERE.
Both of the baby cards I made are for baby girls! I created my own Diaper Pin (354A) background paper using dark and light pink inks to use on both cards. This one was for a good friend who just had a baby. I made this to go with her gift.
This other card is for my Sister-In-Law who's baby
It turned out to be rather easy to create, with the most enduring part being the background paper. However, it was quick to make since the area was small. It was made by stamping the newly released Argyle Background (438P) with brown ink and then selected diamonds were stamped in blue using the Argyle Diamond (441A). The grassy area under this adorable monkey was done by masking, sponging, and then stamping the Easy Grass Background (059E). The funny Monkey Birthday Greeting (594F) was stamped at the bottom and makes for a great masculine card, don't you think? If I had a brother, I'd give it to him *wink*.
Have a wonderful day!
Smiles,
Jennifer
One of the newer Christmas images from DRS Designs is the Snowman Bird Buddies (232H) that I've used on today's card. I really like how this card turned out--the colors, the layout, and the bit of sparkle on the snowman make this one of my faves!
Since I like all of the elements of this card so much, I'm pretty sure I'll be using this image and greeting for some of the Christmas cards I send out this year. Stay tuned!
Thanks for stopping by. I hope you'll be back soon!
Smiles,
Jennifer
The Family Portrait was colored with Copic Markers and then masked, and I sponged orange ink around them to match my the color scheme. Same was done for the From All of Us Greeting, but it was sponged while in a Nestie die. The card front was stamped with the Spooky Eyes Background (647H) with Versamark ink and the Halloween Arc (043E).
Thanks for stopping by to check out my Ghost and Goblins card. If you're interested in playing along please visit the challenge HERE and enter to win a great prize from DRS Designs.
Good Luck!
Smiles,
Jennifer
Happy Wednesday Everyone!
Today I'm sharing a card I made for the sketch challenge on the 365 Cards Blog this week.
This is the sample sketch...
...and is my take on it.
 I've used 2 new stamps from DRS Designs on the card front: the Country Window (444L) and the Sitting Thinking Greeting (398F).
I stamped and colored this window (with Copic Markers) 3 times. I cut 2 of them out and layered them as shown to create lots of dimension with self adhesive foam!
I've used 2 new stamps from DRS Designs on the card front: the Country Window (444L) and the Sitting Thinking Greeting (398F).
I stamped and colored this window (with Copic Markers) 3 times. I cut 2 of them out and layered them as shown to create lots of dimension with self adhesive foam!
I was going for a realistic 3D look where the outer most layer is just the curtains. The middle layer is the window frame, and the bottom layer is what's seen "outside" the window--the sky, flying butterfly and the grassy hill.
If you're interested in playing along, check out the details HERE on the 365 Cards Challenge Blog. One lucky winner will get a $10 voucher to shop at DRS Designs!
Thanks for stopping by and have a wonderful day!
Smiles,
Jennifer
Hey Everyone!
Interested in new stamps? Yesterday was Release Day over at DRS Designs and this release focuses mostly on some fun Birthday stamps. Check them all out HERE. The Birthday card shown below displays the new One More Candle Greeting (481E).
I used the Girly Swirly Cake (454M) as the main image for this card. I thought it was perfect with all of those candles on top! I colored it with Copic Markers and sponged yellow ink around it. I added a bit of sparkle using yellow Stickles on the flames, flower centers, and the stars around the sentiment.
I'll be showing off more of the new releases in my upcoming posts. Stay tuned, and enjoy the rest of your weekend!
Smiles,
Jennifer
I seem to be into trying new things lately and for today's card I've made an attempt to create a framed card using acetate/polyester sheets--also known as transparency sheets. I found this tutorial online for Framed Wall art and decided to try it for my Silhouette Challenge Card for DRS Designs.
I started by cutting the acetate sheet to about 3.5" x 4.5." I stamped it with 2 Silhouette Love Hearts (213D) that I overlapped slightly. Then I split the Engagement Wishes Greeting (069E) and stamped it above and below the hearts. The pink frame was created by cutting the center out with a Nestablitity die and I added a white heart brad to each corner. I adhered the acetate behind the pink frame. The front of the card base was embossed with a heart embossing folder and I used foam tape to adhere the framed acetate to it. An elegant white and silver bow finished the card front.
Please check out DRS Designs Silhouette challenge HERE and enter to win 3 stamps of your choice!
If your interested in puchasing acetate sheets or cards you can get them directly from DRS Designs.
Smiles,
Jennifer
Hi Everyone!
Today I'm sharing a few Christmas cards I made. I was bound and determined to use some of the many vellum sheets I have. I guess you could say I challenged myself to use it and here are the results:
These aren't your typical cards. The card base doesn't have a fold. Instead, lifting the vellum and the white cardstock (stamped with the Silent Night Sheet Music (506P) ) allows you ample space to write a personal message to the recipient on the colored cardstock located underneath. I used the same style for both of these Ornament cards, but changed up the colors a little bit. I can't decide which one I like better! Here's a close up of the red and gold one.

With a CAS design, these cards are great for mass producing. Other than cutting all the cardstock and vellum, basically this card was just a few basic steps. First, I heat embossed the Christmas Ornament Greeting (844K) on the vellum. Then, the Silent Night Sheet Music (506P) was stamped using red ink on the white cardstock layer. A brad was then added at the top of the ornament to make it look like it was hanging, and it's what holds all of the layers together. The final touch was to add a red ribbon tied in a bow to decorate the top of each card and then adhere all of the layers to a piece of cardstock that measures 4.25" x 5.5". Have you started your Christmas cards yet?
Thanks for stopping by!
Smiles,
Jennifer
Not sure if this is a Michigan thing or if its world wide, but did you know there's a helium shortage? I learned this a little more than a month ago when preparing for my Son's first birthday party. I tried to order 2 dozen helium filled balloons several weeks before his party and I was informed of the shortage by several local party supply stores. All of them were unable to take orders prior to 1 week before the event because they weren't sure if they'd have helium to fill my request. I was shocked! How can you have a birthday party, especially a FIRST birthday party without balloons!?!? I guess this is another one of those things like water, natural gas and oil, that many of us take for granted. Once it's gone it's gone! Well, luckily for us, it all worked out and we had balloons for Anthony's first birthday party!
Is there a helium shortage in your area? I'm curious if this is worldwide or if it only affects the states.
Thanks for checking out my Balloon card!
Smiles,
Jennifer
Hi Everyone!
The image was colored with Copic Markers, fussy cut and then adhered to the card front. Couldn't help but add the cute Martha Stewart punched bats to accent the Halloween theme on this card. I added eyes to them with a white Gel pen. Isn't that Women are Angels Greeting funny?!?! I love it!
I am a regular subscriber to Scrap and Stamp magazine and I was sent a complimentary issue since my card was published in it.
I'd like to share the extra copy with one of you!
Please leave a comment on this post by Monday, August 20th and I will select one winner from all of the comments and mail out the magazine for free. This is open to US and Canadian residents only.
Thanks for celebrating with me!
Smiles,
Jennifer
There's a new challenge on the DRS Designs Blog this week and the theme is wheels! This Happy Healing card is my challenge entry.
I heat embossed the Silhouette Wheelchair image (745G) on glossy cardstock and then sponged blue ink around it while it was in a Nestie die. I stamped the Knee Replacement Get Well Greeting (346G) and sponged it the same way. The background was embossed with the Houndstooth Embossing Folder and since it is a Happy Healing card made with love :-) I thought the heart border would be a nice touch!
Can the DRS DT challenge you to create with wheels? If so link your card HERE for a chance to win a great prize from DRS Designs!
Good Luck and Happy Stamping!
Smiles,
Jennifer
Hey Everybody! I just saw a post that it's time for DRS Designs annual card drive for Operation Write Home!
Start creating stamped cards today to help support our Troops! All donors will receive a Thank You prize from DRS Designs. The donor who sends in the most donated cards will win a $50 DRS Designs Gift Certificate and the next 2 generous donors will receive a $25 DRS Designs Gift Certificate. Deadline for all donations is Oct 10, 2012. Please see the card requirements and other details for this card Drive HERE.
Thanks to all who support our troops!
Smiles,
Jennifer
I just realized I've been hiding this card from you. I created it a while ago, and it got lost in the mix and never made it into a post on my blog...until now!
I love using this Hope Achieves Greeting (1087H) from DRS Designs when I'm looking for an encouragement card. The last line "achieves the impossible" really packs a punch and tells anyone that they can do whatever they set their mind to. I used a simple layout for this A2 card. The card front was stamped with the Lines O Plenty Background (366H), and the upper and lower borders were decorated with a border punch. I added a horizontal panel embellished with some yummy plaid ribbon to the center and added the stamped greeting to the far right side.
So, what hopes do you have for the rest of Summer? We're about to journey on a 16 hour road trip with a 13 month old who just learned to walk! It should be interesting, but I'm hoping I don't pull too much of my hair out and actually find the time at the beach relaxing.
I hope you enjoy the rest of your Summer as well. I think I'm still in shock that it's August already and Fall will be here before we know it!
Thanks for stopping by today!
Smiles,
Jennifer