Welcome to Ink N Scrap Habits!
I've created this blog to share my life & love of paper crafts with others. You will read bits and pieces of what goes on in my world and be able to see my paper craft creations! Please leave me a comment if you see something you like. I'd love to hear from you!
Hey Everyone! I'm back again today with a card I created for the color challenge over at DRS Designs. Here's the inspiration photo. It's perfect for Fall!
So, I'm a little off on my greens. Guess that part of my memory failed me, LOL! At least the orange and yellows work!
I colored the Witch Feet? Image (140H) with Copic Markers. The Butt Look Big Greeting (542E) was added underneath on the card front. I kept things simple using only a decorative border punch and some bat embellishments.
DRS Designs is giving one winner the following 3 stamps:
Bountiful Basket 791L
Open Leaf 584DAutumn Greetings 422B.
Will it be you?
The deadline for this challenge is Wednesday, October 21, at 6:30 pm ET. Remember...Challenge entries don't have to use DRS Designs stamps, but if you use them on your challenge card, you'll get an extra entry into the prize drawing!
Click HERE to enter.
Good luck and have a wonderful weekend!
Smiles,
Jennifer
Hi Friends!
Well, better late than never, or at least it feel that way this week...Here's the card I made for this week's DRS Designs challenge, "Spooky or Cutsey?" I think I tried to go more with the spooky theme, but I just love this Fancy Pumpkin (077G) image. I guess he fits the "cutsey" part of this challenge, LOL!
He was colored with Copic markers and then the edges were sponged with black ink to give it an eerie look. I stamped a small portion of the Poison Potions Greeting (543H) along with the Accent Bats (517A), and the Silhouette Graveyard (579H) on the card front and inked the edges of that as well. Some polka dotted orange ribbon embellished it nicely, making the orange from the pumpkin 'pop' and it was all adhered on a black, A2 card stock base. Easy peasy and quick, and very festive too!
We are looking forward to buying our pumpkins tomorrow!
Hope your Halloween is shaping up nicely!
Smiles,
Jennifer
It's just a week or so into October and our neighborhood has exploded into a Halloween frenzy! It seems as if many of my neighbors have taken advantage of the mild weather we've had thus far and brought out every Halloween decoration they own. It's so nice to see the neighborhood look so festive! We've taken advantage of the weather ourselves and got our Fall yard work done, but our yard also has some scarecrows, pumpkins and even a milk carton skeleton!
So, are you enjoying all the awesome, new Halloween stamps from DRS Designs last release? I having a lot of fun with them, but most of all I'm loving the color combos I've been using to show them off. I love the fun bright colors that you can get away with on Halloween cards and this one is no exception!

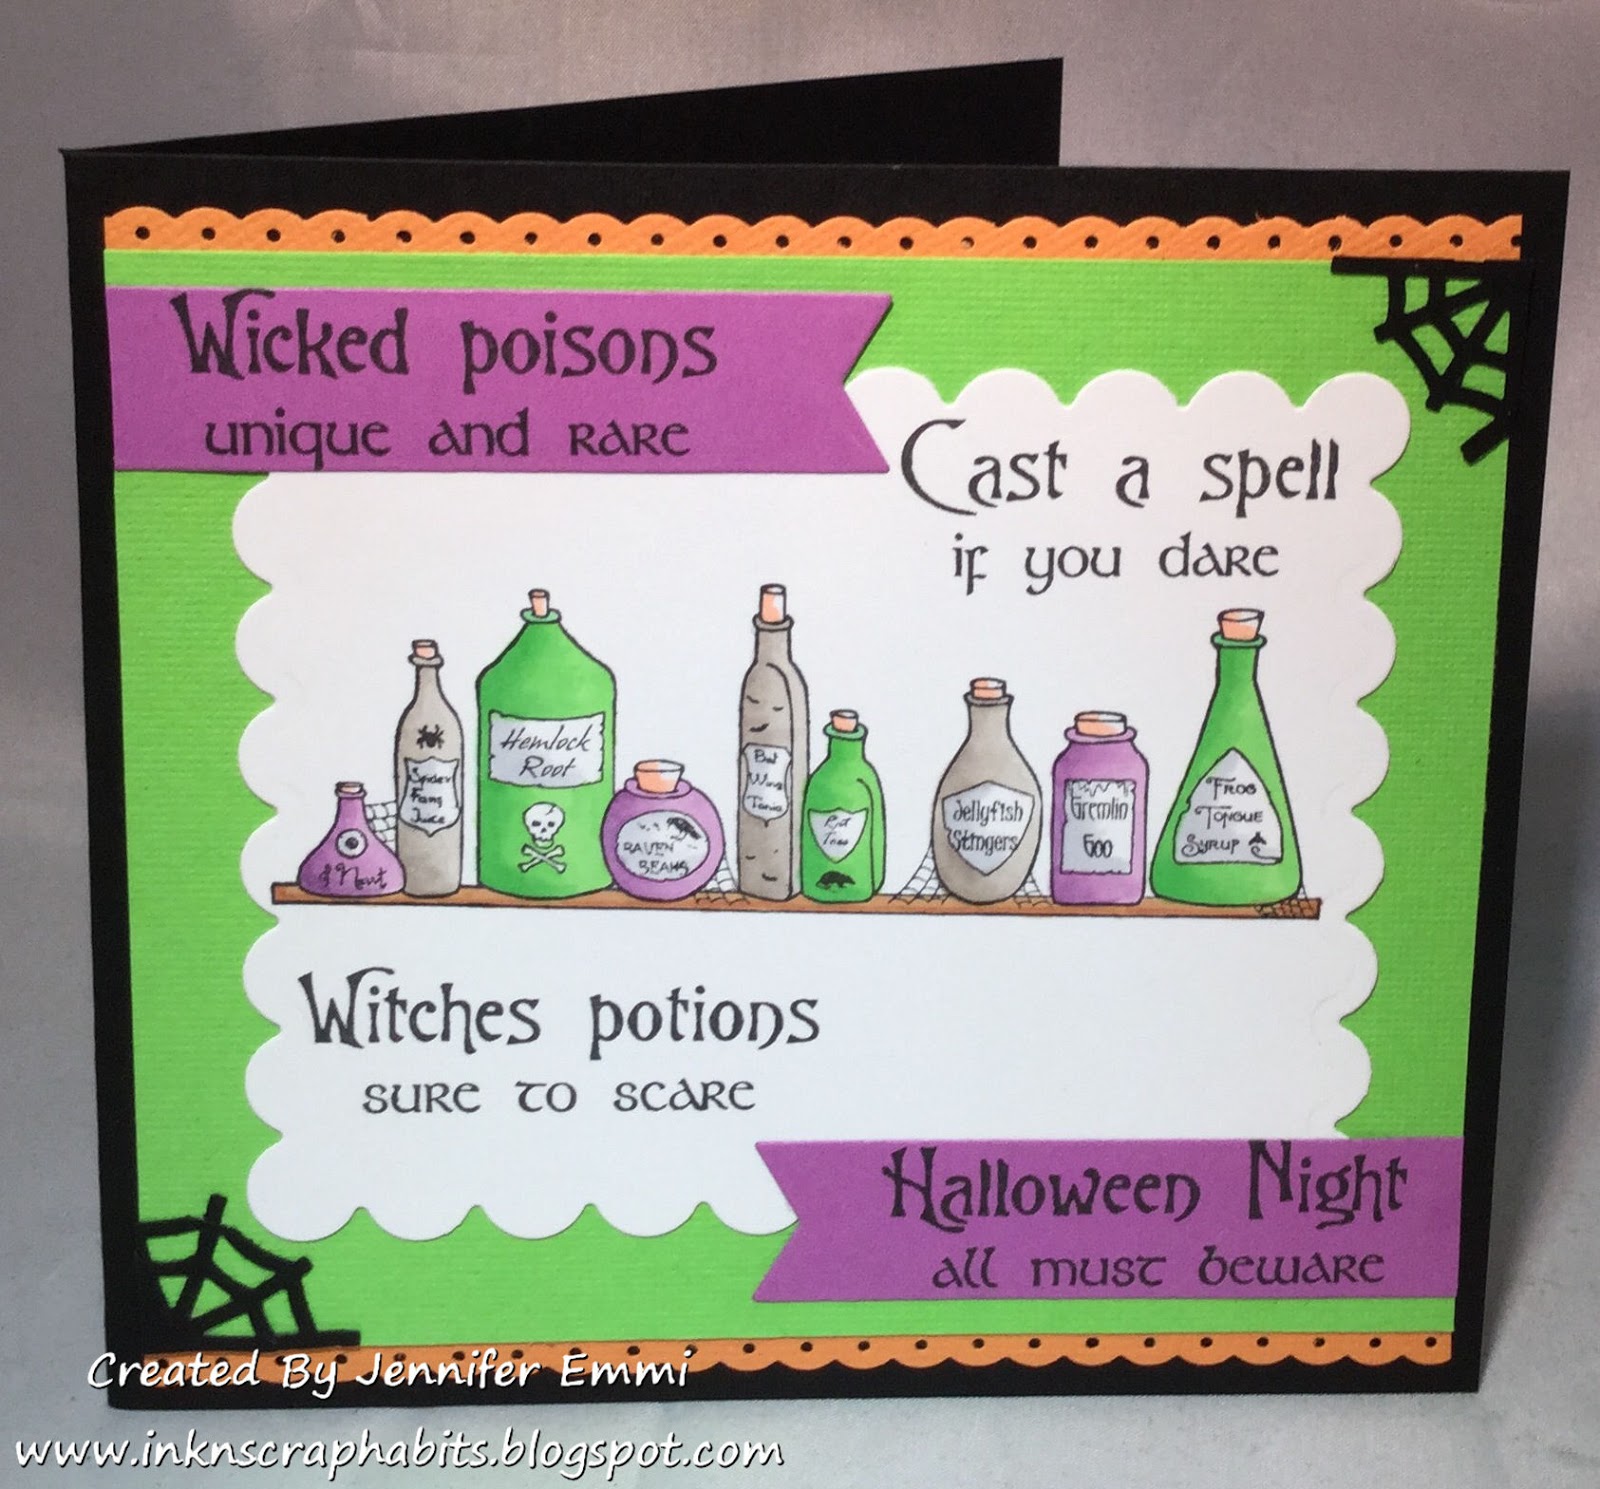
For starters, I stamped and colored the Magic Potions Shelf (537H) with Copic Markers. Then I used a large, scallop Nestability die to cut it out. The Poison Potions Halloween Greeting (543H) was too long for the layout so I split it up. I stamped the first and last set of lines on purple fishtail banners to use as embellishments around the colored shelf and the middle sets of lines were stamped directly on the white cardstock used for the image. I added some spider webs to the empty corners as shown and the top and bottom portions of the card front were lined with orange scallop borders. The black cardstock base was cut to create a 5" x 4.5" and the card front adhered in the center made it complete.
I hope you enjoyed this card today and I hope the rest of your day is great!
Thanks for stopping by!
Smiles,
Jennifer
Well, don't let my post title confuse you! I'm not mentioning music in today's post--this refers to the DRS Designs challenge just posted. We want you to use any type of metal embellishments for your challenge entry. Here's mine:
Can you believe it's October 1st?!?!? Halloween planning is in full force and I'm still making Halloween cards to celebrate! To make this card, I started first by coloring the Witch Feet (140H) with Copic Markers. I think her stockings scream "Witch!" in those purple and green colors. They make for a fun and festive card! I used these colors on the rest of my layout and I split up the Ghoul Friends Witch Greeting (536E) to fit on the vertical panel as shown. I laced black ribbon through the metal bracket before adhering it in place, and then the matted image was adhered on top. Finally, I stamped the Accent Bats (517A) to embellish the empty space on my card front.
Won't you play along? One lucky winner will receive a $10 DRS Designs store voucher from all of the challenge entries. Link your card HERE.
Thanks for stopping by!
Smiles,
Jennifer
I'm so excited to be able to use the DRS Designs blog challenge this week to show off more of their new Halloween stamps. This weeks challenge theme is "Flying High", and the Accent Bats (517A) I used to create my own pattern paper on this card fit the bill! Each challenge entry needs to include something that flies on it.
The new Silhouette Grave Yard (579H) trimmed the edge of my pattern paper, and the RIP Tombstone (570B) is the only colored portion on the entire card front. There's something I really like about the pop of color in that small tombstone image. The Poison Potions Halloween Greeting (543H) was stamped off to the side as shown and I felt additional embellishments were not needed. I thought the layout and the pattern paper alone added a lot of texture to this finished card.
Stay tuned as I will be showing off more Halloween and Fall cards very soon. I have a fun stamping weekend ahead of me!
Thanks for stopping by!
Smiles,
Jennifer
Happy Fall, y'all!
Can you believe it's the first day of Fall? Where has 2015 gone? It's hard to believe that Christmas is right around the corner, but for now, I'm excited for this time of year and for DRS Designs new Halloween stamps!
I stamped and colored the Witch Feet? (140H) with Copic Markers and paired it with the new Ghoul Friend Witch Greeting (536E). This greeting totally makes me chuckle and I know a few "ghoul" friends this would be perfect for! Once I had the focal image colored, this was a pretty quick and easy card to complete. The greeting was stamped with black ink and then cut out using a Nestability die. I used the die as a stencil and sponged the stamped portion with orange ink to match the color scheme. I assembled the card as shown and decorated the card front with a punched spider web at the top edge that was embellished with light green rhinestones, a few cardstock bats with green-dotted eyes, and a bright green grosgrain ribbon pulled it all together. I hope you like it!
Have a great day!
Smiles,
Jennifer
As I've mentioned previously I love this time of year, and my stamping has gotten a lot more fun recently with a new package of Halloween stamps from DRS Designs! Today I'm showing off one of their new sentiments for this weeks blog challenge using the color palette below.
These colors are perfect for a Halloween card, wouldn't you agree?
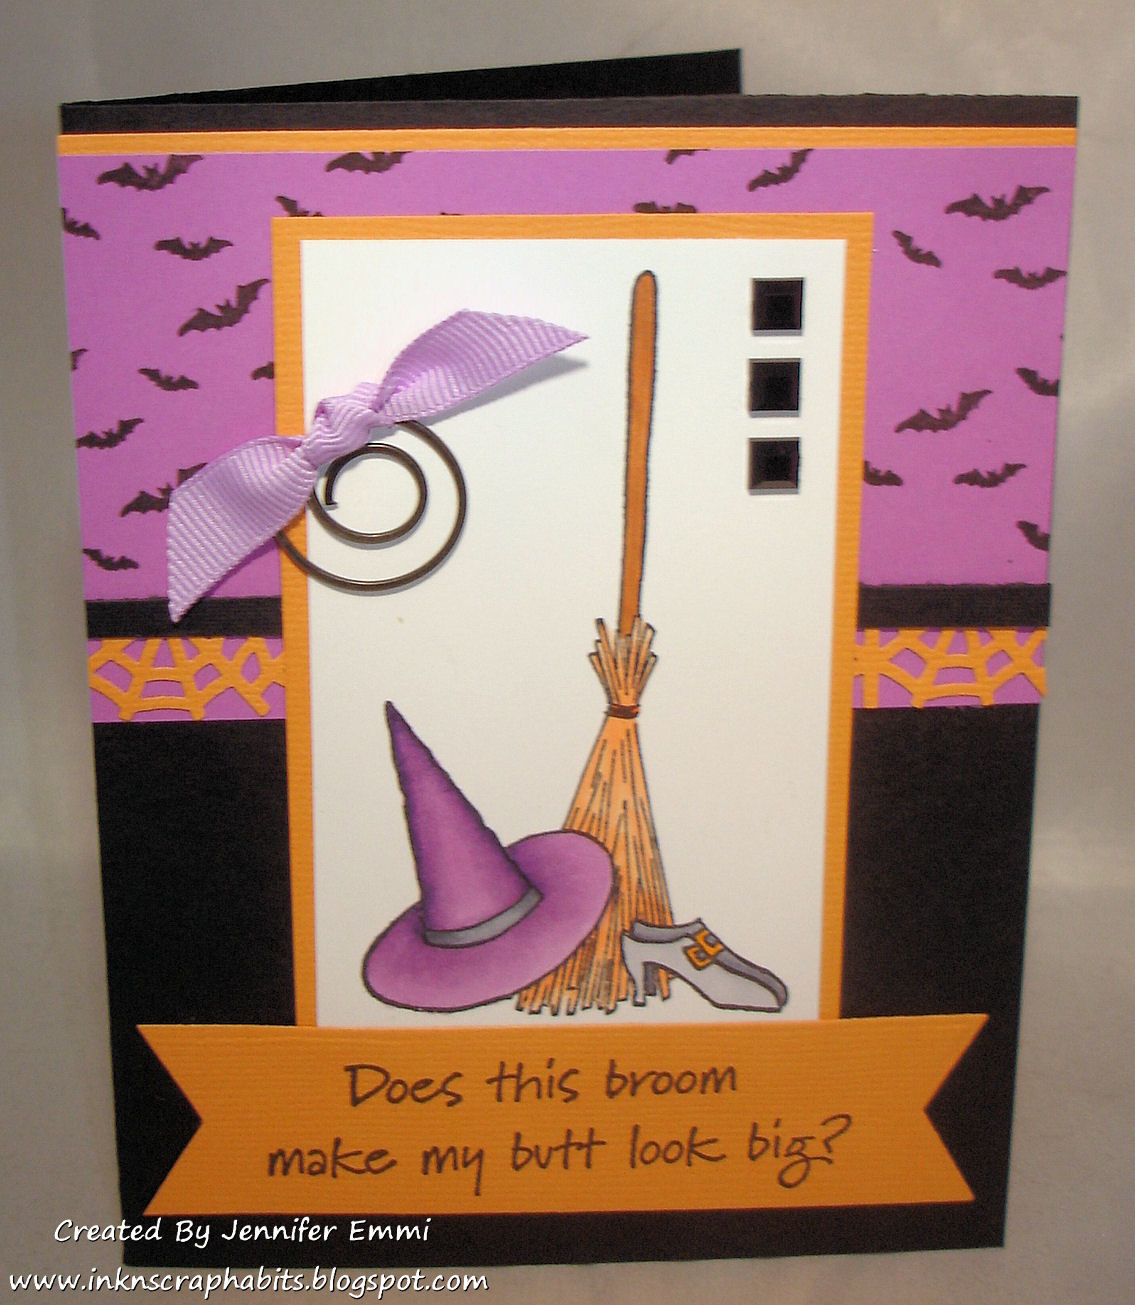
I started by coloring the Witchly Accessories (154K) with Copic markers. It was matted on orange cardstock and embellished with a spiral clip tied with violet ribbon on one side, and three black square rhinestones on the other. I created my own pattern paper panel using the Accent Bats (517A) and embellished it with a spiderweb punched out from orange card stock. The card base was created from a piece of black card stock to create an A2 size card. The pattern paper panel was adhered at the upper portion of the card base and then the matted image was adhered in place as shown. I stamped the "Butt Look Big Greeting (542E)" (Soon to be released) on a piece of orange card stock, cut it out with a metal die and adhered it at the bottom of the image to complete my card.
If you are interested in playing along in this color challenge, DRS Designs is giving away two stamps of your choice from their online catalog. Click HERE to enter.
Good luck and thanks for stopping by today!
Smiles,
Jennifer
It's the most wonderful time of the year and I'm not referring to Christmas! LOL! Don't get me wrong I love summer, as most of us do, but there's something about the change of seasons when the weather becomes cool. With Halloween right around the corner there's no better time to start making your Halloween cards and that's what I've done today for this weeks DRS Designs Blog Challenge.

The challenge theme is "A Real Cutie" and I've chosen this Mummy (943H) for the cute focal image on my Halloween card. I used a C3 Copic marker to shade it, it was fussy cut out and then set aside while I made my card front. I used a Nestability die to cut out the purple scallop and while it was still in the die, I sponged it with black ink and outlined it with a fine point black marker. The Accent Bats (517A) were randomly stamped and the Mummy was adhered in the center. The card front was made from gray cardstock and I stamped the Who's Your Mummy Greeting (909D) towards the bottom. The purple scalloped panel was adhered in the center and then the bottom portion was trimmed with black ribbon. The card front was adhered onto a black cardstock note card that measures 3.5" x 5", and my card was complete.
Please run over to the DRS designs challenge post to see all of the cute cards the DRS Design Team came up with and to log your entry today. DRS Designs is giving away a $10 store voucher to one lucky winner. Will it be you?
Thanks for stopping by and have a wonderful day!
Smiles,
Jennifer
Posted by Jennifer E.
I'm still playing with DRS Designs new Halloween stamps. I can't seem to get enough! Maybe it's the weather or the fact that Autumn is my favorite time of year, but I'm really excited about all I've created recently. On the card I made for today, I'm showing off The Raven (125G) and the Spooky Tree Limb (136F), and with October just days away, I thought it was appropriate to show off the Run In Fear Halloween Greeting (532E) as well.
I added a bit of color to the image using Copic Markers, embellished it using a spider web border punch, an embossing folder, twine, brads, and my favorite Halloween Bat punchies! I even added some extra dimension to this card by popping up the image/greeting panel by adhering it with foam tape.
I hope I've inspired you today to get inky! If Halloween isn't your thing, but Autumn is, check out DRS Designs latest Blog challenge. I promise you won't be disappointed. It's perfect for Fall images and this link has a ton of inspiration too. Give it a try, one lucky winner might just be you!
Has the weather changed already where you live? The Fall-like temps are here and the high temps these days is only about 60*! This kind of weather definitely gets me in the mood for apples, cider, pumpkins and pie! Can't forget the ghosts and goblins too!
This card shows off the new Silhouette Spooky Village (141H) from DRS Designs. I added a bit of color with Copic Markers and then used the Accent Bats (517A) and the Halloween Arc (043E) to complete the scene. The edges were distressed to give it a spooky feel and my focal image was complete. I created the card front using orange cardstock--the top was dry embossed and the bottom was stamped with the Large Original Plaid (641P) maker stamp. I layered it with yellow cardstock and then with a back panel that was adhered with a single yellow brad at each end. The stamped image was adhered in place as shown and then the card front was adhered to a black cardstock base. Finished card size is 5.5" x 4.25."
Thanks for stopping by and have a great day!
Smiles,
Jennifer
I love when challenges force me to do things that I wouldn't normally do, or things that I've forgotten to do. Although, I guess that's what makes a challenge, a challenge! The latest challenge on the DRS Designs blog challenges you to use knots. Below is the card I created for this challenge, and it allowed me to look at my embellishments and use a spiral clip to add the knot to my card front. I haven't use spiral clips in forever! DRS Designs is also the current sponsor over at the Loves To Scrap Challenge Blog. I am entering this card into their "Anything Goes Challenge"[ as well. Interested in playing along in their challenge? You could win a $10 store voucher to get free stamps from DRS Designs online catalog.
I am still playing around with the new Halloween stamps I received from DRS Designs. I used the Silhouette Spooky Village (141H) as my focal image and distressed the edges with black ink to give it a spooky feel. I used Copic Markers to fill in the windows and color the moon. The Accent Bats (517A) were stamped to make my own pattern paper on one of the vertical panels, and the Large Original Plaid Maker (P641) was used to create the other one. The Halloween Arc (043E) was stamped so that it curved around the image in the background.
I hope you'll take this opportunity to check out both of these challenges and enter them if you're able for a chance to win free stamps from DRS Designs!
Good Luck!
I can't believe that it's September already, can you?!? Hardly seems like Summer has even started yet and it will be October and time for pumpkins before we know it! I admit though, a small part of me is almost giddy that Autumn is near. It's my favorite season! I'm in love with the new Halloween stamps that DRS Designs has just released and nothing gets you ready for the next season like stamping up cards for it. I've been inking them every chance I get!
I colored the image with Copic Markers and sponged green ink around it while it was in a Nestie die. Using the Out-Of-The-Box Technique allowed me to use a smaller die that looked better with my layout--that's why the broom is hanging out of the oval shape a bit. As you can see I split up the greeting above and below my image and three bat punchies embellished this card nicely. A white gel pen gave them eyes and made them creepy. It's almost like they're looking at you! Hope you like it!
Thanks for stopping here today. I appreciate your visit!
Smiles,
Jennifer
Hi Everybody!
Does my title have you curious?
Well, now that it's September, it will be time for the ghosts and goblins to come out soon and DRS Designs is getting ready with some awesome new Halloween stamps! They are now available for purchase and the one seen below is Count Porkula (134D)! How cute is he?!?!?!? Leonard Pig is all dressed up for Halloween and he even has his Trick-orTreat bag!
I used him as the focal point on my card below for this weeks DRS Designs blog challenge. The theme is to use gems or sequins on your project! Not a real challenge for me lately as I seem to be using gems all the time.
I made my own pattern paper by stamping the Accent Bats (517A) repeatedly on the bright green card stock. I trimmed it with gray card stock and then added a spiderweb border and black card stock to both ends. Count Porkula was colored with Copic Markers, matted with a pink scallop rectangle and adhered in the center of the card stock. Next, I used a die to cut out the bright green banner and then stamped it with the Tiny Happy Halloween (938A) greeting. I added a bit of spider web to it to match the pattern paper at the bottom before adhering it in place as shown. Finally, I added 3 green gems at the bottom right side of the card front and my card was complete!
Thanks for stopping by!
Smiles,
Jennifer
It's Thursday again and there's a new challenge posted on the DRS Designs site today! I'm excited about this one because the theme is "It Gives Me The Creeps," and it is the perfect opportunity to show off some of their new Halloween stamps!
One of these stamps is the new Raven (125G) and to me it is the perfect definition of creepy! If you look close, it has a very evil eye! Eeek!
There wasn't much coloring to this image. I used Copic markers to color in the tree branch, the birds feet, and beak. Once I trimmed down the image to fit the size of my card, I distressed it with black ink to give it a spooky feel. I trimmed it in orange card stock at the top, and added a decorative border made from black card stock on the bottom. Orange gems decorated it nicely, and I hid the seam with an orange ribbon. I stamped the Accent Bats (517A) in two places around the image and then added 2 bat punchies which made it complete. Next, I created the card base from gray card stock and distressed it with black ink as well. I stamped the Halloween Arc (043E) at the top and randomly placed more of the Accent Bats over the entire card front. Then, I added a little texture by running it through the paper crimper. Then, the decorated image was adhered in place as shown, and a final bat punchie was placed at the bottom of the card front.
We hope you're in a creepy mood and excited to get out your Halloween stamps as well. Want to play along? Please see all of the details for this creepy challenge HERE. We'd love for you to be the winner of the next prize given away for free from DRS Designs!
Thanks for stopping by!
Smiles,
Jennifer
Yikes!! The latest challenge from DRS Designs has snuck up on me!! This challenge is an inspiration by color challenge using the colors in this photo on your challenge card.
Best part about this challenge is that the colors are perfect for Halloween and I have some new Halloween stamps to play with!!! I'm sneak peekin' DRS Designs new Bump Into Me Halloween Greeting (149G). I split it up to fit my layout and sponged green ink around it while it was still in a Nestie die.
I used the Large Original Plaid (641P), stamped in different colors, to create the pattern paper panel that I used to hide the seam where I split up the stamped text. I thought the purple and green "Boo" brads were the perfect embellishment!
Well, I'm not sure which is creepier right now...this Halloween card or the fact that Halloween is only 9 weeks away!!!
Have a great day!
Smiles,
Jennifer
Happy Halloween!
A new challenge started today over on the DRS Designs Blog. It's all about Halloween! It inspired me to ink up this cute little ghost (191C) and the new Boo-tiful Halloween Greeting (960E) from DRS Designs. Here's the card I put together for the challenge.
The card base and the orange layer were stamped using watermark ink and the Spooky Eyes Background (647H). I embellished it with a strip of ribbon, 4 black eyelets and I used foam tape to adhere the black scallop and the gray layer for some dimension.
You can enter the Halloweeen challenge at DRS Designs HERE. I hope you my entry and that you all have fun with all the little ghosts and goblins tonight!
Smiles,
Jennifer
I can hardly believe it's practically the end of October already! But, I have to admit, I'm like a kid again with butterflies in my belly over Halloween this year, now that my 2 year old is old enough to participate in the festivities and enjoy it! Our neighborhood had a "Boo" parade for all the little kids this past Sunday and it was our son's first introduction to what Halloween is all about. He enjoyed being in his Mickey costume and parading all around the neighborhood singing "boo" carols (something like Christmas caroling.)
Here's a pic of the cutest Mickey Mouse ever!
With Halloween right around the corner, the new challenge on the DRS Designs Blog is "Pumpkins A Plenty." I created this card below for my entry.
It was the perfect opportunity to use some of the cute little pumpkin brads I've had forever! They seem to match the the Fancy Pumpkin (077G) perfectly. I colored it with Copic Markers and then used a masking technique to sponge the yellow ink around it, creating the white frame. I broke up the Batty Happy Halloween Greeting (548G) to accommodate my layout and then added 3 bat punchies to add some dimension to my card front. For the final touch, I used some yellow Stickles on the buckle for a bit of sparkle. Finished card size is 4.25" x 5.5".
Well, that's about it for me today. I hope I've inspired you to get in the spirit of Halloween (or Fall too) and show off your pumpkins. Make sure to check out all the details on the "Pumpkins A Plenty" challenge HERE!
Smiles,
Jennifer
Hi Friends!
My first instinct was to create a Spinner card to sneak peek DRS Designs *Soon-to-be-released* Good Witch Bad Witch stamp (971D). It took me awhile to execute the perfect design, but I'm glad to say that it worked out perfectly and I'm happy I get to finally show it off with you today!

I started by stamping, coloring, and cutting out the Boomstick Stella Witch (415H) and the Good Witch Bad Witch images. Then I used a circle Nestability die to cut out the moon from yellow cardstock. I embossed it and inked the edges with yellow-orange ink for dimension. I added the witch to the center with foam tape to make her look like she was flying in the Halloween sky. Then I put her to the side to work on the card base.
To accommodate the size of the moon, I made a 5" x 5" cardstock base from purple cardstock and I used black cardstock for the card front. I first heat embossed the Halloween Arc (043E) in white, and then ran the entire black piece through the star embossing folder. I wasn't sure if the white embossed area would still look ok after embossing it, but gladly, it held up just fine. The witch and moon were then adhered to the center of the card front.
I used a portion of the spinner card directions on Splitcoast Stampers to create the spinning device at the bottom of the card. The Good Witch Bad Witch image actually spins around! Here are a few pictures demonstrating that.


I embellished this card with some purple grosgrain ribbon to decorate the bottom and then some purple bat punchies flying around the moon. I really like this card a lot and I hope you do to, but I'll let you decide for yourself if she's a Good Witch or a Bad Witch!
Have a great day!
Smiles,
Jennifer
Hi Everyone! Hope your day is off to a fabulous start!
Can you believe it's almost October already!?!? It will be ghost and goblin time before we know it! The new blog challenge over at DRS Designs, "So Spooky it's Scary" and THIS CARD from Splitcoast Stampers inspired me to create this Spooky Halloween card. I'm really happy with how it turned out-actually it's better than I thought it would be. I think it really has an eerie, spooky feel!
The first thing I did was heat emboss the Spooky Tree with Moon (070L) on a white card front. Then, I taped a large circle Nestability die centered over the image and used it as a stencil. I sponged the moon area with yellow inks and the rest of the area with an eerie purple ink. I love how it really looks like the full moon is glowing in the darkness! Next, I stamped the Spooktacular Halloween Greeting (933F). I split it up so that the first half of the sentiment was stamped above the scene and the second half was stamped below it.
I matted the card front on yellow cardstock and then used foam tape to adhere it to a 4.25" x 5.25" purple cardstock base. An eerie card like this wouldn't be complete without a few bat punchies--I added eyes to them with a white gel pen and then adhered only their bodies so that I could fold up their wings to make them dimensional. Eeek! Does this card give you the creeps?
Smiles,
Jennifer
...Candy Corn!
Would you have ever guessed it? I bet you were thinking broccoli or some other green vegetable. I know this was totally UNEXPECTED--that's because I created this for this week's DRS Designs Blog Challenge which is to create something UNEXPECTED!
This card was pretty quick to create. One of things that helped make this quick is the design of the Candy Corn Background. By stamping it in orange ink, half of the coloring is already done for you. All I did was color the bottom of each candy piece with a yellow Copic Marker and my background was finished --easy, peasy as they say! The background used on the top of the card front was made simply by stamping the Spatter Background with black ink. At times, I stamped it off as well so some of the spatter dots are a bit faded.
Well that's it for me today.
Until next time,
Smiles,
Jennifer