Welcome to Ink N Scrap Habits!
I've created this blog to share my life & love of paper crafts with others. You will read bits and pieces of what goes on in my world and be able to see my paper craft creations! Please leave me a comment if you see something you like. I'd love to hear from you!
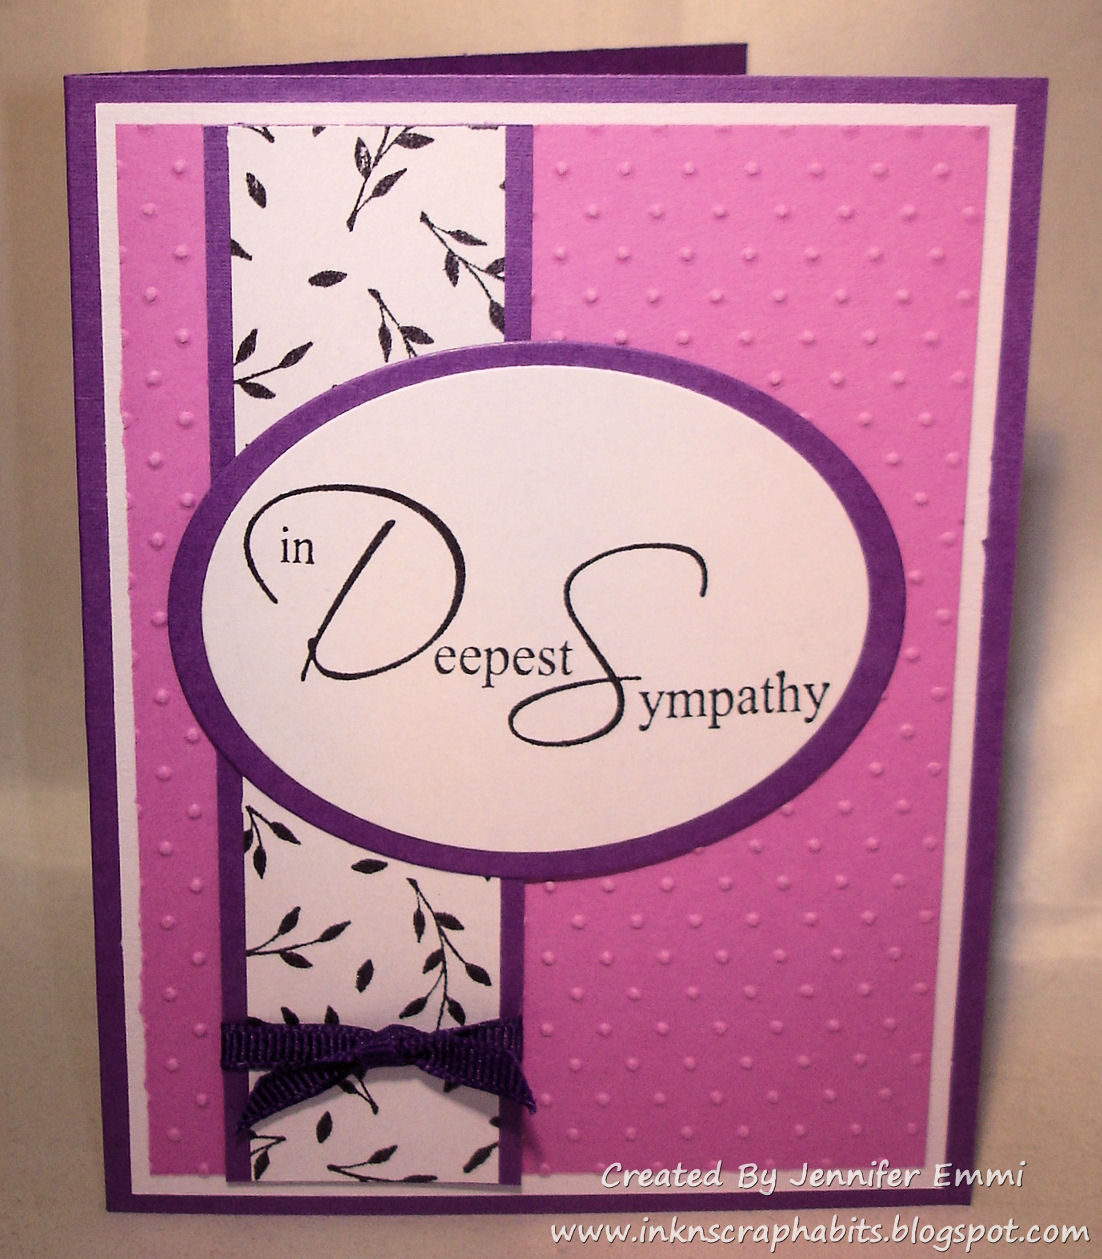
Thankfully, I'm not in need of a sympathy card right now but the challenge on the DRS Deigns Bog starting today is "Feeling Sentimental. " I thought a sympathy card was perfect for the challenge not only because I used a sentiment as the focal point of my card, but also because there's a lot of emotion associated with a sympathy card. Plus, my sympathy stash is low and I always like to have those cards on hand.
I kept my layout simple and used the Brush In Deepest Sympathy greeting (588G) as the focal portion of my card. I love the elegant look of the Silhouette Branch Background (363H) and I tend to use it frequently on sympathy cards. Today's card was no exception and I used it to create the pattern paper panel. A simple dark purple ribbon tied in a knot embellished it, and it was layered on top of a dry embossed matted piece of purple card stock. Clean and simple and easy, peasy--that's what I was going for today! Hope you like it!
Thanks for stopping by!
Smiles,
Jennifer
For most of us, I'm sure sympathy cards are our least favorite to make. However, after a long battle with cancer, my best friends Mother recently passed away. I felt it was important to make her a card to send my condolences and today I'm sharing the Sympathy card I made for her.
The stamps I used on this card are by DRS Designs. I started by stamping the Brush Deepest Sympathy Greeting (588G) in light blue ink. It was cut out with an oval Nestability die and then matted with blue card stock cut from a scallop oval Nestability die. Next, I created my own pattern paper to decorate the card front. The Silhouette Branch Background (363H) was heat embossed on light blue cardstock using clear embossing powder. I then hand-cut the bottom scalloped edge and then layered it with white card stock cut the same way. The top of the white card stock was embellished using a border punch. A sheer white ribbon was tied across the middle, knotted on the left hand side, and then the matted sentiment was adhered in the center. Next, the card front was adhered onto a blue card stock base and three white pearls were adhered as shown in the bottom right corner. Finally, I decorated the inside a little bit by stamping the silhouette branch background with blue ink at the top and bottom edges of the white panel that was adhered inside.
It's little things like this that help us get through difficult times, and my friend was really happy to receive this card. I'm glad I took the time to make it.
Thanks for stopping by and have a great day!
Smiles,
Jennifer
Of course no one likes to have the need to make a Sympathy card but the best time to make them is when you don't need them. The new color challenge posted on the DRS Designs Blog today inspired me to add a Sympathy card to my collection for that exact purpose. Here's the challenge inspiration photo:
And here's my creation!
This layout was inspired by something I saw on Pinterest. I used an oval nestability die as a stencil and sponged the middle with pink ink to create the background for my card front. Next I stamped the Dandelion Puff (380G) in the center with black ink. I love how the shaded pink oval makes the silhouette "flower" stand out! It makes for a very elegant look and could be done using any color and still look great. The next step was to mat it twice, once with pink card stock and then again with black card stock. I added this to a gray, A2 card stock base. I added the sentiment by stamping the One Line "In Sympathy" Greeting (262B) on a gray banner that was matted with black. For a bit of dimension I adhered this with foam tape so that it popped up from the bottom of my image. I added 3 gray butterflies around the image and embellished them with a small pink rhinestone for a touch of color.
I hope I've inspired you to get inky today!
Thanks for stopping by!
Smiles,
Jennifer
The Mother of one of my good friends recently passed and I sent my last sympathy card to her. I find it's always best to create sympathy cards when you don't need them, so now I'm in the process of replenishing my stash. DRS Designs latest release is perfect for this!
.JPG)
I made this card over the weekend using the Winged Angel (389H) and I paired it with the Angel By Your Side Greeting (390F). The Angel was colored with Copic Markers. I used B000, B02 and B05 for her gown and C1, C3, and C5 for her wings. E00 and E02 were used to create the "glow" coming from behind her.
I just love this pair of stamps! I think the Angel is such a peaceful image which is perfect for sympathy cards and the font used for the greeting is so elegant. You can't go wrong using this combo for a sympathy card! Usually I have a difficult time creating these types of cards, but everything about this card just fell into place. I guess these stamps really motivated my creative thought process and I hope they do the same for you!
Have a great day!
Smiles,
Jennifer
This is an A2 size card, but I cut down the top layer a bit and decorated it with a border punch. Then the card front was embossed using my, new-to-me, pet print embossing folder. I stamped the upper portion of the Furry Friend Sympathy Greeting with dark brown ink and then sponged it with light brown ink while it was in a Nestie die. Then I tied plaid ribbon in a knot at the bottom of it before matting it with a dark brown scalloped rectangle. As you can see, this was adhered to the center of the card front.
The inside of the card was layered with ivory cardstock and the lower portion of the Furry Friend Sympathy Greeting was stamped at the bottom and the Dog Bone was stamped on an angle on each side. I have to Thank my friend Paula for this layout. I love how the card front is short enough to see the inside message at the bottom of it!
Thanks for taking the time to stop by today! Have a great weekend!
Smiles,
Jennifer
Hi Everybody!
Hope you all had a nice long holiday weekend! The last 5 days have been very busy for me and I didn't get a chance to share my card for last week's DRS Blog Challenge until now.
My goal for completing their challenge to use punches was to come up with a layout to mass produce some sympathy cards. Below is the layout I came up with however it turned out to be more involved than I thought and this was the only one I made.
I really like the focal image used on this card. I heat embossed the Sea Grass (128L) on glossy cardstick and sponged each part of it with the appropriate color ink. Then it was matted with kraft cardstock. The One Line Heartfelt Condolences was stamped on a banner and the edges were inked with yellow ink before matting it with kraft cardstock. The sentiment and image were adhered in placed as shown on a light blue card front that was embossed with the Swiss Dots embossing folder. A decorative corner punch was used in the upper left corner and a yellow brad was added there as well. The cardfront was then adhered to an A2 cardstock base made from kraft cardstock. The finishing touch was adding some punched butterflies that were decorated with coordinating rhinestones.
Thanks for stopping by and be sure to check out all the details for the paper punch challenge HERE.
Smiles,
Jennifer
Sympathy cards are definitely my least favorite cards to make, but today I'm taking advantage of the So Sorry Challenge on the DRS Designs Blog to make a few up a head of time. It makes it so much easier when I have a card already made and ready to go when the unfortunate time arises.
For this card I used the Sketch challenge SC367 for the layout. I used the Sadness You're Feeling Sympathy Greeting (029H) as the focal point of my card front. Leaving off the bottom line, "In Deepest Sympathy," I stamped the greeting with brown ink, sponged blue ink around it while it was still inside a Nestability die and then adhered it using foam tape for dimension.
To complete this card, I stamped the final line of the greeting in the lower right corner directly on the card front. Here's a close up of the greeting so you can comfortably read it. Aren't these wonderful comforting words?
I hope you'll join me and the rest of the DRS DT in making some sympathy cards for this challenge. Enter your cards HERE for a chance to win some free stamps from DRS Designs.
Thanks for stopping by!
Smiles,
Jennifer
I'm here today with a bittersweet post to share with you. Over the weekend I stamped this sympathy card for a dear friend of mine whose Mother passed away. She was 84, full of life and a strong fighter at the same time.
When I first started making cards, I NEVER made sympathy cards. I always thought that since handmade cards were supposed to be kept, who would want to keep a sympathy card to remember the pain and loss they felt when they received that card. However, now I feel differently --I think a handmade sympathy card is extra special and it lets the recipient know you really care. I make sympathy cards often now, and I always make sure to have a few on hand so that I have one ready to go whenever I need one. How do you feel about making Sympathy cards?
I really like how this note card turned out because I think the blue and brown together are peaceful and calming. Both stamps I used are from DRS Designs. I used the No Words Sympathy Greeting (068G) for my focal point and used the Cross In A Cross (1022B) as an embellishment. Both of them were cut out using Nestability dies and I sponged them with brown ink before removing them from the dies. The Swiss Dots embossing folder added texture to the background and a simple brown ribbon and bow made this card complete. Finished card size measures 5" x 3.5".
Thanks for stopping by!
Smiles,
Jennifer
For so many people I know 2013 has not been very kind. Unfortunately, I've needed more sympathy cards this thus far than I care to count. I'm hoping and praying that the second half of 2013 gets better.
Here's another sympathy card I created for a friend. The stamped elements on this card are DRS Designs Single Rose (774G) and the One Line Heartfelt Condolences (321D). I kept things simple--just some sponging, dry embossing with the very elegant Swiss Dots folder, a border punch, and a well tied ribbon made this card complete.
Until next time, have a wonderful day!
Smiles,
Jennifer
It is both unfortunate and ironic that I need a sympathy card this week while DRS Designs is holding their Sympathy challenge. I don't normally like to have to make a sympathy card when one is actually needed, but a friend of mine over at the Stamp Shack posted a card in the gallery that inspired today's card. (Thanks Amy!)
I created the background by inking a small acrylic block and stamping it directly on my cardstock with 3 different colors. Then I heat embossed the Sea Grass (128L) and the One Line In Sympathy (262B) sentiment over top.
I added natural twine tied in a knot to the focal image and then added a small panel behind it that was dry embossed with the Swiss Dots folder. This is a small note card, finished card size is 5" x 3.5."
Thanks for taking the time from your busy weekend to visit my blog!
Smiles,
Jennifer
Well, we all know that it's better to create sympathy cards ahead of time rather than trying to make one when your heart is heavy. The Sympathy challenge on the DRS Designs Blog this week is the perfect opportunity to work on a few.
I didn't have a lot of time when I sat down to make my challenge card. I knew coloring an image was out of the question and since I haven't played with glossy cardstock in a while, I decided to get it out and do a little heat embossing.
I heat embossed the Silhouette Majestic Pines (757L) with black embossing powder and then sponged it with blue ink for the sky and green ink for the ground. I used a yellow Copic Marker for the moon. The Tiny With Sympathy sentiment (263A) tag was also heat embossed and sponged with ink. I added a dry embossed layer of polka dots to the background and each layer was matted with black. The light blue cardstock base measures 4.25" x 5.5."
I hope I've inspired you to stamp today! Thanks for stopping by!
Smiles,
Jennifer
The DRS Designs Blog this week has challenged us to create Trifold cards. I had some sympathy stamps that I've never used so I decided to get them inked up for this challenge.
I started with a dark brown cardstock base for my trifold card. I stamped up my own background paper using the Polka Dot Background (688P). For the top flap, I stamped the polka dots with Versamark ink and for the bottom they were stamped with Momento Rich Cocoa ink. The edges of both panels were distressed with Vintage Photo ink.
I created the opening by layering the Sealed With A Prayer image (1010D). I colored it with Copic Markers and attached it to the top flap of my card. I added a small piece of Velcro so that it could be opened and closed repeatedly. The bottom flap was decorated with a strip of dark brown cardstock that was layered with light blue grosgrain ribbon. The silver metal cross I added was a left over embellishment from my son's Baptismal invitations. Love that I have found a great way to reuse them! It was attached by placing a silver brad through the ring at the top of the cross.
I stamped the Extending Sympathy Greeting (1090G) on the inside and embellished it with the praying hands image from the Sealed With A Prayer stamp. I colored them with Copic Markers, fussy cut them, and then used craft glue to adhere them above the inside greeting. The edges of the inside panel were distress with light blue ink and as you can see there is plenty of space to write your own heartfelt message.
Well, that's it for me today. Thanks for stopping by! I appreciate your visit and hope you'll check out all the challenge details and the great prize up for grabs on the DRS Designs Blog!
Smiles,
Jennifer
Have a great weekend!
Smiles,
Jennifer
I'm not really a fan of making sympathy cards, but I try to make them every so often just to have on hand. The sympathy card I'm showing today was made for the sketch challenge that can be found this week on the DRS Designs Blog.
I kept the details to a minimum and used the Many Hearts of Sorrow greeting (598G) for the center of the challenge design. I heat embossed it with clear embossing powder on glossy white cardstock. Then I cut it out with an oval Nestability die and sponged Ballet Blue ink over it in order for the sentiment to become visible.
I matted it on green triangles and added a paper flower on either side. On my dark blue A2 size cardstock base, I added 2 light blue panels that I embossed with the Swiss Dots folder. as a final step I added the matted sentiment design to the center of the card.
The winner of this DRS Sketch challenge will get their choice of 3 DRS Designs stamps for FREE! Yes, that's right, not 1, not 2 but 3 stamps for FREE!! Run over HERE and link up your card today!
Thanks for stopping by!
Smiles,
Jennifer
No one likes to make Sympathy cards, but unfortunately every now and then we need them. I prefer to have them made up ahead of time--it seems to make having to use them a bit easier. I made this one recently using the new Background Branch (721K) from DRS Designs.
I didn't even know this stamp was a "background" until I started writing this post. Regardless, colored with Copic Markers, it's made a lovely focal image for this sympathy or thinking of you card.
If you look closely, you'll also see that I clear embossed the white background with the brand new Polka Dot Background (688P). I then distressed the edges with light green ink which helped make the polka dots more visible. I stamped the Mind and Prayers Greeting (676F) with green ink at the bottom of the card front. Since I think simple is better for these types of cards, I kept the embellishments on the simple side: a few matching brads, a decorative border punch, and some elegant ribbon pulled everything together nicely.
Thanks for visiting today!
A friend of my Aunt Tracy recenty lost her Grandfather. They had a special relationship, and she wanted to give her friend a card that was extra special. Knowing that I make handmade cards all the time, she asked me to create a sympathy card for her.
I used the Splitcoast Sketch challenge SC293 from a few weeks ago for my layout. I loved how this card turned out and Aunt Tracy loved it too!
The Lilly Sympathy Cross (L314) and Heartfelt Condolences sentiment (D321) I used are by DRS Designs. The cross was colored with Copic Markers. I then masked it and sponged yellow ink around it. I stamped the cross a second time, coloing only the lillies, and then cut them out to add some dimension by adhereing it with pop dots. I used an EK Success Border punch and added pearls to the holes at each dip in the border. The yellow background panel was embossed with the Cuttlebug Swiss Dots embossing folder and a simple blue bow made this card complete. I'm really happy with how elegant it looks!
Hubby doesn't usually say much about my cards when I make them. I always show him and I usually get "That's nice Honey" and he barely turns his head to look at my cards. This card however, the layered flowers really grabbed his attention and this time I got a sincere "Wow, that is a really nice card! I like how the flowers are popped up!" Maybe one day he'll really enjoy me showing my cards to him! (I can hope right!?!?!)
Smiles,
Jennifer
I'm usually not one for clean and simple cards, but this one totally is! I embellished it with a simple 2 layered Prima flower and added a paw button to the center of the flower. I love that part of this card! I also used Yellow Stickles on the halo, and Crystal Stickles on his wings. Can't forget to add fluffiness to the cloud--I created this with white Fun Flock!
Well, that's about it for now. Sorry for such a short post today. This week has been hectic and I'm so behind, so I have to limit my computer time to make the most of my days. Stay tuned for more coming soon!
Thanks for stopping by today and have a wonderful weekend!
Smiles,
Jennifer
Here's another set of DRS Designs newest stamps! This Lily Sympathy Cross (L314) and the One Line Sorry For Your Loss Sentiment (D317) are brand new!
I love this cross image..it's simply beautiful. Yes, it's titled for sympathy, but I'm anxious to use it for a different type of card. Wouldn't it make a beautiful Easter card as well?? I'll be keeping that thought in my back pocket for future use.
I kept this card fairly simple, as I think most sympathy cards should be on the simpler side and I didn't want to take away from the image itself.
I used my Copic Markers to color in the cross and then I lightly painted the lillies with Opal Shimmerz to give them a subtle sheen look. I masked the cross and the edges around the image so that I could sponge blue ink for the background. My Heart EK Success border punch and some sheer blue ribbon finished this card off nicely.
Just a reminder...don't forget about DRS Designs Sketch Challenge currently underway. You could win 6 FREE stamps just for playing along! See all the details and link your card up HERE.
Thanks for stopping by!
Smiles,
Jennifer
For the next 2 weeks DRS Designs is holding a sketch challenge. Here's the sketch to follow:
For your participation you could win either a beach prize package or a golf prize package from DRS Designs. You can see picture of the prize packages HERE.
Here's my take on the sketch:
I added white Fun Flock to the cloud to make it fluffy and I used Yellow Stickles on the halos to make them glisten.
Please see THIS POST on the DRS Site to see all of the Sketch challenge details and enter your card today!
Thanks for stopping by!
Smiles,
Jennifer
Tomorrow is the big Release Day over at DRS Designs, and today I'm showing off some more sneak peeks! This release is a bit bitter sweeet for me as there are many sympathy related stamps. For example, the Cat Angel and the sentiment you see on this card are part of tomorrow's release. Of course no one want to have to make a sympathy card of any kind, but when you need one it's so nice when you have one already made and ready when you need it. I'm usually not one for Clean And Simple, but sometimes I think sympathy cards are better off in the CAS category.
I colored this Cat Angel with Copic Markers. I cut it out using a Nestability die, covered it with a mask and then sponged blue ink around it for the sky.
I dressed this card up just a bit by adding some brown felt ribbon, and then I used Stickles on the angel wings, and Fun Flock on the cloud for a relaistic effect.
Make sure to check out all of DRS Designs new Releases tomorrow. As soon as they become available, you can see them all HERE.
Thanks for stopping by! Smiles,
Jennifer


