Welcome to Ink N Scrap Habits!
I've created this blog to share my life & love of paper crafts with others. You will read bits and pieces of what goes on in my world and be able to see my paper craft creations! Please leave me a comment if you see something you like. I'd love to hear from you!
Well, another month here and gone and it's true, Halloween is almost here!
Our costumes are sewn, the accessories have been purchased, the pumpkins are carved, and the candy bowls are full! Our household is ready!
Today's card was made with new Halloween stamps from DRS Designs. I wanted to create a different Halloween card--something a little different from the traditional orange and black. When I colored the Fuzzy Spider (550H) with Copic Markers, I colored parts of his legs green for a fun and eerie look.
Are you ready for Halloween?
Smiles,
Jennifer
Hi everyone, happy Sunday! Hope you're having a wonderful weekend!
Today I'm sharing a fun marshmallow card I made when DRS Designs latest stamps were released. Their marshmallow collection reminds me of the bon fire traditions my family shares every year.
Many people associate roasting marshmallows and S'mores with Summer campfires, but it's often too warm for my family to really enjoy them in the Summer. We have most of our bon fires in the Fall. Having a bon fire on Halloween night has become a tradition for us. We sit in camping chairs in the middle of our driveway, with a portable fire pit, and decorate the area around us with our freshly carved Jack O' Lanterns. While passing out Halloween candy to all the ghosts and goblins who pass by, we enjoy some yummy, ooey, gooey marshmallow treats of our own.
For this card, I used the new Mini-Marshmallow (493A) to create the background. I stamped it repeatedly with Versamark. This little guy is perfect for a background because he really is "mini." He only measures 0.5" x 0.5"! The Melt For You Greeting (497B) fit perfectly in the window of an SU! punch and I used it to fill in the empty space in the lower right hand corner of my card front. I added 2 small rhinestones to dress it up a bit.
Here's a close up of the Toasting Marshmallow (430L) that I used as the focal image. I always have to add a bit of sparkle to the flames when I use this image. The yellow Stickles are perfect here!
Well that's about it for me today. But, stay tuned to my blog over the next few days. New stamps are coming out from DRS Designs very soon and I'll have some sneak peeks for you! I'm pretty certain you'll love them! ;-)
Until next time,
Smiles,
Jennifer
The sentiment I used for my focal point is the Changing Leaves Thanksgiving Greeting (1122G). I stamped it with Vintage Sepia Versafine and then sponged orange ink over it while it was in a Nestie die. I decorated it with 3 brown rhinestones and adhered it with foam tape for a little added dimension.
So, tis the season for creating Autumn Greetings...I hope you'll link up your project on the DRS Blog so you can win the fabulous prize they're giving away this week! Check out all the details HERE!
Have a wonderful Halloween weekend and stop by again soon!
Smiles,
Jennifer
Hi Stampers! Happy Wednesday! I hope you're having a wonderful week!
Today I'd like to share with you the details about this week's Wicked Wednesday ATC challenge. DRS Designs is their sponsor and for playing along, you have a chance to win a $10 gift certificate to the DRS Designs store. The theme is "Full Moon."
It's been a really long time since I've created any sort of ATC's, so I decided to take this opportunity to create a Halloween ATC and then I used it to create a card. If you're familiar with ATC's, you know that they are only 2.5" x 3.5" in size. It was a nice change to work on a smaller scale! The Halloween scene on my ATC was created using 3 stamps from DRS Designs: the Spooky Tree with Moon (070L), the Accent Bats (517A), and a portion of the Moonlight and Magic Halloween Greeting (609G). Everything was colored with Copic Markers, even the background--I originally started with white cardstock! I used a scalloped rectangle die to create a mat for the scene and used an ATC sized piece of yellow shimmer cardstock for the base. I thought the black ribbon completed it nicely.
Then I created this card by adding a little texture with a star embossing folder, some star-shaped rhinestones, and yummy purple and yellow plaid ribbon. I used the remaining portion of the Moonlight and Magic greeting at the top, and the ATC was added at the bottom. Viola! Another Halloween card was complete!
Please check out all of the wonderful ATC's created by the Wicked Wednesday DT and link your ATC for a chance to win!
Thanks for stopping by!
Smiles,
Jennifer
I've had this adorable Cat stamp combo for quite awhile now and can't believe this is my first time getting them inky. This week's DRS Designs Cat challenge was the perfect opportunity, and I'm glad to finally be showing them off!
The Cat in the Bag (1118H) was colored with Copic Markers. I broke up the Cat's Meow Birthday Greeting (1125G) to fit my layout. I highlighted the words "cat's meow" with a sentiment tag that was popped up on foam tape. The shading around the image was done with a sponge while it was in a Nestie die and I used Post-It Notes to mask off the edges on the sentiment tag.
I hope you'll join us on the DRS Designs Blog for a chance to win some free stuff from DRS Designs.
Happy Stamping!
Smiles,
Jennifer
PS: For those of you in the Cleveland, Ohio area, the Adventures in Stamps rubber stamp and scrapbook convention is this weekend (October 19th and 20th) at the Ehrnfelt Event Center in Strongsville. Stop by the DRS Designs booth for some demonstrations and Make n Take projects and meet several of the DRS DT members, including myself! Hope to see you there!
Nothing says Fall like apples, and what could be better then a yummy, caramel one!?!?! I colored DRS Designs Candy Apple (082K) to look like it was dipped in oooey-gooey caramel. Is your mouth watering yet?
I used shimmer, copper cardstock for my card front and heat embossed the Smell My Feet Greeting (524F). Tis the season for a bit of spooky-ness added with the spider web border and a nice brown ribbon to match!
I hope this Halloween gives you something good to eat!
;-)
Smiles,
Jennifer
Hello Stamping Friends!
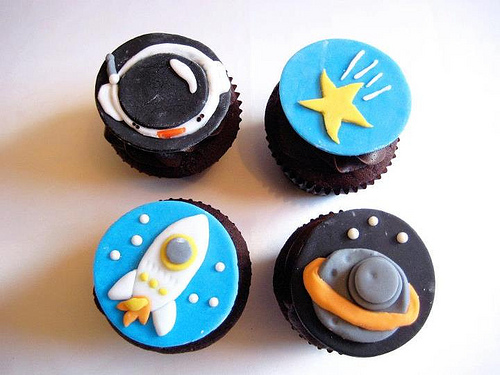
How about a little something to brighten your Monday? Would you be interested in shopping for free at DRS Designs? You'll have a chance to do so by playing along with the Cupcake Inspirations blog challenge this week. The challenge is to create anything using this photo for inspiration. You can use it as a theme challenge, color challenge, sketch challenge etc.
I decided to stay with the space theme and created this card using DRS Designs stamps.
Smiles
Jennifer


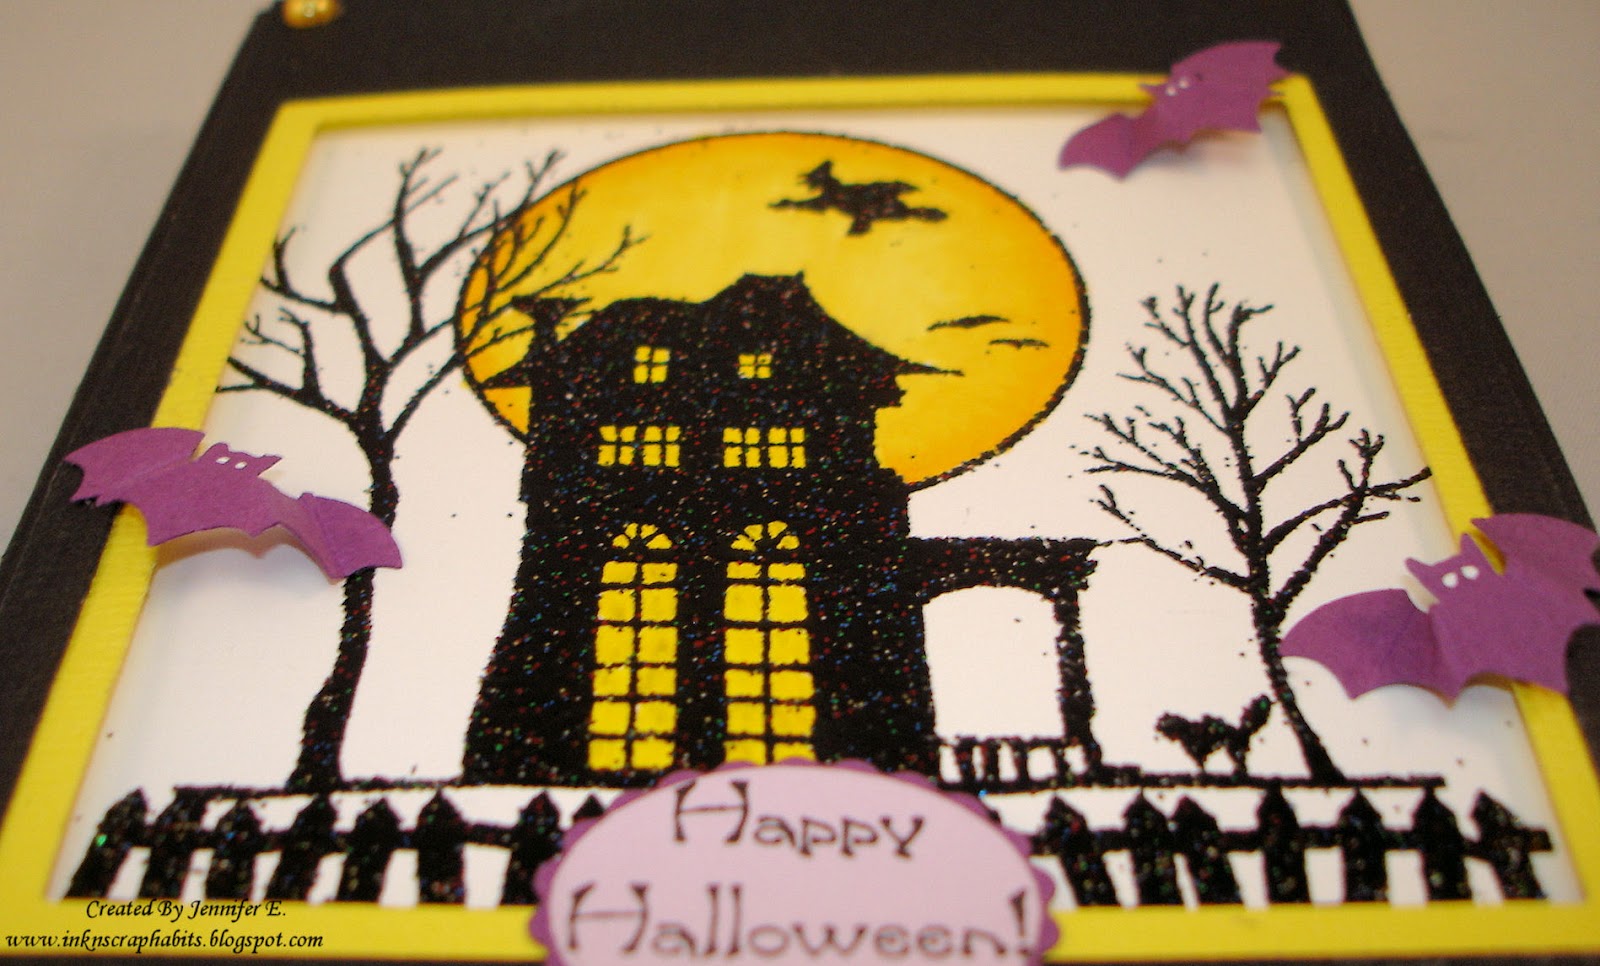
I initially wasn't going to do any more to the card front since I thought it looked fine with the stamped image, sentiment, and the frame alone, but I thought some bat punchies would be a nice touch. They are from a Martha Stewart punch and I added eyes to them with a white gel pen. I also gave a little texture to them by scoring their wings which gave them a 3D look. (Sorry, I don't remember whose blog gave me this great idea, but if it's you or you recognize the idea, please let me know so I can edit this post to give credit appropriately.) I adhered each of them so that they looked like they were flying above the image within the frame.
Please check out all of the details for this week's witch challenge on the DRS Designs Blog. They have a great prize up for grabs and one lucky winner will get it just for playing along. I hope it's you!
Have a great day!
Smiles,
Jennifer
Hi Everyone!
My card front was made from orange vellum that I distressed with black ink. I stamped the Accent Bats around the edges and then adhered it on to a black cardstock base. Next, I stamped the Witches Brew Halloween Greeting on white cardstock and matted it on black. I stamped the accent bats around the edges of this as well to fill in the blank white space. This was then adhered to the center of the card front. Next, I stamped the Burning Cauldron on white cardstock and colored it with Copic Markers. Then I fussy cut it out, and adhered it to the lower right corner as shown.
I embellished this card with a few bats punchies that I made a bit spookier by adding white eyes with a gel pen, and yellow Stickles made the cauldron flames look realistic. This card was pretty easy to stamp overall and I love how festive it is!
Hope you enjoyed seeing it!
Thanks for stopping by today.
Have a great day and please visit again soon!
Smiles,
Jennifer
Here's my entry for the new blog challenge on the DRS Designs web site. The theme this week is Fall Leaves.
I used the Changing Leaves Thanksgiving Greeting (1122G) for my focal point. I stamped it using brown ink and used a Nestie Die to cut it out. I sponged orange ink around it while it was still in the die. I added a leaf punchie and a small bow tied with natural twine to embellish it. I used a piece of craft cardstock for my card front and stamped it with the newly released Tree Limb (568P) Versamark ink. However, the second tree from the left was stamped in brown ink to make it stand out. I added orange, brown and burgundy leaf punchies to decorate the trees. I used a corner rounder on the craft card front and then adhered it to a 4.25' x 5.5" white cardstock base.
Please visit the challenge on the DRS Designs blog for a chance to win your choice of 2 stamps from DRS Designs!
Thanks for stopping by!
Smiles,
Jennifer
For all you Halloween lovers, you need to check out the new stamps DRS Designs has just released! I mentioned a few posts ago that I got sidetracked with these new stamps and here's one of those projects. The Fuzzy Spider (550H) and the Vertical Happy Halloween(538D) are brand new and now available for purchase!
I thought it was only appropriate to stamp the Empty Spider Web (329G) for the background to show off the Fuzzy Spider. The Martha Stewart Bat punchies are a great touch for this kind of card. I added eyes to them with a white gel pen.
I colored the spider image with Copic Markers masked it and then sponged purple ink around its belly. I thought about adding black flock to the gray parts, but for the sake of time I decided against it. I just might still do it when I use this stamp again. How would you spook up this spider?
Enjoy all of DRS Designs new Halloween stamps and even better, enjoy stamping and creating your Halloween Cards!
Smiles,
Jennifer
Hi Friends!
It's Thursday already and another Blog challenge just started on the DRS Designs Blog. The theme this week is pumpkins, and I was able to plan my layout to show off another sneak peek of the new stamps DRS Designs is releasing this Saturday, September 29th.
The new stamps on this card are the Batty Happy Halloween (548G) and the Accent Bats (517A) that I used to create the pattern paper. I also used the fun Fancy Pumpkin (077G) and the Interlocking Star Background (819H). The Fancy Pumpkin was colored with Copic Markers and I stamped the Accent Bats around it. Some Yellow Stickles brightened up his eyes, nose, and mouth.
I'm loving these new Halloween stamps and I hope you've enjoyed the ones I've show so far. Don't forget, Saturday is the big release day and you can see the new stamps HERE as soon as they become available.
I'll be showing off more Halloween goodness soon!
Stay tuned!
Smiles,
Jennifer
With the chill in the air, Autumn is definitely here! Don't let that bright sunshine fool you! It's time to start winding down every evening with my fireplace on, a cozy blanket over my shoulders, a good book in one hand and a nice hot cup of cocoa in the other!
Here's another card I made to sneak peek DRS Designs new "You're So Sweet" (546D) sentiment. That adorable "Mini Marshmallow" (493A) you see in the background is also part of this upcoming release. All of the new designs will be available for purchase on September 29th. I colored the Cocoa and Marshmallows (233H) with Copic Markers and fussy cut it. I used an SU! punch to cut out the sentiment and adhered it with foam tape. I wrapped a little twine at the bottom and added 3 brown rhinestones.
Three more days until the new releases are available for purchase! Stay tuned to see more!
Enjoy!
Smiles,
Jennifer
Happy Fall, Y'all!
I know Fall just began, but I just had to squeeze one more Summer related post before Autumn, Halloween and Christmas dominate my blog for a while. I created this Summer Strawberry card to sneak peek one of DRS Designs new sentiments. "You're So Sweet" (546D) is part of their next release which will be available for purchase on September 29th.

I liked the idea of this sentiment paired with these Large (Juicy) Strawberries (291K), but I'll also be showing it off soon with some of DRS Designs Marshmallow stamps too. Here, they were colored with Copic Markers and then sponged with light blue ink after cutting them out with a Nestie die. I handmade the sentiment banner and used Post It Notes to mask off the edges before sponging it with light blue ink as well. I added a red rhinestone to each side to dress up the banner a little bit. Red and white gingham ribbon was tied in the center and a little ribbon tag in the upper right corner made this card fun! Hope you enjoyed seeing my last taste of Summer...Lots of Autumn and Halloween cards coming soon!
Smiles,
Jennifer
Sorry it's been a week already since I've last posted. I received a new bag of rubber goodies from DRS Designs and I got sidetracked with their new Halloween images. Just wait til you see them!!! I get to show them off very soon, so stay tuned.
For now, I'm sharing this cute birthday card I created for this weeks DRS Blog Challenge. The theme is "Punny" sayings and I couldn't resist using cute, little "Wags" the Dog (1117F) with the "Paws"itively Fantastic Birthday Greeting (727F).
I also used the Polka Dot Background (688P) and the Small Dog Print (1003A) to create my own pattern paper. I love the look of the 2 patterns and colors overlapping each other. Not sure how I stumbled on this layout, but I'm really happy with it as well. I think it shows off the image and sentiment well, yet is spacious enough to show off the background too. Wags was colored with Copic Markers and the background layers were distressed with Antique Linen. Finished card size is 4.25" x 5.5"
Run over to the DRS Blog and check out the rest of the "punny" cards created by the DRS DT. I promise you'll enjoy what you see!
Have a great day!
Smiles,
Jennifer
I couldn't help but be inspired and in awe of all the telescoped cards in the gallery at SCS recently. I just had to give it a try for this weeks Sunflower challenge on the DRS Designs Blog and I thought the large size of the Sunflower Pumpkin Patch (105P) would be perfect for this technique. (See the tutorial for how to create a telescoping Image HERE.)
The image was colored with Copic makers and distressed with Vintage Photo ink. I embellished this card with some sheer copper ribbon tied in a knot and added Yellow Stickles to the Sunflower petals. This looks really nice with the shimmer from the copper cardstock. I added the Small Autumn Greetings sentiment (422B) to the bottom right corner, right over top of the ribbon band.
Here's what the telescoped layers look like from the side. There's quite a bit of dimension here! This finished card size is 4.5" x 5."
Thanks for stopping by and please come back to visit soon!
Smiles,
Jennifer
There's nothing worse then the feeling you get when you realize you've missed someone's birthday. The new Lost Track Birthday Greeting (482F) is a belated funny from DRS Designs that you can use to help make up for it.
I created my own pattern paper for this card using the Funky Birthday stamp (494D). It was stamped in blue and green inks and then the edges were distressed in blue as well. I stamped the recently released Vertical Birthday Wishes (400D) on the blue panel and the dark blue panel at the top was embossed with the Swiss Dots folder for texture. Some white grosgrain ribbon embellished it nicely and pulled everything together. Finished card size is 4.25" x 5.5".
Have a great day!
Smiles,
Jennifer
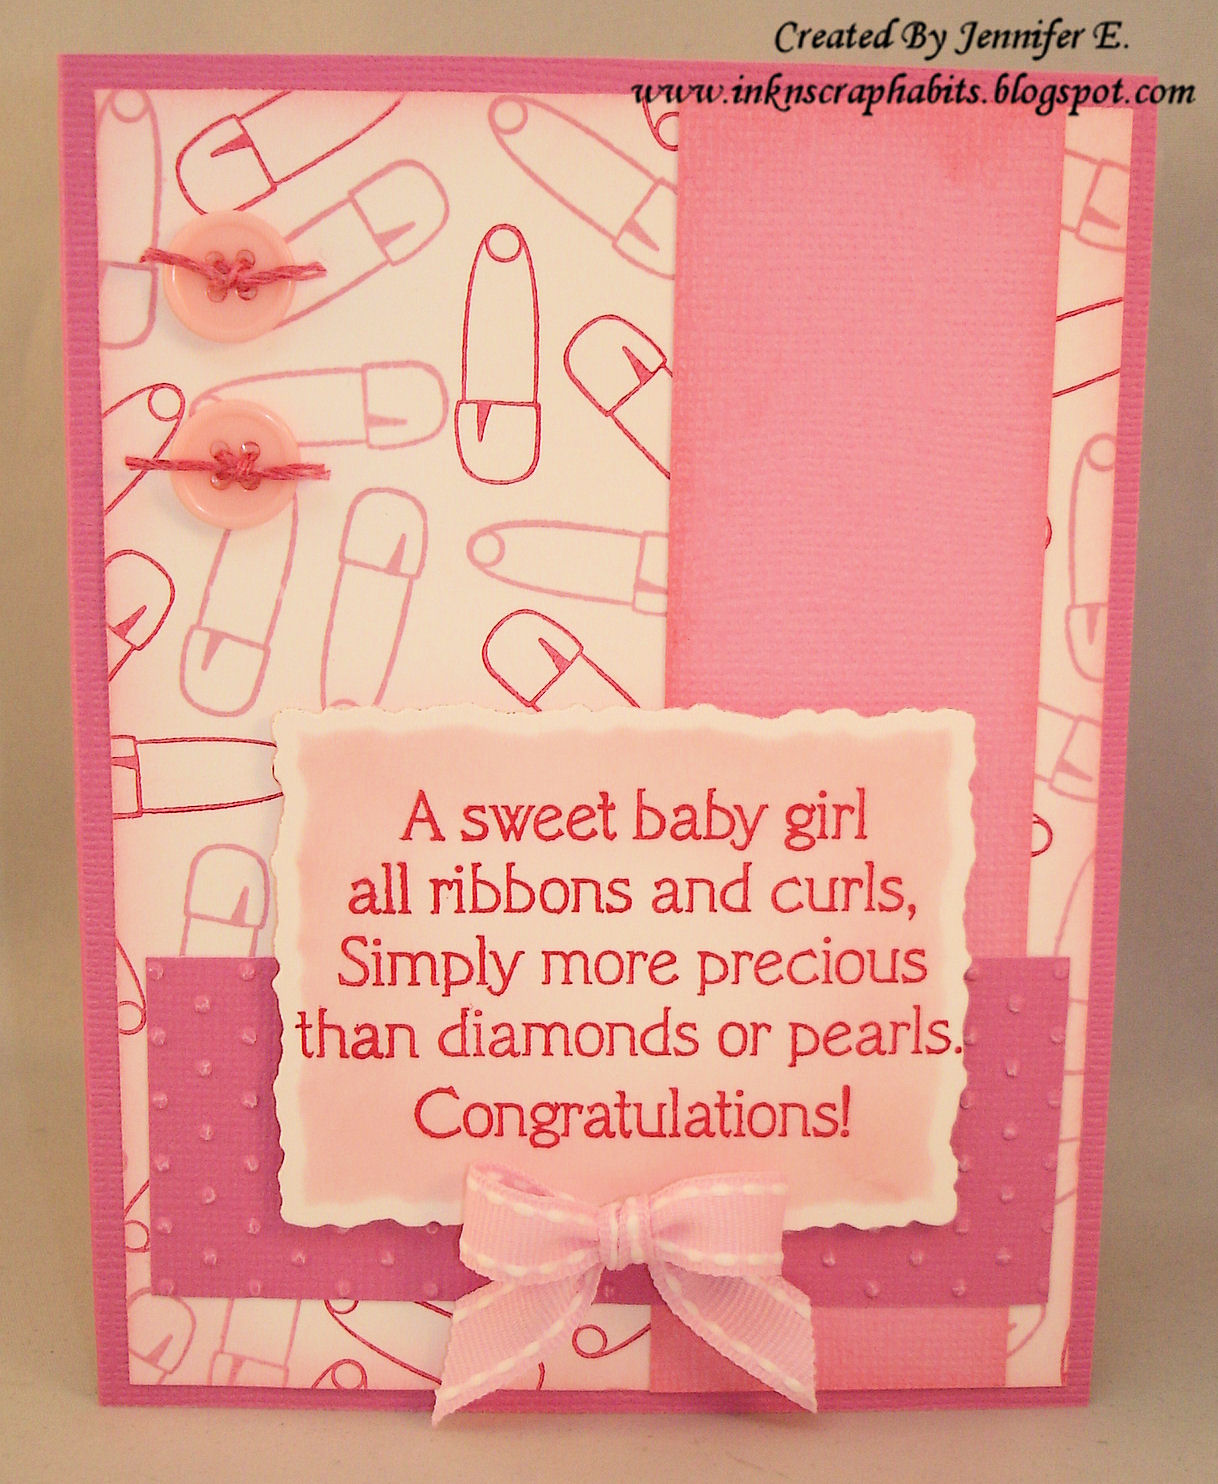
It's been awhile since I've created baby cards and it works out perfectly with this week's challenge on the Craft Your Passion Blog. It's a "Blast From The Past" challenge to use any of their previous challenges. I've selected challenge # 112 For Baby. This challenge is being sponsored by DRS Designs and you could win a $10 DRS Designs Store Voucher. Can you say "FREE" stamps?!?!? Gotta love that! Enter to win HERE.
Both of the baby cards I made are for baby girls! I created my own Diaper Pin (354A) background paper using dark and light pink inks to use on both cards. This one was for a good friend who just had a baby. I made this to go with her gift.
This other card is for my Sister-In-Law who's baby
It turned out to be rather easy to create, with the most enduring part being the background paper. However, it was quick to make since the area was small. It was made by stamping the newly released Argyle Background (438P) with brown ink and then selected diamonds were stamped in blue using the Argyle Diamond (441A). The grassy area under this adorable monkey was done by masking, sponging, and then stamping the Easy Grass Background (059E). The funny Monkey Birthday Greeting (594F) was stamped at the bottom and makes for a great masculine card, don't you think? If I had a brother, I'd give it to him *wink*.
Have a wonderful day!
Smiles,
Jennifer
One of the newer Christmas images from DRS Designs is the Snowman Bird Buddies (232H) that I've used on today's card. I really like how this card turned out--the colors, the layout, and the bit of sparkle on the snowman make this one of my faves!
Since I like all of the elements of this card so much, I'm pretty sure I'll be using this image and greeting for some of the Christmas cards I send out this year. Stay tuned!
Thanks for stopping by. I hope you'll be back soon!
Smiles,
Jennifer