Welcome to Ink N Scrap Habits!
I've created this blog to share my life & love of paper crafts with others. You will read bits and pieces of what goes on in my world and be able to see my paper craft creations! Please leave me a comment if you see something you like. I'd love to hear from you!
I used Copic Markers to colored the image and I added some red Stickles to the ornaments and yellow Stickles to make the star glisten and shine!
Thanks for stopping by and have a wonderful weekend!
Smiles,
Jennifer
The image was colored with Copic Markers and then masked and sponged with yellow ink while in a Nestie die. I kept the design elements of this card fairly simple. As you can see, I used some decorative corner punches, the Swiss Dots embossing folder and some fun red ribbon to dress up this layout.
DRS Designs is giving away free stamps to one lucky participant this week for playing along. Check out the challenge HERE and link your card up to win!
Smiles,
Jennifer
Hi Everyone!
Hope December is off to a good start for you and that your hand-stamped Christmas cards are well underway! I'm still working on mine and I'm happy to be sharing one of them with you today.
I started this by stamping the Triple Trees With Snow (004L) with green ink. Then I cut them out with an oval Nestie die and used red Stickles for ornaments or holly berries, however you prefer to think of them! I also added Icicle Stickles to some of the tree branches and snow mounds beneath the trees, which is better seen in the picture below.
I've seen a lot of holiday cards recently using red, white and Kraft so I thought these colors would be good to show off my holiday pine trees. The White Christmas Text (259P) was stamped with white ink for the background on the Kraft cardstock and the edges were distressed with the same ink for a snowy effect.

The Small Merry Christmas (520D) is a 2-line sentiment, but I cut the words apart and stamped them in one line to fit the sentiment banner using Versamark ink. Then I heat embossed it with white embossing powder. Next, I embellished the banner with a snowflake punchie fastened with a small silver brad. Thick red grosgrain ribbon was added to the top of the card front with a big red bow before adhering it to a 4.25" x 5.5" red cardstock base.
Viola! Another easy Christmas card is complete!
Happy Holidays to you!
Jennifer
Here's a picture of all of us. Left to right is Shelia, Karin, Me and Sue.
Saturday evening after the show we went back to Karin's house where she treated us to pizza, salad, and snacks and then we stamped the night away,literally. I think Shelia and I stayed until about Midnight! Of course it was only appropriate of me to hand-stamp Karin a Thank You card for all of her hospitality. I created 2 different versions of the same card, because its always good to have an extra Thank You card on hand.
As you can see I used the Argyle and solid diamond stamps to create the backgrounds. I also used the Material Maker Square (583L) in the backgrounds as well. The Brush Thank You (1095H) was used as the focal point for both cards. Click on either one of these cards to see a larger view.
Here's the inside of the card I made for Karin. I used a left over scrap from the Argyle Background and matted it with dark green cardstock to embellish the bottom of the inside panel.
Have you thought about making Thank You cards got some of the special Christmas gifts you get this year? These would be perfect and you could even stamp the argyle and solid diamond using red and green ink for the occasion!
That's it for today. Please stop by again soon!
Smiles,
Jennifer
Rarely do I ever combine different challenges, but today's Christmas card was made with 3 challenges in mind. That alone, made things a little more challenging! ;-) But it was fun to coordinate them all together.
•The layout I used is for this weeks Tuesday Morning Sketch Challenge. DRS Designs is their sponsor and 1 lucky winner will win a $10 store voucher to put towards any DRS Designs product of their choice! Use the sketch below for a chance to win!
• The stamped and embossed elements I chose are for this card are for this weeks DRS Designs "snow fun" Blog challenge. This is another opportunity to win free product from DRS Designs! I colored the Snowman Bird Buddies (232H) image with Copic Markers and after masking it I sponged blue ink around the upper portion of the image. I stamped the Interlocking Snow Background (015H) for the vertical panel.
•Then finally for the third challenge I added glitter to enter this card for Last Friday's Free For All challenge on Splitcoast Stampers (F4A144).
Hope you've enjoyed seeing it!
Smiles,
Jennifer
Well, I survived the hectic Thanksgiving holiday how about you? Now that all of the company has gone and I'm well rested after a long weekend it's time to start thinking about my Christmas cards. Unfortunately, I haven't planned ahead all your long like some of you do and I have to make about 25 of them now for my stamping friends. I have several ideas for layouts in my sketchbook but I've gotten sidetracked with DRS Designs latest releases. Have you seen them? These new holiday stamps are now available for purchase and can be found on the new releases page, or stay tuned to my blog over the new week or so to see them being shown off!
I used Copic Markers to color in the Santa Face. I masked it while it was in a Nestie die and sponged light blue ink around it, but it's difficult to see in this photo. The Ho Ho Ho greeting was colored in red and and then I used red Stickles to bling it up a bit.
Don't forget there a few days left for the DRS Designs Turkey challenge. Don't miss out and link up your Thanksgiving Turkey cards HERE for a chance to win a great prize from DRS Designs.
Thanks for taking the time to stop by here today. I appreciate your visit!
Have a wonderful day!
Smiles,
Jennifer
Happy Thanksgiving!
May you be blessed with good food and may you enjoy the company of your family and friends today!
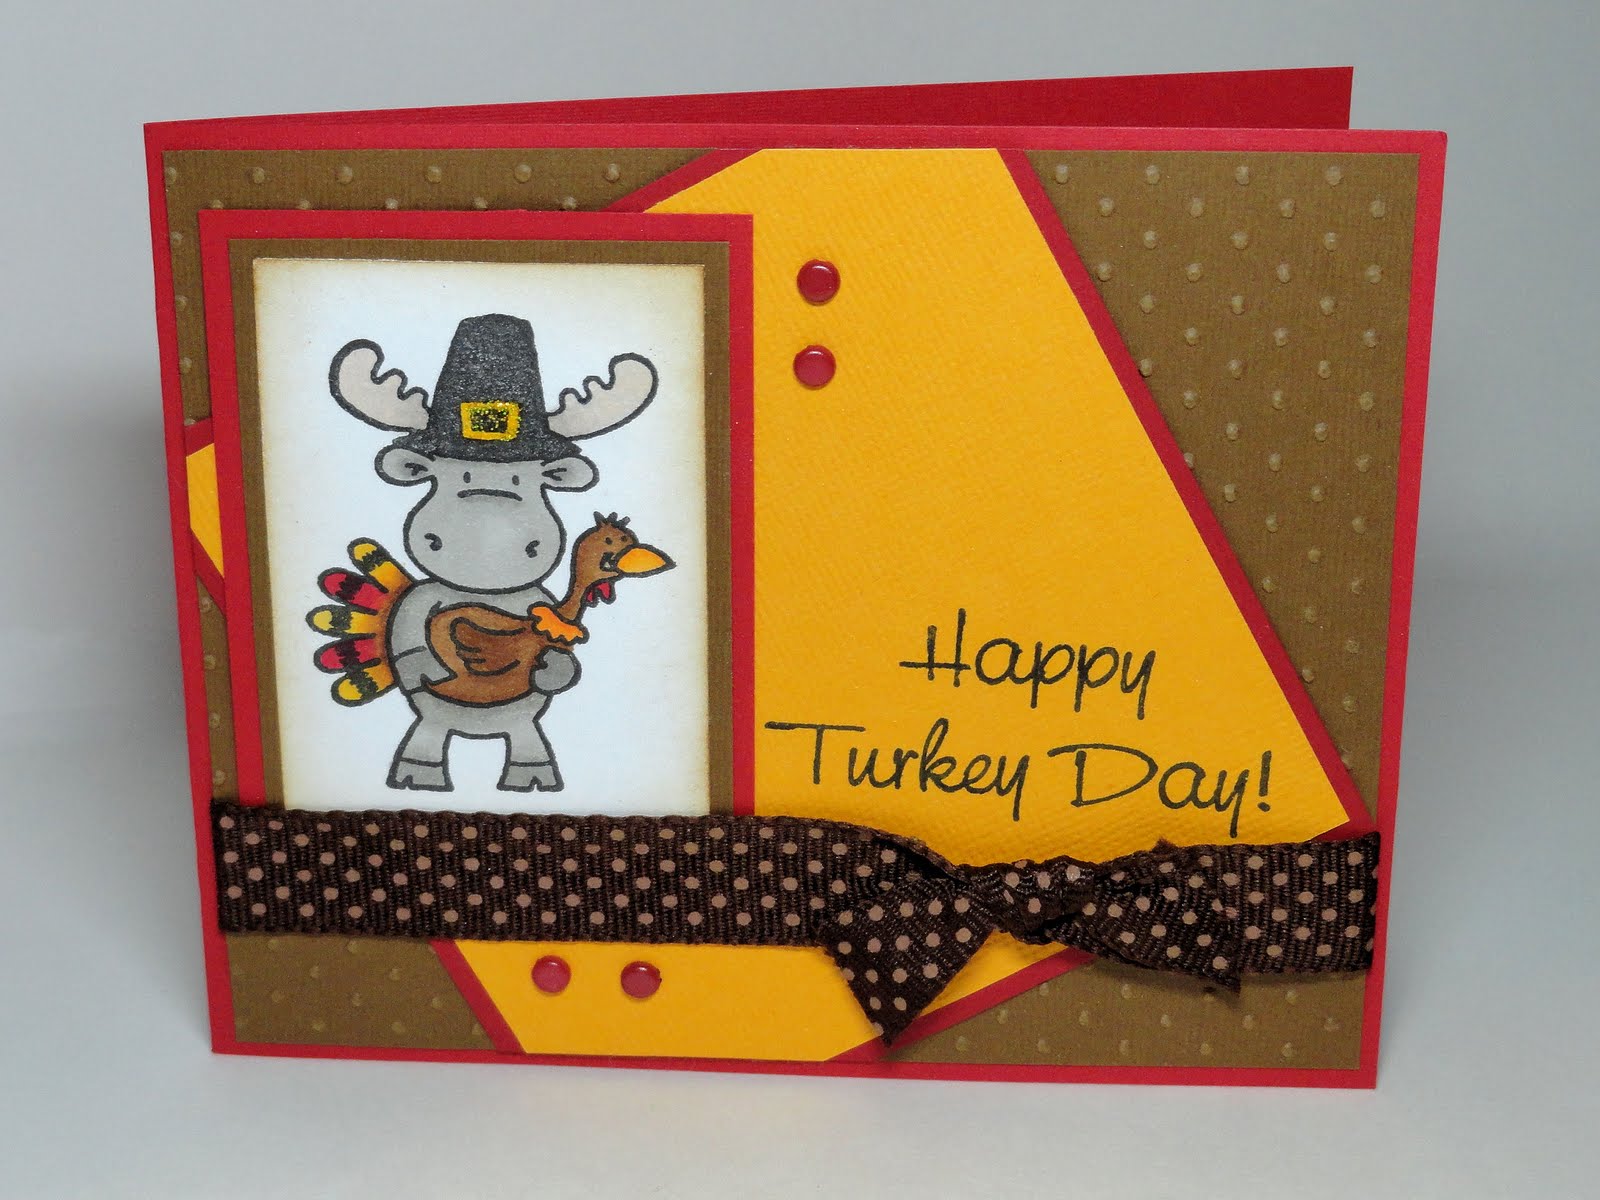
Hope your Turkey Day is wonderful!
Smiles,
Jennifer
Stamps: Riley and Co-Turkey Riley, DRS Designs-Turkey Day Greeting (787E)
With all of the Thanksgiving preparations underway, I was looking for a quick and easy card to make for today's post. The first line of DRS Designs Thankful For the Little Things Greeting (071H), "Leaves of red, orange, and gold," inspired me to create something with leaves to use with it. I decided on a wreath made out of leaf punchies for the focal design on my card front. I thought since I didn't have to color an image I could get it done quickly--wrong! Punching all those little leaves and trying to arrange them in a circle probably took me just as long to do as coloring an image. However, my frustration slowly went away as I saw how elegant this card became with a little distressing, some matted layers, a border punch, some craft glue, and a beautifully tied bow!
I hope each of you has a wonderful and safe Thanksgiving!
Thanks for stopping by!
Smiles,
Jennifer
Happy Sunday! I hope you're having a great weekend!
Things are still really busy here. We've been cleaning, organizing, setting up, and decorating for the big Turkey Day. Our family party seems to keep growing a little bit everyday. We now have 38 people coming for dinner!!! So, it's been hectic, but it will be so much fun to have the extended family together!
All of the stamps I used on today's card are from DRS Designs-Long Tall Wheat (590H), Checkerboard Background (342P), and the Hayrides Harvest Greeting (624H). The greeting was heat embossed with Copper embossing powder, cut out with a Nestie Die and sponged with orange ink while still in the die. The wheat stalks were stamped in SU! More Mustard and Pumpkin Pie inks, the checkerboard was stamped in Versafine Vintage Sepia, and I used a new (to me) embossing folder by Darice for the bottom panel.
Thanks for stopping by!
Hope you have a wonderful week!
Smiles,
Jennifer
Our Thanksgiving preparations are underway! How are yours coming along? We are having about 35 people at our house for Thanksgiving this year, so we have been busy straightening up our basement, setting up tables and chairs, and decorating. Luckily, I don't have to cook--Thank God for Moms and Grandmas who take pride in that, otherwise I would be way over my head! Unfortunately for the Turkey on today's card, we are having turkey with all the fixin's for our meal.

I created this card for the Turkey challenge that can be found on the DRS Designs blog this week and for this weeks Ways to Use It Challenge on Splitcoast Stampers. The image I used is DRS Designs Turkey Propaganda (499H). I colored it with Copic Markers and then masked it, creating a stencil so that only the sign was showing and sponged it with light brown ink. Then I masked the entire image and sponged yellow ink around it. The background panel was created by stamping the new Material Maker Square (583L) repeatedly to create a pattern. A decorative border punch, few silver brads, and some beige grosgrain ribbon were used to embellish this card. Finished size is 5.5" x 4.25."
Until next time, Thanks for stopping by!
Smiles,
Jennifer
Don't these apples look delish?!?! They make me think of the yummy apple crisp I'm making for our Thanksgiving holiday. My mouth is watering already just thinking about that wonderful meal!
They apples were colored with Copic Markers and brown ink sponged around them while in a nestie die. The checkerboard was stamped with SU! Real Red and I used the Swiss Dots embossing folder for the beige portion of the card front. Some red brand and brown grosgrain ribbon finished this card nicely.
Thanks for stopping by to see my work!
Smiles,
Jennifer
I normally always make cards that are A2 size but while cleaning out some drawers the other day I found a bunch of envelopes left over from my wedding thank you cards. They measure 3.5 inches by 5 inches and I thought it would be nice to make a bunch of smaller cards especially for thank you's and sympathy cards.
The card I'm showing today uses DRS Designs Triple Crosses (510G), a portion of their Faith Greeting (243F), and I stamped their new Material Square Background Maker (583L) in yellow for the bottom portion of the card front. The layout I used follows this week's My Favorite Things Sketch challenge. I used decorative scissors for the edge enhancement of the card front, fun ribbon and 3 tan rhinestones for the embellishments.
Hope you like it!
Smiles,
Jennifer
The new challenge on the DRS Designs Blog this week is candles. I got a little creative and changed up the Holly Hurricane (164M) to look more harvest-like.
The candle, hurricane glass, and bow were colored with Copic Markers. I sponged light brown ink around the hurricane and then added a bit of yellow Stickles to the candle flame and then Diamond Glaze to the hurricane make it look like real glass. For the transition from a Christmas image to a Thanksgiving image, I stamped the Bunch of Wheat (137K) repeatedly, colored them with Copic Markers, fussy cut them out, and then arranged them over the bottom of the hurricane to cover up the holly. I replaced the bow that was originally there.
The new Thanksgiving Blessings Sentiment (637E) was broke up and stamped individually to fit the layout.
DRS Designs is giving away a great prize this week for this challenge. Check out all the details HERE and link up your card for a chance to win!
Thanks for stopping by, hope you'll be back soon!
Smiles,
Jennifer
This past Saturday DRS Designs released some great new stamps perfect for making Thanksgiving cards and I'm sharing some of them off today with this bright and cheery card!
I used the Sunflower Trio (345G) to decorate the Beauty of An Autumn Day Greeting (788G). The sunflowers were colored with Copic Markers and then I added some bling to them with Yellow Stickles. The greeting was stamped with brown ink and then I used a Nestie die to cut it out. I sponged yellow ink around it before taking it out of the die. The new Checkerboard background stamp (342P) was used to create the background panel. The Swiss Dots embossing folder, some brown grosgrain ribbon, and few brown brads made this card complete.
Here's a close up of the greeting panel. Aren't those sunflowers gorgeous?!?!
Run over to the New Release page to check them out along with the rest of the new stamps HERE.
Thanks for stopping by and have a wonderful day!
Smiles,
Jennifer
It's November already! Can you believe it!?!? DRS Designs is starting out the month with some new releases and I've used a few of them on the card I'm sharing today. The layout I used for this card is one of the sketch challenges from Splitcoast Stampers, SC390.
The focal scene was made using the new Scarecrow image (566F) and the Long Tall Wheat Stalks (590H). I used the masking technique to add the Silhouette Fence (500G). The scarecrow was colored with Copic Markers, and the bottom of the oval was sponged with brown ink to create the ground. The wheat stalks were stamped with More Mustard and Summer Sun inks.
The background design on the sentiment panel was stamped using the new Material Maker Square (583L). I stamped it with orange chalk ink and the result looks like pattern paper! The fun "Happy Fall Y'all" sentiment (635B) is also part of this new release. The vertical panel was embossed with a new-to-me embossing folder by Darice.
Stay tuned to the new release page of the DRS Designs website to see all of the new releases as soon as they become available.
Have a wonderful weekend!
Smiles,
Jennifer
Hi Stampers!
Today I'd like to share with you another opportunity to win free stamps from DRS Designs! DRS Designs is the sponsor of this week's Play Date Cafe Blog challenge and the inspirational photo goes right along with the DRS Autumn Greetings challenge. (You could create one card and enter it for both challenges! But, shh, don't tell anyone I told you to do that LOL!)
Inspired by the colors above, I created an Autumn Greeting card which also sneak peeks one of DRS Designs new stamps! (Stay tuned, new stamps will be released this Saturday November 3rd!)
The soon-to-be-released Open Leaf stamp (584D) works perfectly with the Medium Silhouette Leaf (701D) as a 2 step stamping process. I started first by stamping the Silhouette Leaf 3 times with an Autumn colored rainbow ink pad. Then, I stamped the Open Leaf on top of them in burgundy ink. I stamped the Script Font Background (098P) over top with orange chalk ink and then distressed the edges in orange as well. The card base was made from red cardstock and I stamped the top of it with the One Line Beauty of Autumn (704D). A beautiful variegated burgundy ribbon was used for the trim.
Don't forget to check out both challenges for a chance to win!
Thanks for stopping by and please visit again soon!
Smiles,
Jennifer
Happy Halloween!
I know this is a busy day for everyone, so I'm going to keep things short and sweet today.
Hope you have a safe and wonderful Halloween!
Happy Haunting and "Trick or Treating!"
Smiles,
Jennifer
Well, another month here and gone and it's true, Halloween is almost here!
Our costumes are sewn, the accessories have been purchased, the pumpkins are carved, and the candy bowls are full! Our household is ready!
Today's card was made with new Halloween stamps from DRS Designs. I wanted to create a different Halloween card--something a little different from the traditional orange and black. When I colored the Fuzzy Spider (550H) with Copic Markers, I colored parts of his legs green for a fun and eerie look.
Are you ready for Halloween?
Smiles,
Jennifer
Hi everyone, happy Sunday! Hope you're having a wonderful weekend!
Today I'm sharing a fun marshmallow card I made when DRS Designs latest stamps were released. Their marshmallow collection reminds me of the bon fire traditions my family shares every year.
Many people associate roasting marshmallows and S'mores with Summer campfires, but it's often too warm for my family to really enjoy them in the Summer. We have most of our bon fires in the Fall. Having a bon fire on Halloween night has become a tradition for us. We sit in camping chairs in the middle of our driveway, with a portable fire pit, and decorate the area around us with our freshly carved Jack O' Lanterns. While passing out Halloween candy to all the ghosts and goblins who pass by, we enjoy some yummy, ooey, gooey marshmallow treats of our own.
For this card, I used the new Mini-Marshmallow (493A) to create the background. I stamped it repeatedly with Versamark. This little guy is perfect for a background because he really is "mini." He only measures 0.5" x 0.5"! The Melt For You Greeting (497B) fit perfectly in the window of an SU! punch and I used it to fill in the empty space in the lower right hand corner of my card front. I added 2 small rhinestones to dress it up a bit.
Here's a close up of the Toasting Marshmallow (430L) that I used as the focal image. I always have to add a bit of sparkle to the flames when I use this image. The yellow Stickles are perfect here!
Well that's about it for me today. But, stay tuned to my blog over the next few days. New stamps are coming out from DRS Designs very soon and I'll have some sneak peeks for you! I'm pretty certain you'll love them! ;-)
Until next time,
Smiles,
Jennifer
The sentiment I used for my focal point is the Changing Leaves Thanksgiving Greeting (1122G). I stamped it with Vintage Sepia Versafine and then sponged orange ink over it while it was in a Nestie die. I decorated it with 3 brown rhinestones and adhered it with foam tape for a little added dimension.
So, tis the season for creating Autumn Greetings...I hope you'll link up your project on the DRS Blog so you can win the fabulous prize they're giving away this week! Check out all the details HERE!
Have a wonderful Halloween weekend and stop by again soon!
Smiles,
Jennifer
Hi Stampers! Happy Wednesday! I hope you're having a wonderful week!
Today I'd like to share with you the details about this week's Wicked Wednesday ATC challenge. DRS Designs is their sponsor and for playing along, you have a chance to win a $10 gift certificate to the DRS Designs store. The theme is "Full Moon."
It's been a really long time since I've created any sort of ATC's, so I decided to take this opportunity to create a Halloween ATC and then I used it to create a card. If you're familiar with ATC's, you know that they are only 2.5" x 3.5" in size. It was a nice change to work on a smaller scale! The Halloween scene on my ATC was created using 3 stamps from DRS Designs: the Spooky Tree with Moon (070L), the Accent Bats (517A), and a portion of the Moonlight and Magic Halloween Greeting (609G). Everything was colored with Copic Markers, even the background--I originally started with white cardstock! I used a scalloped rectangle die to create a mat for the scene and used an ATC sized piece of yellow shimmer cardstock for the base. I thought the black ribbon completed it nicely.
Then I created this card by adding a little texture with a star embossing folder, some star-shaped rhinestones, and yummy purple and yellow plaid ribbon. I used the remaining portion of the Moonlight and Magic greeting at the top, and the ATC was added at the bottom. Viola! Another Halloween card was complete!
Please check out all of the wonderful ATC's created by the Wicked Wednesday DT and link your ATC for a chance to win!
Thanks for stopping by!
Smiles,
Jennifer
I've had this adorable Cat stamp combo for quite awhile now and can't believe this is my first time getting them inky. This week's DRS Designs Cat challenge was the perfect opportunity, and I'm glad to finally be showing them off!
The Cat in the Bag (1118H) was colored with Copic Markers. I broke up the Cat's Meow Birthday Greeting (1125G) to fit my layout. I highlighted the words "cat's meow" with a sentiment tag that was popped up on foam tape. The shading around the image was done with a sponge while it was in a Nestie die and I used Post-It Notes to mask off the edges on the sentiment tag.
I hope you'll join us on the DRS Designs Blog for a chance to win some free stuff from DRS Designs.
Happy Stamping!
Smiles,
Jennifer
PS: For those of you in the Cleveland, Ohio area, the Adventures in Stamps rubber stamp and scrapbook convention is this weekend (October 19th and 20th) at the Ehrnfelt Event Center in Strongsville. Stop by the DRS Designs booth for some demonstrations and Make n Take projects and meet several of the DRS DT members, including myself! Hope to see you there!
Nothing says Fall like apples, and what could be better then a yummy, caramel one!?!?! I colored DRS Designs Candy Apple (082K) to look like it was dipped in oooey-gooey caramel. Is your mouth watering yet?
I used shimmer, copper cardstock for my card front and heat embossed the Smell My Feet Greeting (524F). Tis the season for a bit of spooky-ness added with the spider web border and a nice brown ribbon to match!
I hope this Halloween gives you something good to eat!
;-)
Smiles,
Jennifer
Hello Stamping Friends!
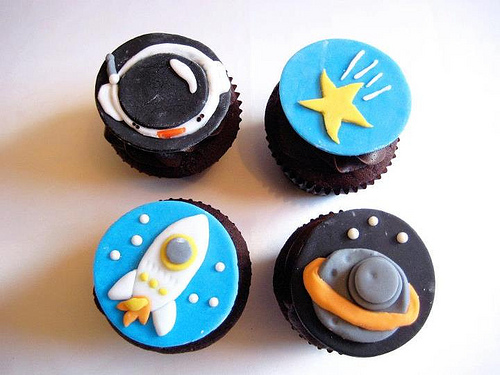
How about a little something to brighten your Monday? Would you be interested in shopping for free at DRS Designs? You'll have a chance to do so by playing along with the Cupcake Inspirations blog challenge this week. The challenge is to create anything using this photo for inspiration. You can use it as a theme challenge, color challenge, sketch challenge etc.
I decided to stay with the space theme and created this card using DRS Designs stamps.
Smiles
Jennifer


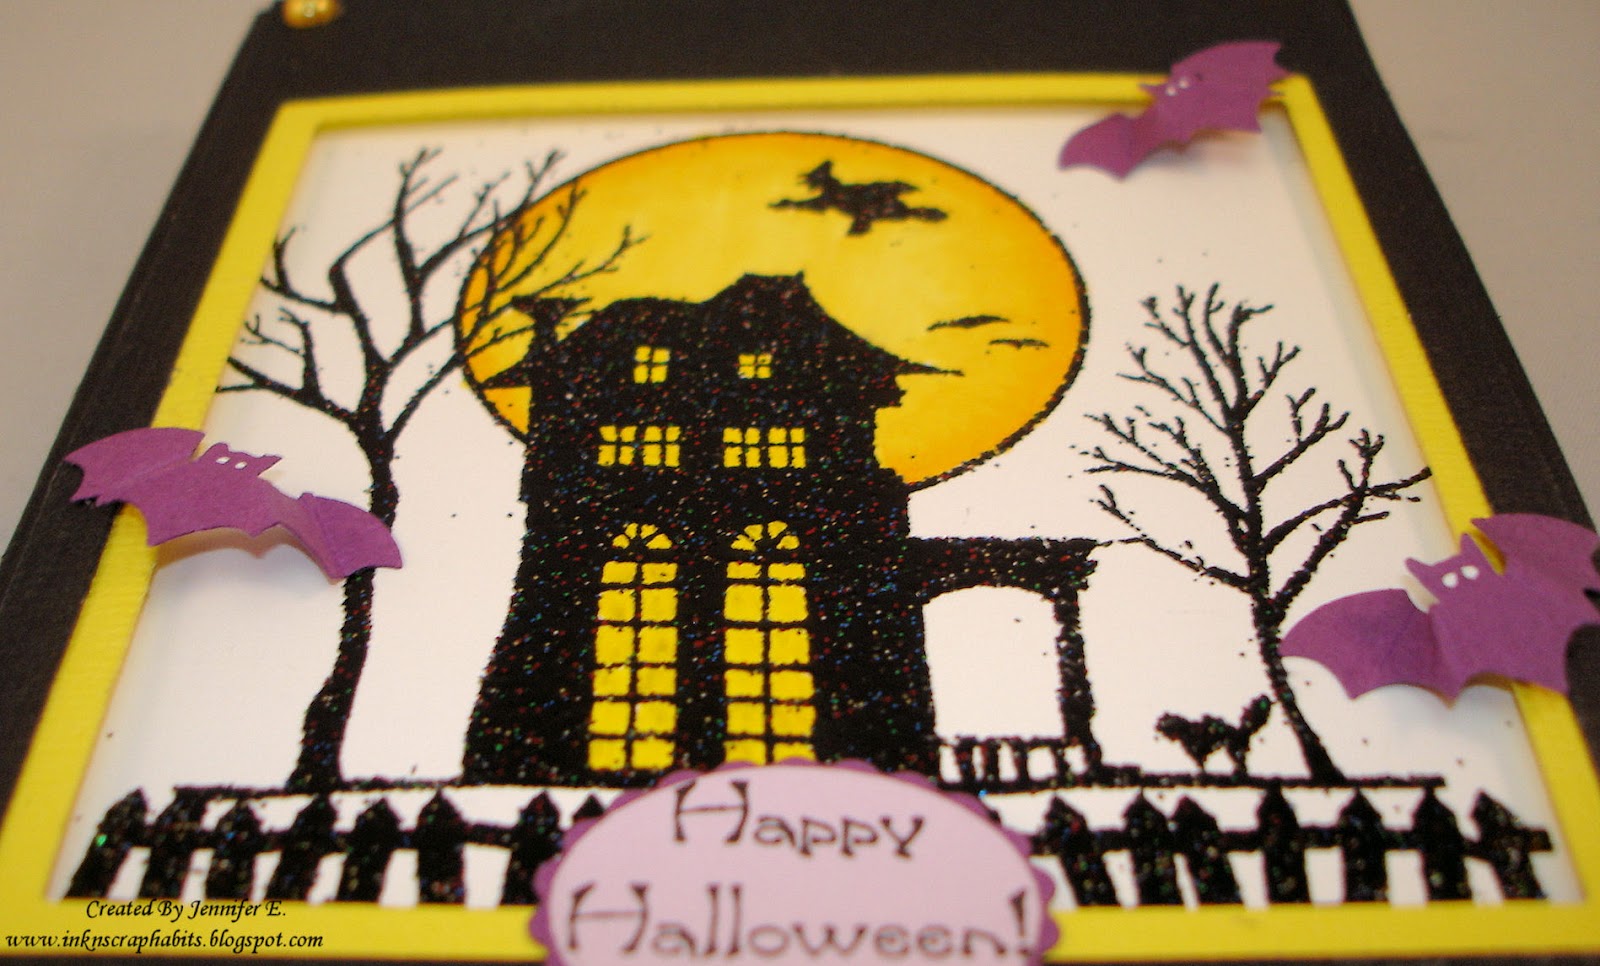
I initially wasn't going to do any more to the card front since I thought it looked fine with the stamped image, sentiment, and the frame alone, but I thought some bat punchies would be a nice touch. They are from a Martha Stewart punch and I added eyes to them with a white gel pen. I also gave a little texture to them by scoring their wings which gave them a 3D look. (Sorry, I don't remember whose blog gave me this great idea, but if it's you or you recognize the idea, please let me know so I can edit this post to give credit appropriately.) I adhered each of them so that they looked like they were flying above the image within the frame.
Please check out all of the details for this week's witch challenge on the DRS Designs Blog. They have a great prize up for grabs and one lucky winner will get it just for playing along. I hope it's you!
Have a great day!
Smiles,
Jennifer
Hi Everyone!
My card front was made from orange vellum that I distressed with black ink. I stamped the Accent Bats around the edges and then adhered it on to a black cardstock base. Next, I stamped the Witches Brew Halloween Greeting on white cardstock and matted it on black. I stamped the accent bats around the edges of this as well to fill in the blank white space. This was then adhered to the center of the card front. Next, I stamped the Burning Cauldron on white cardstock and colored it with Copic Markers. Then I fussy cut it out, and adhered it to the lower right corner as shown.
I embellished this card with a few bats punchies that I made a bit spookier by adding white eyes with a gel pen, and yellow Stickles made the cauldron flames look realistic. This card was pretty easy to stamp overall and I love how festive it is!
Hope you enjoyed seeing it!
Thanks for stopping by today.
Have a great day and please visit again soon!
Smiles,
Jennifer
Here's my entry for the new blog challenge on the DRS Designs web site. The theme this week is Fall Leaves.
I used the Changing Leaves Thanksgiving Greeting (1122G) for my focal point. I stamped it using brown ink and used a Nestie Die to cut it out. I sponged orange ink around it while it was still in the die. I added a leaf punchie and a small bow tied with natural twine to embellish it. I used a piece of craft cardstock for my card front and stamped it with the newly released Tree Limb (568P) Versamark ink. However, the second tree from the left was stamped in brown ink to make it stand out. I added orange, brown and burgundy leaf punchies to decorate the trees. I used a corner rounder on the craft card front and then adhered it to a 4.25' x 5.5" white cardstock base.
Please visit the challenge on the DRS Designs blog for a chance to win your choice of 2 stamps from DRS Designs!
Thanks for stopping by!
Smiles,
Jennifer