Welcome to Ink N Scrap Habits!
I've created this blog to share my life & love of paper crafts with others. You will read bits and pieces of what goes on in my world and be able to see my paper craft creations! Please leave me a comment if you see something you like. I'd love to hear from you!
Hi Friends, Happy Monday! Hope you had a wonderful weekend!
Today I'm sharing the second part of my previous post. The "It's A Jungle Out There" ATC Challenge on the Wicked Wednesday Challenge Blog this week is sponsored by DRS Designs. I've used the ATC I created for the challenge on this card, and the layout I've used is a sketch from Splitcoast, SC418.
Smiles,
Jennifer
The Wicked Wednesday ATC Challenge this week is "It's A Jungle Out There." I created this cute ATC using DRS Designs Jenny Giraffe (859G) which was colored with Copic Markers. I used a Post-It Note to sponge in the ground line and then I tried getting a little creative with the tree. I used the Spooky Bat Tree (406H) for the tree trunk, cut off the moon and then covered the upper portion with leaf punchies punched from cardstock scraps.
If you like to make ATC's, I encourage you to play along and link yours HERE. DRS Designs is giving away a $15.00 voucher toward FREE stamps!
Stay tuned for my next post. I'll be showing 'It's A Jungle Part 2!' where I'll use this ATC on a card and I promise it will be just as cute!
Have a great weekend!
Smiles,
Jennifer
Here's my entry for the button challenge that can be found on the DRS Designs Blog this week. I created it to show off the new Life is Friendship sentiment (794F). I thought it was perfect for the Snowman Bird Buddies (232H) image. Since it is a Winter theme, I had to use snowflakes for my background paper. I stamped the Interlocking Snowflake stamp (015H) in blue and purple inks. I added 2 blue buttons to the background panel and love the finished look! I often forget to use buttons for embellishments, but I'm definitely inspired by all of the sample cards seen on the Challenge post! This challenge was a wonderful reminder and I hope to include buttons more routinely in my card making.
Thanks for stopping by and checking out my post today. Hope you'll be back soon!
Smiles,
Jennifer
I have a little something different to show you today, and I bet you've already peeked at the pics below and your first thought was 4th of July cards...Nope! My friend Nancy participates with an organization called Blankets Of Hope. Blankets Of Hope provides blankets to sick or wounded Soldiers/Veterans who are returning to the US. Each blanket has a 4-1/4 x 5-1/2 cardstock tag attached to it that the blanket maker uses to write a note to the soldier. That's what I've made below--10 blanket cards!
I apologize a few of these pictures are blurry. Had I not already sent the cards in I would have retaken them, but they are in transit to Nancy for the assembly event later in January!
Each card was hand stamped with stamps from DRS Designs. The cards didn't have to be patriotic but what US soldier doesn't love red, white, and blue? I thought making them patriotic was appropriate and DRS Designs has some stamps that were perfect for the occasion. Here's a list of stamps that I used to create them:
These were a lot of fun to make and I loved the fact that I had to leave room for a handwritten message. It made me remember to keep them simple, and that made these quick and easy to create!
Smiles,
Jennifer
DRS Designs is starting off the New Year just right...with new stamps! Check them all out HERE! If you make Valentine's Day cards, cards for Winter Wishes, or even some masculine cards then this release is for you. I'll be sharing a card for each of these occasions very soon and today I'm sharing my Valentine's Day card.
I know this almost looks like a Christmas card, but I love red and olive colors together. I've used the Heart Stem Rose (789G) and the Love You More Greeting (796B) on this card. Both are brand new. I colored the image with Copic Markers. It's so elegant and can be used for many different types of cards. I've got many ideas in my head for it!
Hope your weekend is full of lots of stamping fun!
Thanks for visiting.
Smiles,
Jennifer
Happy New Year!
I hope you've all had a wonderful holiday! I've taken a small break from all things crafty to spend more time with family over the holidays. But now, I'm eager to get back into the swing of things. During my break I received some new dies and stamping supplies, and fresh batch of rubber was just the icing on the cake! Nothing gets me in the mood to stamp like new stuff!
I'm having a blast creating cards with stamps that DRS Designs is releasing this Saturday, January 5th. The "Hogs and Kisses" sentiment (785B) I've used here is part of this release. It goes so well with this Cupig image (607G) and the stamped Interlocking Heart Background (808H). All together they make an adorable Valentine's Day card!
Have a great day!
Smiles,
Jennifer
Hi Friends! Happy holidays to you!
I hope you had a very Merry Christmas! Christmas for us was wonderful! We were blessed to have 4 separate family parties to attend which were full of all our loved ones, great food, and wonderful holiday spirit! Anthony is now 18 months old (I just can't believe it!!) and he might not understand what Christmas is all about just yet, but with all of the gifts he received, he's a pro at opening wrapped gifts! It was such a joy to see him so excited and I know this is just the beginning! I struggled for weeks trying to get him to cooperate for my family Christmas cards and at the first family party it took about 30 of us chanting his name to get this one. He sure doesn't look 18 months in this picture does he?!?!
Now that the Christmas holiday is over I'm slowly getting back to stamping and blogging. DRS Designs is gearing up for their next release (January 5th) and the card I'm showing off is a little sneak peek of what's to come.
I created a Clean and Simple card using this week's sketch challenge from the 365 Cards Challenge blog for my inspiration. Play along for a chance to win a prize toward free stamps from DRS Designs.
Stay tuned to my blog this week to see more of DRS Designs new stamps.
Have a safe and wonderful New Years!
Smiles,
Jennifer
Here's my second Christmas card design that was send out to my stamping friends. I thought this was a pretty simple design at first, but after making just a few I realized just how involved this card actually was. But, I think it turned out so pretty and that's why I decided to stick it out and create so many!
The wreath design was created using leaf punchies from an EK Success punch. I loved using up different colors of my cardstock scraps for the green leaves! I used a craft glue to adhere them around the circle in the red cardstock base and then I added "berries" with red Stickles. I stamped DRS Designs Merry Christmas Arc (102E) above the wreath, and added a sheer red ribbon bow to the bottom.
The inside greeting is also by DRS Designs. I stamped the Simple Joys of Christmas Greeting (957F) so that it would be seen through the wreath on the card front.
Violia! Twenty-five handmade cards signed, sealed and delivered!
Merry Christmas,
Jennifer
The days are dwindling down, only 5 more days til Santa's here! All of my shopping AND wrapping is done! I'm usually never done this early, if you can call this early! I'm enjoying the fact that I don't have to head out into the hecticness other than to grocery shop!
For those of you looking for details on the wreath card I previewed a few days ago, have no fear! You can see it here tomorrow. Today's Christmas card was inspired by this weeks DRS Designs blog challenge which began today.
The challenge is to use the Torn Paper technique. Can you see where I've used it on this card? I tore white card stock to create the snow mounds at the bottom of the Christmas Lamp Post (238H). This image was colored with Copic markers and then masked to create the night sky around it by sponging blue ink. Then I used a glue pen and applied glitter on the snow mounds and made the falling snowflakes. The sentiment is the Merry Christmas Arc (102E) and the bottom of the card front was done using the Score-Pal.
For a chance to win 2 stamps of your choice from DRS Designs, check out the Torn Paper challenge on the DRS Designs blog.
Thanks for taking the time from your holiday preparations to stop by today. I greatly appreciate your visit!
Smiles,
Jennifer
Hi Friends!
Well as promised, here is my first Christmas card design I created to send to my stamping friends.

I received a card made with this type of layout a while back and always wanted to try it. As you can see, I made it a point to use it for one of my Christmas cards this year. I love the unique folding style of this card! Unfortunately, I wasn't able to find a tutorial on this specific kind of card, but it seems to be a cross between a Double Z-Fold card and a Gate Fold Card. Finished card size is A2-4.25" x 5.5"
I created my own background papers by stamping DRS Designs Polka Dot Background (688P) with red and green ink. I stamped it vertically with one color and then horizontally with the second color so that 2 colors weren't stamped on top of one another. It created a really fun pattern! The left half of the Happy "Holly" Days sentiment (888B) is adhered to the left panel and the right half of the Girl Swirl Holly (887G) is adhered to the right side of the card. The way the card is folded, it stays closed by tucking the left side panel behind the Holly image you see on the card front, and to open, you tug lightly on the the left panel, and it slides out from underneath the holly image. All of the edges were distressed lightly with green ink and I added Diamond Glaze to the holly berries to make them stand out.
Thanks for taking time to stop by today. I know this is a very busy time of year for everyone and I appreciate your visit more than ever!
Happy "Holly" Days,
Jennifer
These are the Christmas cards I made this year to send to my stamping friends. Stay tuned to see each of these card designs individually in a later post this week.
Hope your holidays are Merry!
Smiles,
Jennifer
I originally set out to make a CAS card for the Ribbon Challenge on the DRS Blog, but like most of my cards I wasn't happy with the "simple" look. I kept adding more elements and before I knew it, it was no longer CAS! But, I love how it turned out and hope you do too!
Here's how I made it:
I started with a red note card base that measures 3.5" x 5". I created the background design by stamping the Open Plaid (631P) with red ink. Stamping it diagonally in both directions created the plaid. I used a decorative border punch at the bottom of the plaid cardstock, and added red ribbon just above it. I added a poinsettia paper flower to the center of the ribbon that I dressed up with a small white button tied with a red and white twine bow to the center. I, once again, used a portion of the Christmas Multi Greeting (341H) for the sentiment. I love this stamp!

Finally, I glittered up some snowflake punchies and added a red rhinestone to each center. Then I placed them as shown over the plaid background.
Looking for FREE stamps?
Run over to DRS Designs and check out their Ribbon challenge. This week's prize is a $10 store voucher. Play along and it just might have your name on it!
Good Luck and Happy Holidays!
Smiles,
Jennifer
The current challenge on the Cupcakes Inspiration Blog inspired me to create today's Christmas card. Here's the inspiration photo. Those snowmen are just too cute to eat!
Both the Large Snowman Portrait (001L) and the sentiment are by DRS Designs. I found this snowman image already colored and ready to use in a binder where I keep my extra stamped images. I colored it a long time ago with Prismacolor pencils and Odorless Mineral Spirits. Its been a long time since I've used that coloring technique that it kind of makes me want to put my Copic Markers away for a little bit! I got a little creative with the sentiment as it is part of the Christmas Multi Greeting (341H). I use this stamp often when I need a Christmas sentiment to fit a certain space or area. I just cut out the portion that I want to use from my cling-mounted stamp and use it as an individual stamp. It's like having 7 stamps in 1! I decorated the sentiment tag with a punched snowflake and a holly paper punch.
Well, that's it for today. I'm off to finish up some more Christmas cards. I've got to get them in the mail soon!
Have a wonderful Monday!
Smiles,
Jennifer
PS: DRS Designs is sponsoring the Cupcake Inspiration Challenge I mentioned above. You have a chance to win a $10 store voucher. Check out all the details HERE!
I used Copic Markers to colored the image and I added some red Stickles to the ornaments and yellow Stickles to make the star glisten and shine!
Thanks for stopping by and have a wonderful weekend!
Smiles,
Jennifer
The image was colored with Copic Markers and then masked and sponged with yellow ink while in a Nestie die. I kept the design elements of this card fairly simple. As you can see, I used some decorative corner punches, the Swiss Dots embossing folder and some fun red ribbon to dress up this layout.
DRS Designs is giving away free stamps to one lucky participant this week for playing along. Check out the challenge HERE and link your card up to win!
Smiles,
Jennifer
Hi Everyone!
Hope December is off to a good start for you and that your hand-stamped Christmas cards are well underway! I'm still working on mine and I'm happy to be sharing one of them with you today.
I started this by stamping the Triple Trees With Snow (004L) with green ink. Then I cut them out with an oval Nestie die and used red Stickles for ornaments or holly berries, however you prefer to think of them! I also added Icicle Stickles to some of the tree branches and snow mounds beneath the trees, which is better seen in the picture below.
I've seen a lot of holiday cards recently using red, white and Kraft so I thought these colors would be good to show off my holiday pine trees. The White Christmas Text (259P) was stamped with white ink for the background on the Kraft cardstock and the edges were distressed with the same ink for a snowy effect.

The Small Merry Christmas (520D) is a 2-line sentiment, but I cut the words apart and stamped them in one line to fit the sentiment banner using Versamark ink. Then I heat embossed it with white embossing powder. Next, I embellished the banner with a snowflake punchie fastened with a small silver brad. Thick red grosgrain ribbon was added to the top of the card front with a big red bow before adhering it to a 4.25" x 5.5" red cardstock base.
Viola! Another easy Christmas card is complete!
Happy Holidays to you!
Jennifer
Here's a picture of all of us. Left to right is Shelia, Karin, Me and Sue.
Saturday evening after the show we went back to Karin's house where she treated us to pizza, salad, and snacks and then we stamped the night away,literally. I think Shelia and I stayed until about Midnight! Of course it was only appropriate of me to hand-stamp Karin a Thank You card for all of her hospitality. I created 2 different versions of the same card, because its always good to have an extra Thank You card on hand.
As you can see I used the Argyle and solid diamond stamps to create the backgrounds. I also used the Material Maker Square (583L) in the backgrounds as well. The Brush Thank You (1095H) was used as the focal point for both cards. Click on either one of these cards to see a larger view.
Here's the inside of the card I made for Karin. I used a left over scrap from the Argyle Background and matted it with dark green cardstock to embellish the bottom of the inside panel.
Have you thought about making Thank You cards got some of the special Christmas gifts you get this year? These would be perfect and you could even stamp the argyle and solid diamond using red and green ink for the occasion!
That's it for today. Please stop by again soon!
Smiles,
Jennifer
Rarely do I ever combine different challenges, but today's Christmas card was made with 3 challenges in mind. That alone, made things a little more challenging! ;-) But it was fun to coordinate them all together.
•The layout I used is for this weeks Tuesday Morning Sketch Challenge. DRS Designs is their sponsor and 1 lucky winner will win a $10 store voucher to put towards any DRS Designs product of their choice! Use the sketch below for a chance to win!
• The stamped and embossed elements I chose are for this card are for this weeks DRS Designs "snow fun" Blog challenge. This is another opportunity to win free product from DRS Designs! I colored the Snowman Bird Buddies (232H) image with Copic Markers and after masking it I sponged blue ink around the upper portion of the image. I stamped the Interlocking Snow Background (015H) for the vertical panel.
•Then finally for the third challenge I added glitter to enter this card for Last Friday's Free For All challenge on Splitcoast Stampers (F4A144).
Hope you've enjoyed seeing it!
Smiles,
Jennifer
Well, I survived the hectic Thanksgiving holiday how about you? Now that all of the company has gone and I'm well rested after a long weekend it's time to start thinking about my Christmas cards. Unfortunately, I haven't planned ahead all your long like some of you do and I have to make about 25 of them now for my stamping friends. I have several ideas for layouts in my sketchbook but I've gotten sidetracked with DRS Designs latest releases. Have you seen them? These new holiday stamps are now available for purchase and can be found on the new releases page, or stay tuned to my blog over the new week or so to see them being shown off!
I used Copic Markers to color in the Santa Face. I masked it while it was in a Nestie die and sponged light blue ink around it, but it's difficult to see in this photo. The Ho Ho Ho greeting was colored in red and and then I used red Stickles to bling it up a bit.
Don't forget there a few days left for the DRS Designs Turkey challenge. Don't miss out and link up your Thanksgiving Turkey cards HERE for a chance to win a great prize from DRS Designs.
Thanks for taking the time to stop by here today. I appreciate your visit!
Have a wonderful day!
Smiles,
Jennifer
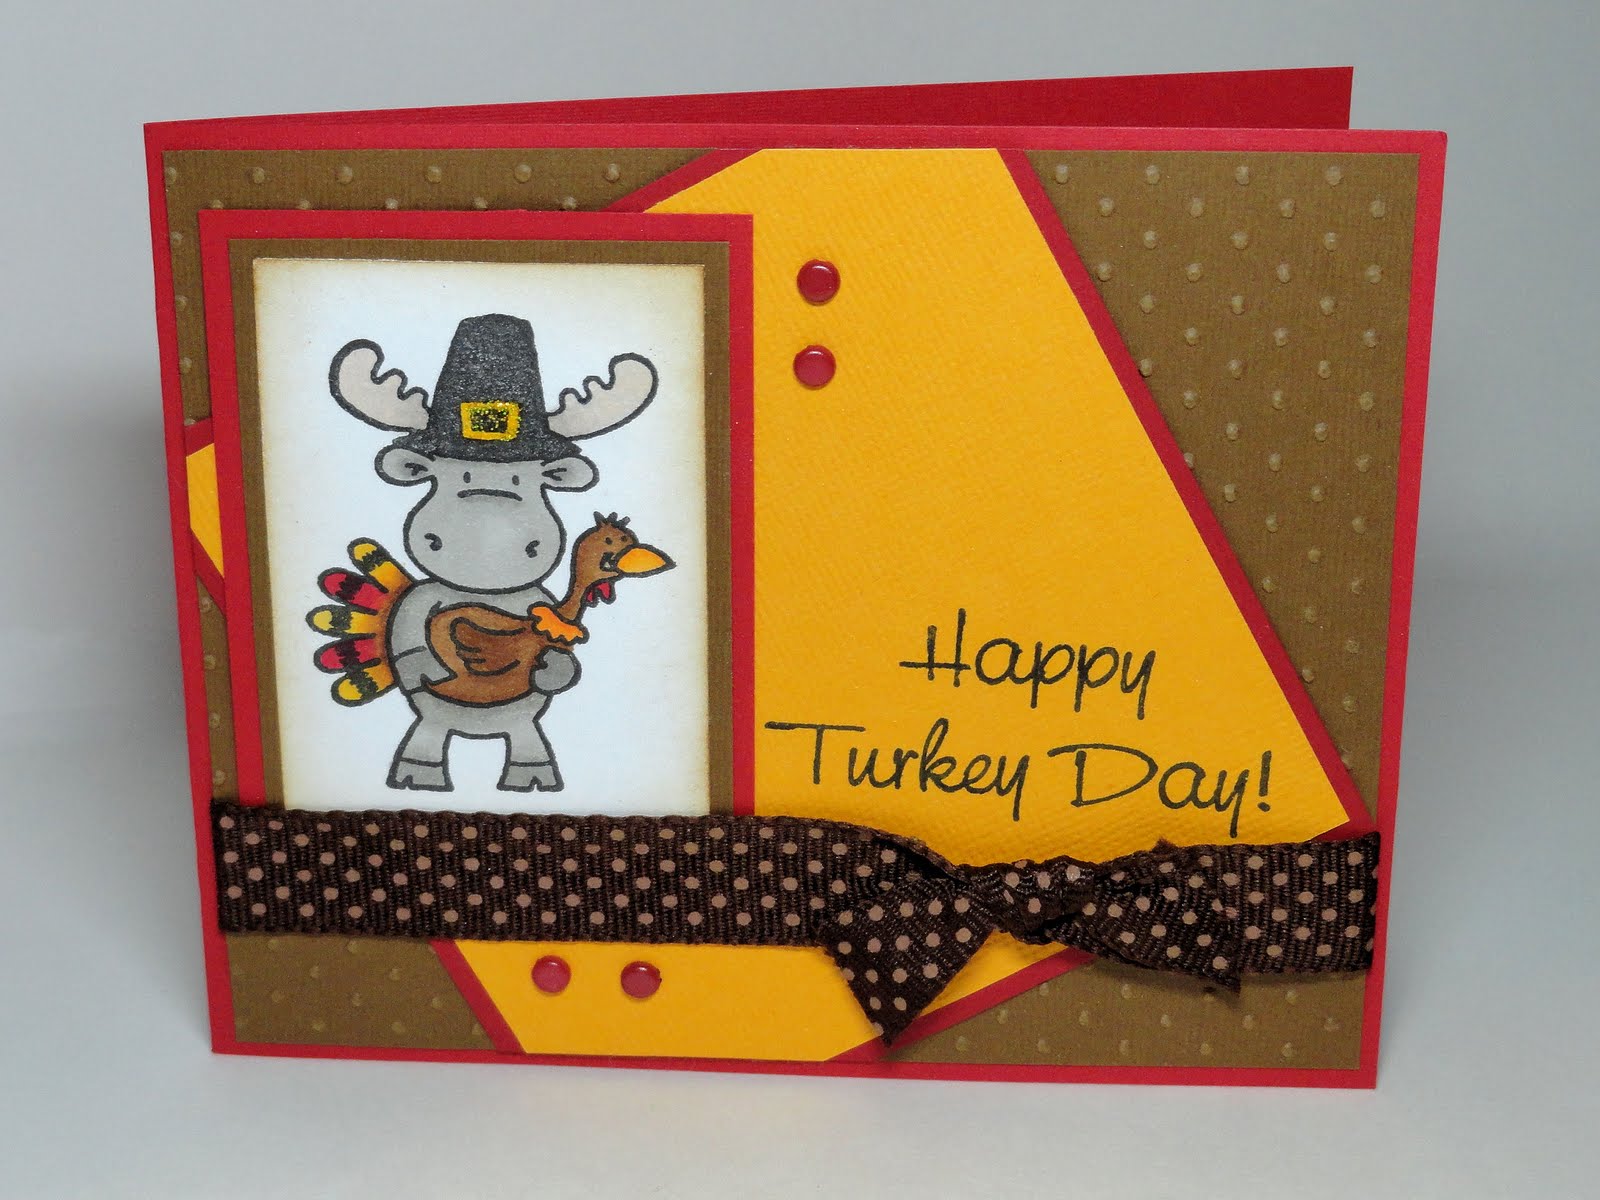
Happy Thanksgiving!
May you be blessed with good food and may you enjoy the company of your family and friends today!
Hope your Turkey Day is wonderful!
Smiles,
Jennifer
Stamps: Riley and Co-Turkey Riley, DRS Designs-Turkey Day Greeting (787E)